Standard PipeMarker
Adding Labels and Areas in Applications
106
BMP71 User’s Manual
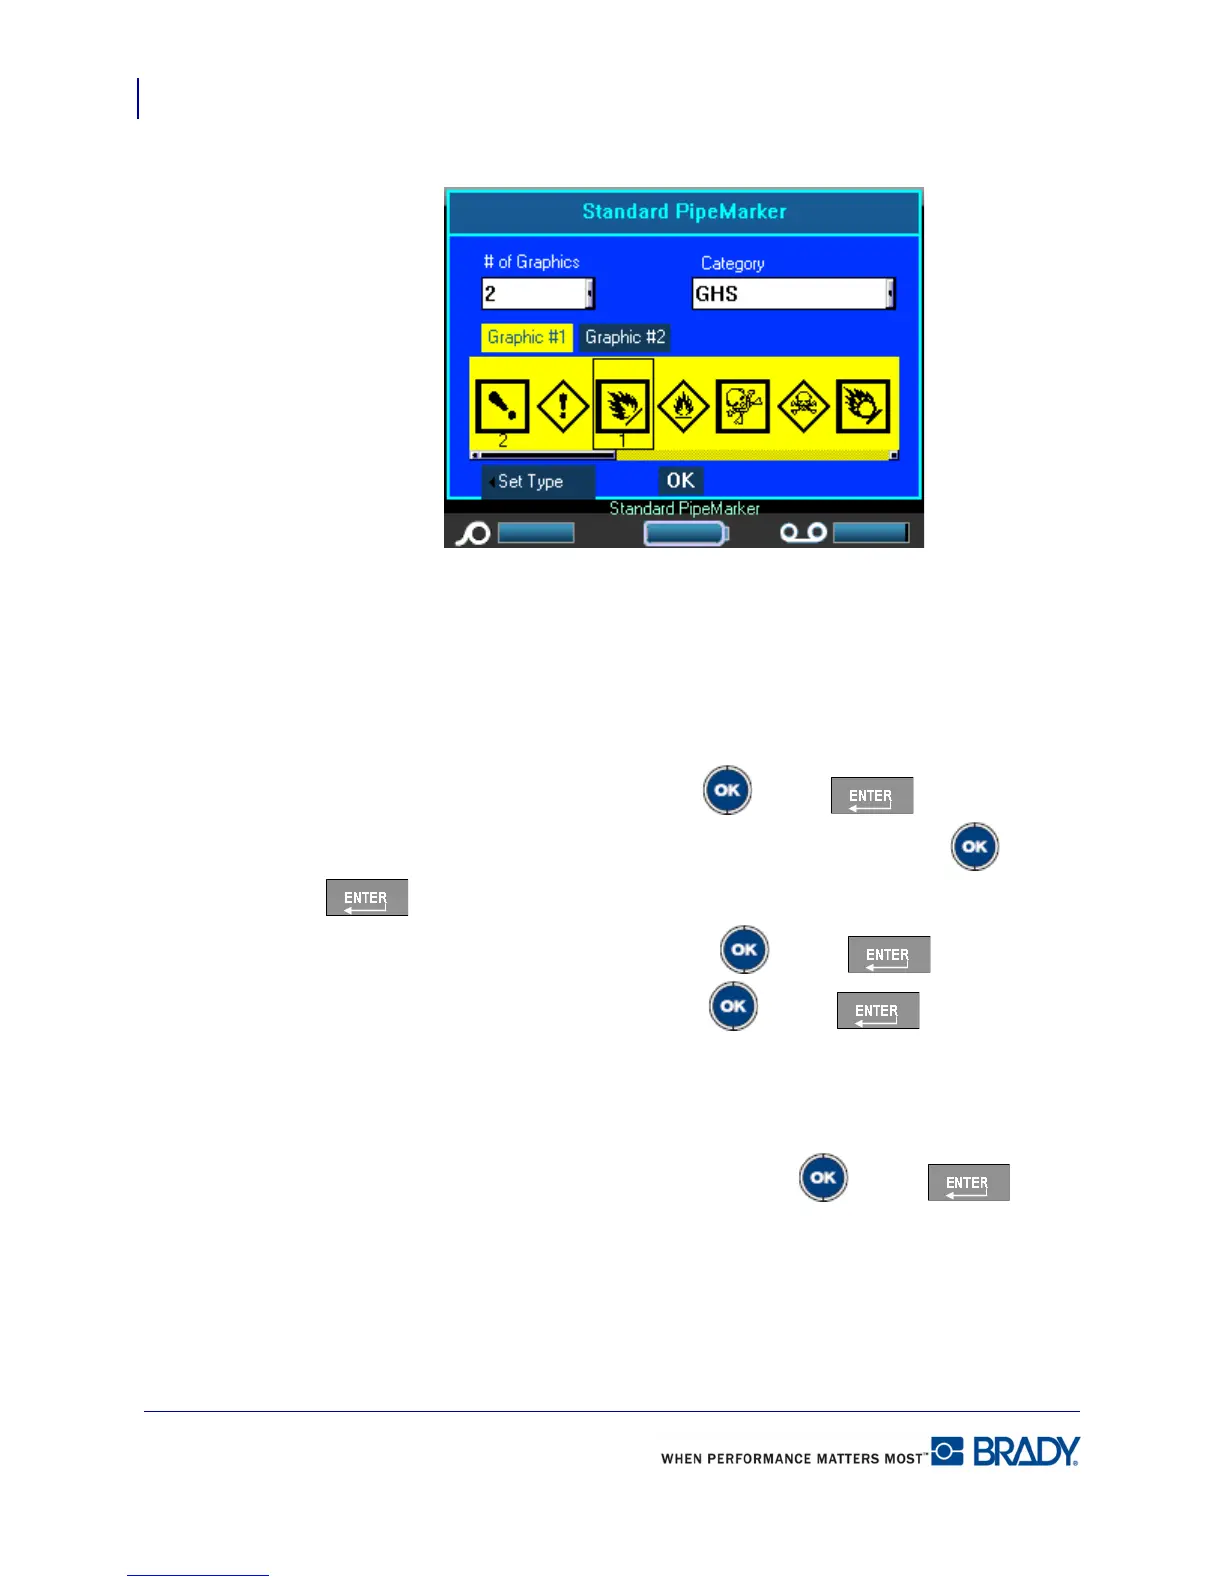
10. In the # of Graphics field, from the drop down list, select the number of graphics to
display on the label. You can add up to four graphics per label. If ‘0’ is selected, proceed
to Step 16.
The Category field displays the default symbol category determined in Setup>Apps. (See
“Setup Apps” on page 30 for more information.)
If you want to change the category:
11. Navigate to the Category field and press OK or Enter .
12. From the drop down list, select the desired symbol category and press OK or Enter
.
13. Navigate to the Graphic #1 field and press OK or Enter to enter the field.
14. Navigate to the desired symbol and press OK or Enter .
The graphic number follows the navigation and displays below the selected graphic.
15. If more than one graphic is assigned, repeat Steps 13 and 14 above, for each Graphic #
field (i.e., navigate to Graphic #2, etc.).
16. When finished, navigate to the OK button and press OK or Enter .