Basic Operations and Maintenance 3-15
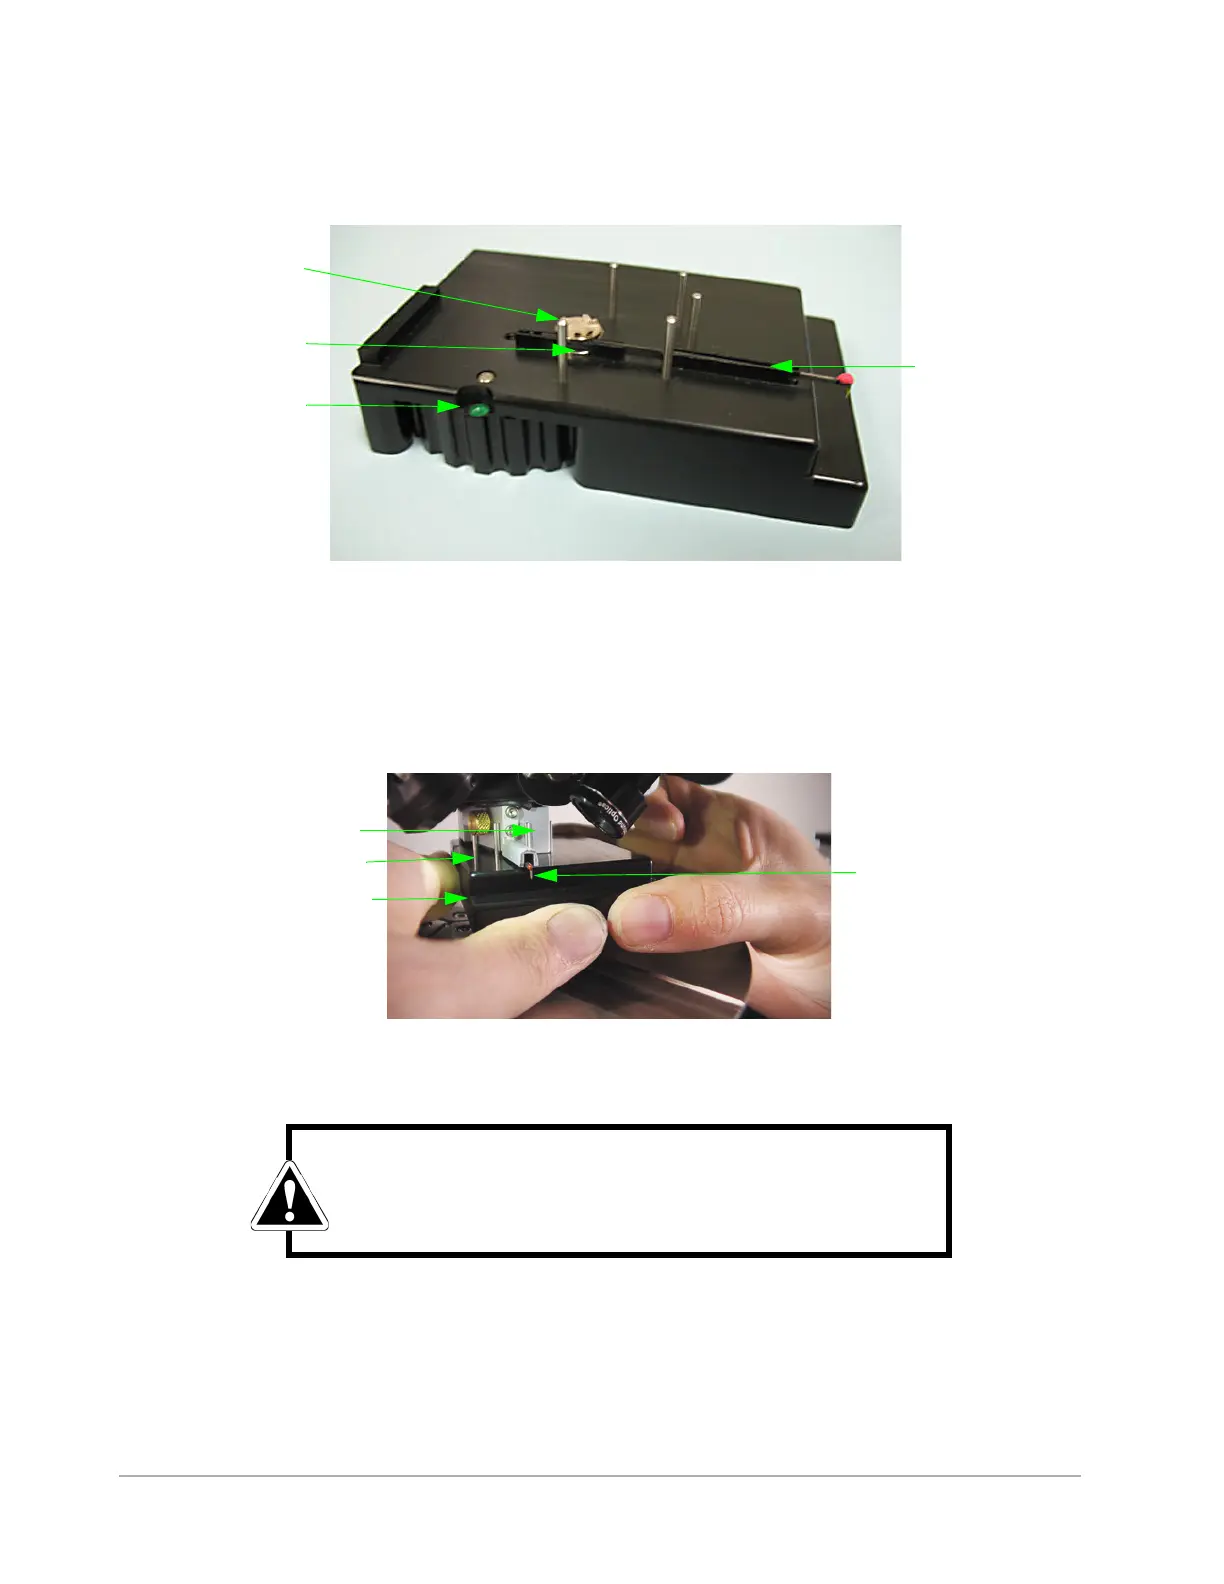
6 Rotate the thumb wheel on the left side of the stylus exchange tool counterclockwise to display the green
circle and engage the magnet (see Figure 3-23).
Figure 3-23: Stylus Exchange Tool with a Stylus Seated in the Channel and the Magnet Engaged
7 Place the stylus exchange tool underneath the sensor head on the DektakXT profiler. Holding the stylus
exchange tool by the sides, align the alignment pins on its top with the outside of the front of the sensor
head (see Figure 3-19). Gently push up until the tool is flush with the bottom of the sensor head. The ridge
at the back of the stylus exchange tool must roughly line up with the back of the sensor head.
Figure 3-24: Stylus Exchange Tool Flush with the Bottom of the Sensor Head
8 Disengage the magnet by rotating the thumbwheel in either direction so that a gray circle replaces the
green one.
9 Lower the stylus exchange tool.
10 Position the magnetic shield on the thumbscrew shaft on the left side of the sensor head.
Magnetic disk pad on
the stylus exchange
tool
Green circle indicating
that the magnet is
engaged
Magnetic disk pad
on the stylus
Stylus arm
extended out
through front of
channel
Sensor head
Stylus exchange tool
Stylus tip
Alignment pin
WARNING
Avoid any personal contact with the stylus arm or tip. This can result in
damage to the stylus.
 Loading...