4-12 Taking Measurements and Analyzing Data
6 To program the measurement points:
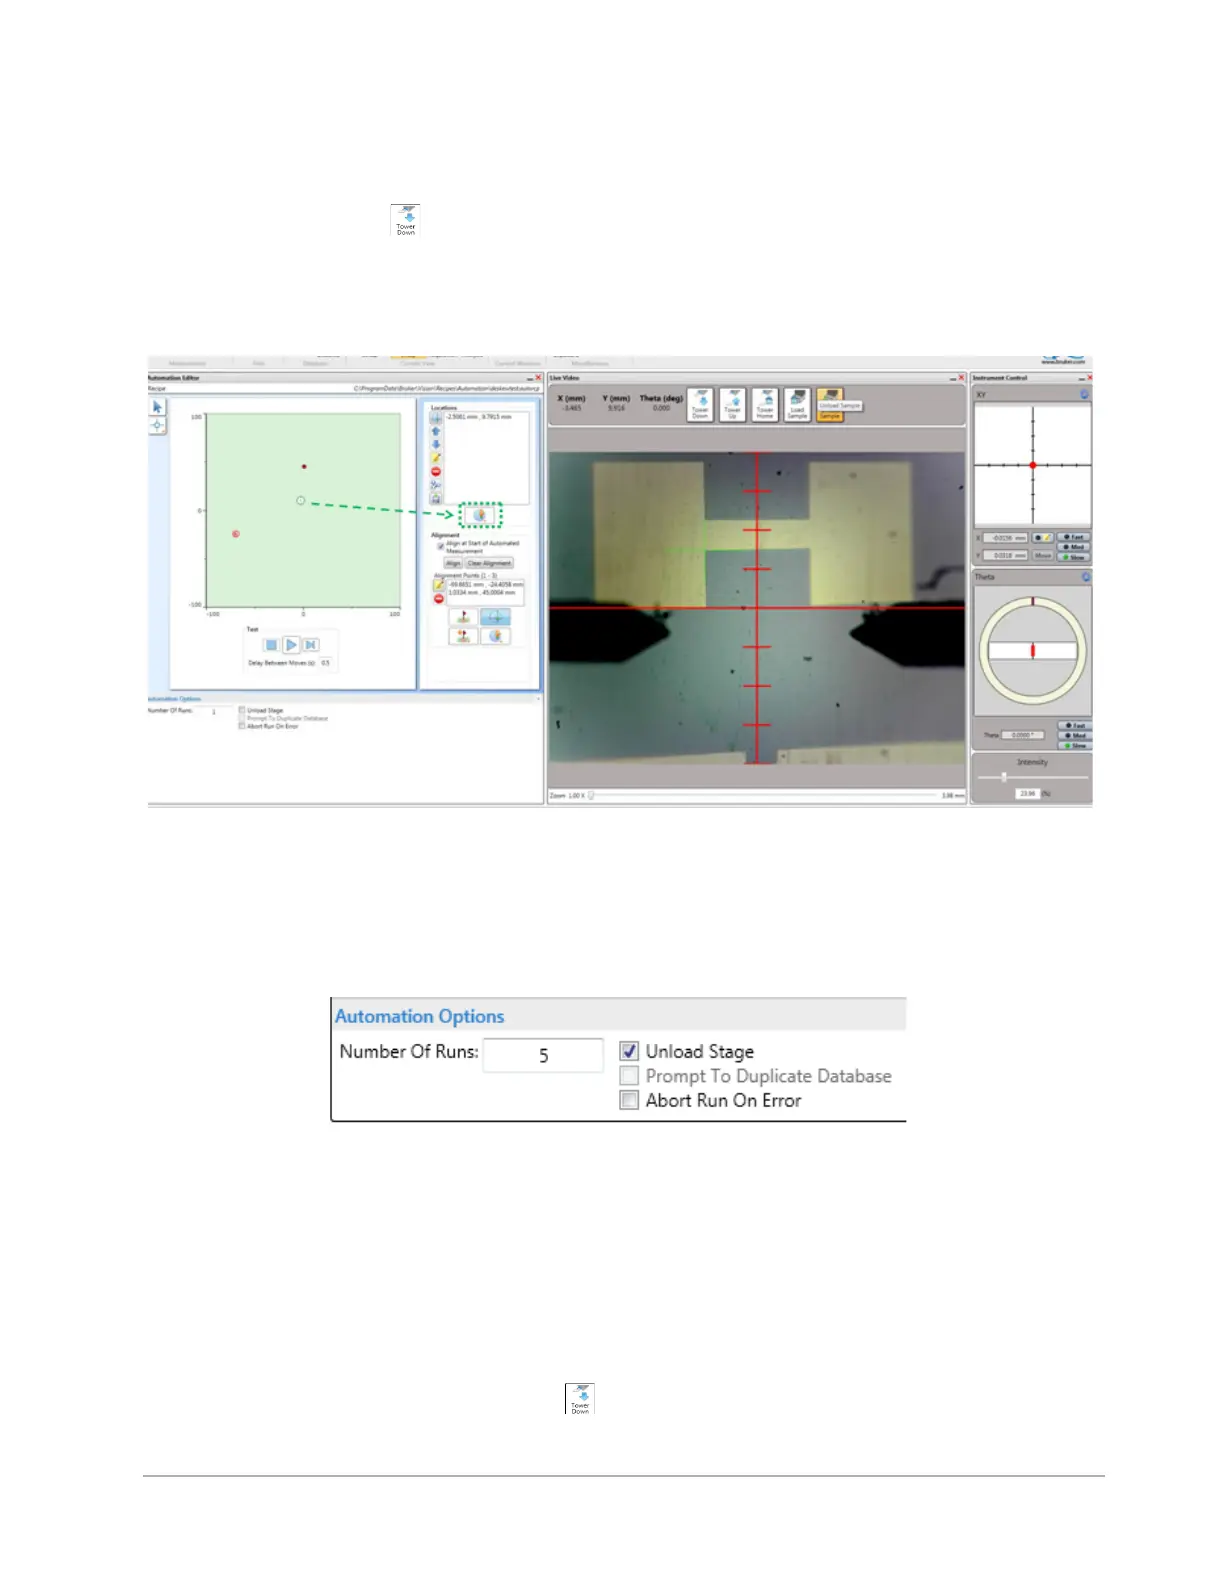
a. Drive the stage to the area on the image that you want to use as the first measurement point.
b. Tower down .
c. In the Automation Editor, click the Measurement Site button. A number outlined by a green circle now
appears at that location (see Figure 4-14).
d. Repeat the above steps to define all further required measurement points.
Figure 4-14: Setting a Deskew Measurement Point
7 In the Automation Editor, select the Align at Start of Automated Run check box to activate the Deskew
feature. The system will now automatically run the Deskew recipe prior running this Automation recipe.
8 If desired, change the Automation Options at the bottom of the Automation Editor (see Figure 4-15).
Figure 4-15: Options at the Bottom of the Automation Editor
9 Select Save > Automation Recipe. Name this recipe and then click Open.
10 Select Measurement > Automated Measurement. The system automatically runs the Deskew recipe
followed by the Automation recipe.
11 As the measurement sequence initiates, an Automation Status message appears. Watch the live progress
bar as the stage moves to the first location specified in the Automation recipe.
12 After the stylus arrives at each programmed point, you must use the Live Video Display and the Instrument
Control Panel above it to tower down and align that point. The stylus then runs over the sample, and
the stage moves to the next location specified in the Automation recipe.

 Loading...