Configuring the PVC2300 and WVC2300 Cameras
Setup > Basic Setup
Cisco PVC2300 and WVC2300 Internet Video Cameras with Audio Administration Guide 61
8
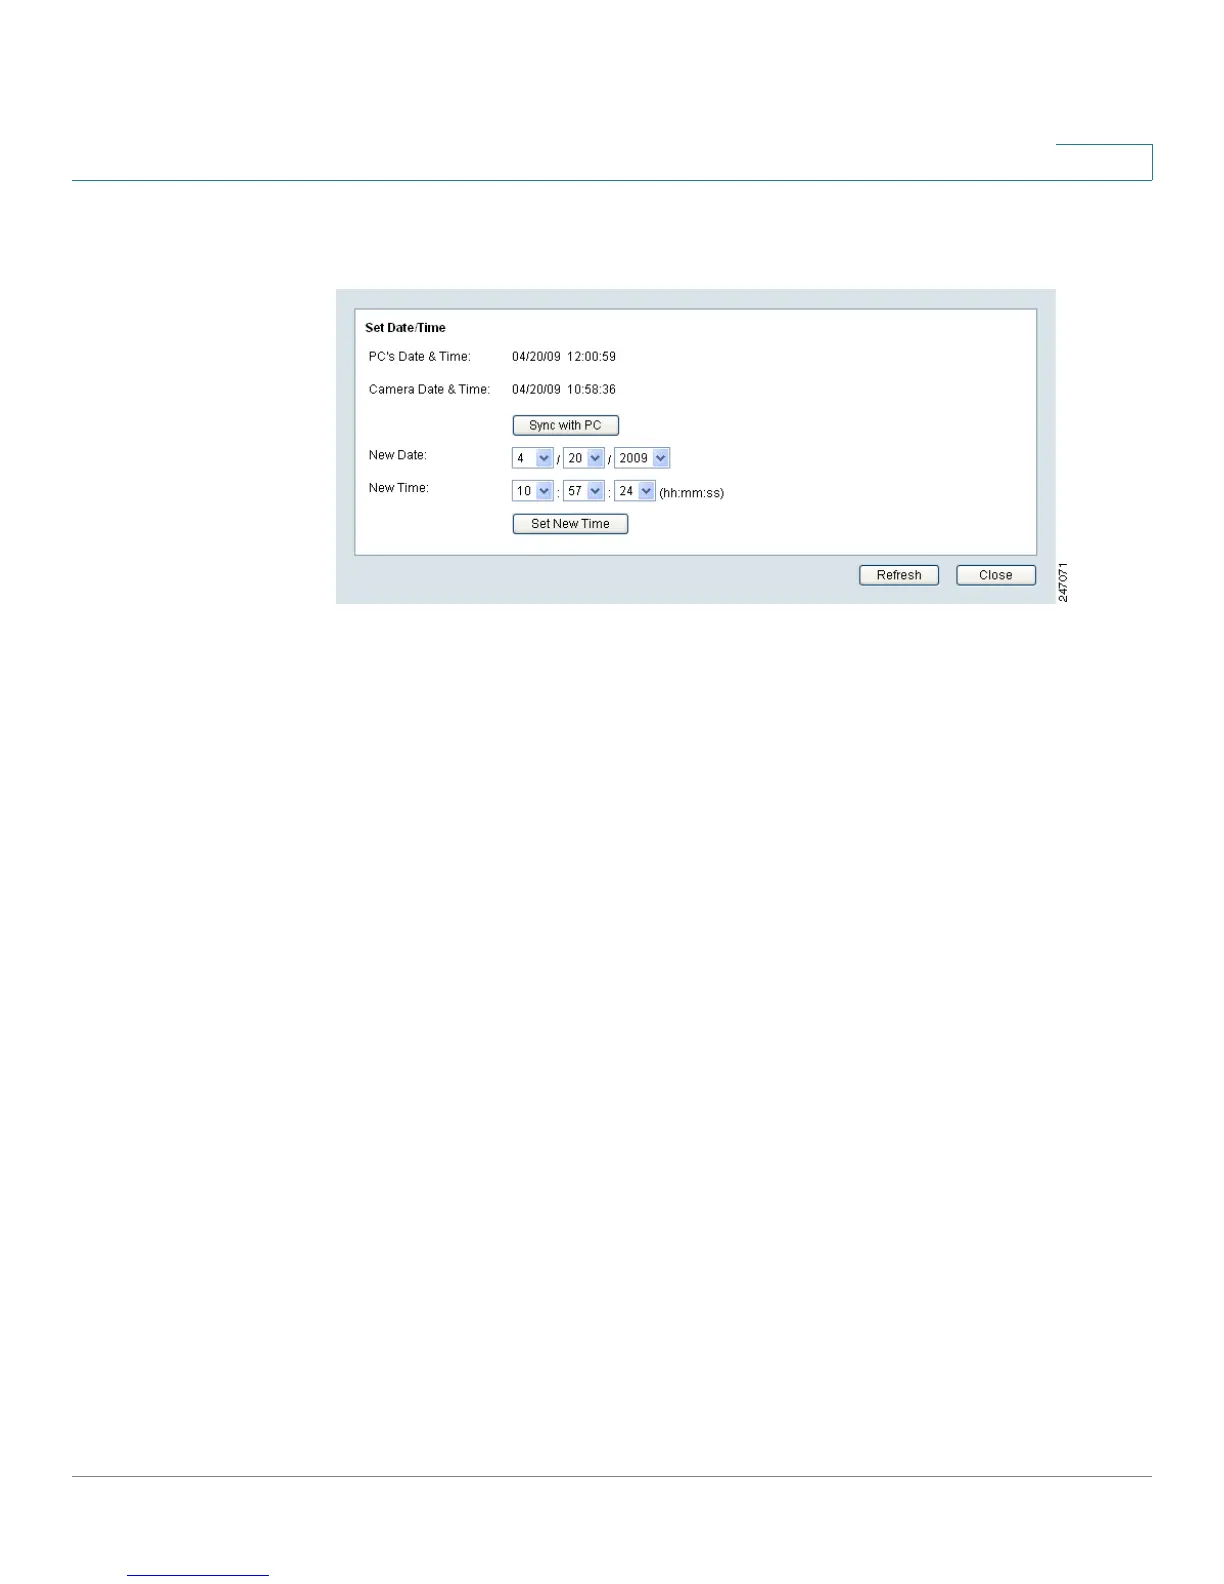
Set Date/Time
• PC’s Date and Time—Displays the current time of the PC connected to the
web-based utility.
• Camera Date and Time—Displays the current time as configured on the
camera.
• Sync with PC—Allows you to synchronize the camera to the clock on the
PC connected to the web-based utility.
• New Date—Allows you to manually enter the date for the camera.
• New Time—Allows you to manually enter a new clock setting for the
camera.
• Set New Time—Click to implement the new date or time setting.
• Time Zone—Choose the time zone for your location from the drop-down
list.
• Adjust for Daylight Saving Time—Select this option if your location is
currently using Daylight Saving Time. Uncheck the Adjust for Daylight
Saving Time check box when Daylight Saving Time ends in your time zone.
• Check here if you want to update the time automatically through the
NTP Server on the Internet—Enable or disable the time server feature as
required. If enabled, the camera will contact a network time server at
regular intervals and update its internal timer.
• NTP Server Address—Enter the address of the NTP Server.
• NTP Port—The default NTP port is 123. If using a different port, enter the
NTP port number (1024 to 65535) in the field provided.