User Guide| FreeSpeak II for Eclipse HX
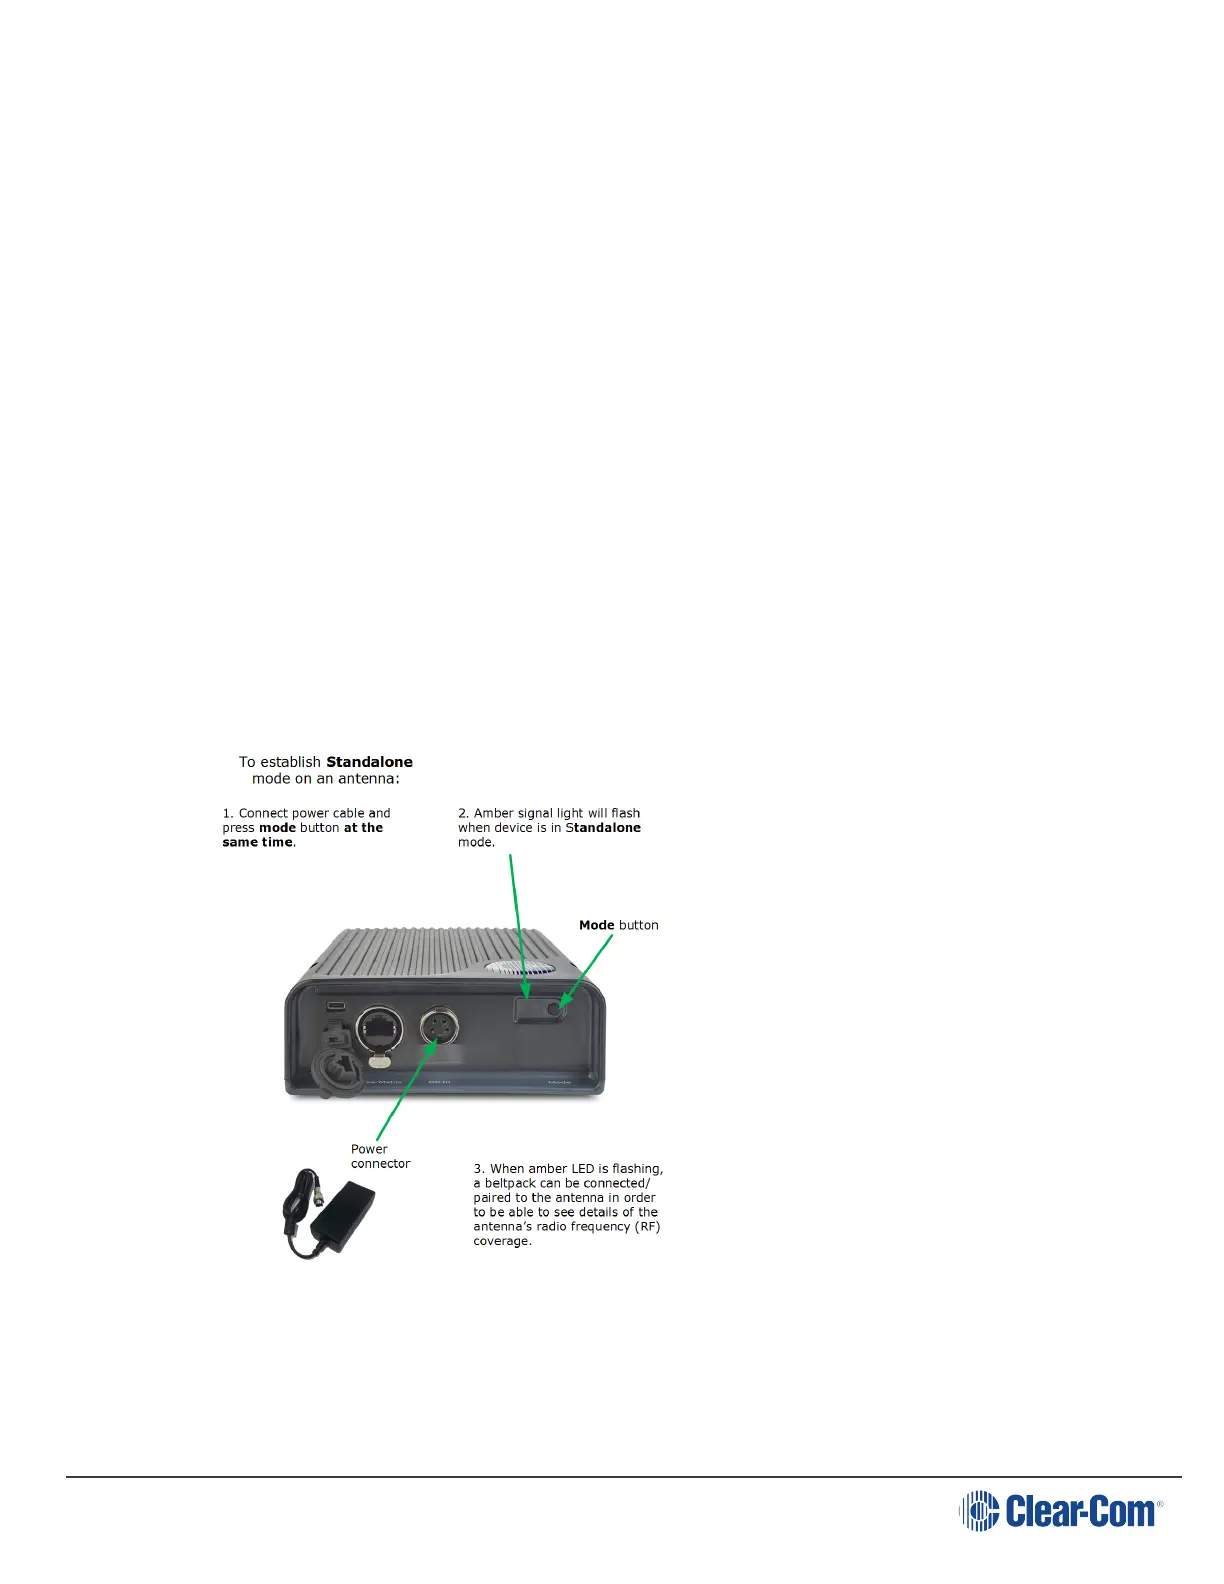
2. Connect the power to the transceiver and at the same time press the black mode button on the
base of the transceiver.
This puts the transceiver in standalone mode, and opens it for pairing to a beltpack.
3. From the beltpack, press the menu key (3 second press) and navigate to System Connect
using the right hand rotary controller on the beltpack.
4. Press button D to see local systems available for connection.
In menu mode the D key on the beltpack operates as SELECT and the C key exits the menu level
and cancels the selection.
5. Scroll through available systems using the right hand rotary controller.
6. When you have found the transceiver to pair to (it will be showing a ‘P’ to indicate that it is
ready to be paired to the beltpack) press button D to select the transceiver and connect the
beltpack to it.
7. When the beltpack is successfully connected to the transceiver, navigate to Site Survey in the
beltpack menu and monitor the range and performance of the transceiver. For more
information on Site Survey functionality see Doing a site survey with a beltpack on page
81.
7.10 Registering beltpacks
Before you can use a beltpack, you must first register it with the FreeSpeak II system. The
beltpacks can be registered to an Eclipse matrix (Omega, Median or Delta) using Eclipse HX
Page 85

 Loading...