25
6) Replace the closer rod and rotation pin into the jamb bracket.
INSTALLATION OF FIRE-RATED PRO-DOORS (OPTIONAL)
The Concord PRO-DOOR ENTRANCES are fire-rated and have been tested and approved for a
minimum fire separation of two (2) hours. The landing entrances are part of a pre-wired, zinc wipe-
coated, integral unit and are ready for installation at the site. Each integral landing entrance has a
manual swing-type door with a clear opening of 35" (890 mm) wide x 80"
(2032 mm) high.
NOTE
Figure # 14 Adjusting the Gate Closer
It is recommended to leave the doors in the frames and ensure that the beaks/latch bolts enter
into the locks freely. This will ensure trouble-free door operation, after the frames are bricked
or framed in. There is a close running clearance between the door frames and the edge of the
platform; therefore, the door frames must be set carefully and exactly. Align the door and door
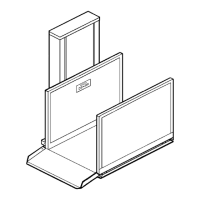
frames to the platform, as in Figure # 15.
1) Begin at the bottom floor and move the door and frame into the rough opening.
2) Line up the door edge with the platform edge. (This measurement of 1 3/4" (32 mm)
represents the width of the cab wall. Therefore, the edge of the door lines up with the
inside of the cab wall.)
3) Maintain a running clearance of between 1/2" (13 mm) to 3/4" (19 mm) space between
the edge of the platform and the door frame. Using 1/2" (13 mm) or 3/4" (19 mm)
plywood as a spacer, level the door sill from side to side using a carpenter's level.
Ensure that the door is level.
) Fasten the door sill to the floor using large flat-head screws on wooden floors. On
m) drive pins or countersunk concrete
e contractor. In some cases, the sill
may have to be raised to permit the finished building floor to match the door sill.
or and check the clearance between the
beak/latch bolts and the door lock. The door must close easily.
) The frames can now be either bricked-in or framed-in and dry walled. It is recommended
that the installer should be on-site when ntractor finishes around the door frames.
4
concrete floors, use the 1/4" (6 mm) x 1 1/4" (32 m
screws. Discuss entrance placement (sill) with th
5) Secure the top of the frame with the door mounting angles supplied.
6) After the frame is secured, carefully open the do
7
the co