32
nce the wiring of the PAL Lock is complete, close the door and make sure of the following:
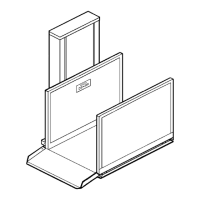
earances are correct. See Figure # 20.
ble contacts are in the locked position (solenoid de-energized), the
imately 1/8" (3 mm).
n its retainers, both vertically and horizontally. Once properly
nsu sure of the following:
e door.
down while ensuring free movement within the
apply a very small drop of light oil to the
contact pin. Work the oil in by manually moving the contact.
3) “Shake” each landing door/gate while th
PAL LOCK ADJUSTMENT
O
1) Check to ensure the lock cl
2) When the mova
springs are compressed by at least 0.100 inch (approx
If necessary, reposition the beak plate by loosening (do not remove) the two screws on the beak plate.
his will allow the beak plate to float iT
repositioned, tighten screws to secure the beak plate in place.
re the PAL Lock functions properly by makingE
) Upon lift arrival at the floor, the lock retracts electrically to fully unlock th1
) Manually push the pin contacts up and2
plastic block. If a contact does not move freely,
shaft of the
e lift is running to ensure that the contacts do not
“break” and interfere with lift operation.
Figure # 20 PAL Lock Adjustments