PBD175 (Spire 3.0) Service Manual
© 2015-2016, Cornelius Inc. - 33 - Publication Number: 620062609SER
ADA CONTROL BOARD INFORMATION AND SERVICE
The ADA feature is located in the front of the drip tray and controlled through a USB connector from the ADA board
to the computer. The ADA feature is a capacitance touch control board activated by an object changing the capaci-
tance field and sending a signal to the computer.
ADA Control Board Diagnostics
Before replacing the drip tray or the ADA board it is possible to determine if the board is faulty by plugging the USB
output into a computer. The control board acts like a mouse and will move a cursor on a screen. If the cursor moves
appropriately, the board is not the problem.
Replacing the ADA Control Board
If it is determined that the ADA control board is not functioning properly, replace it by performing the procedure
below.
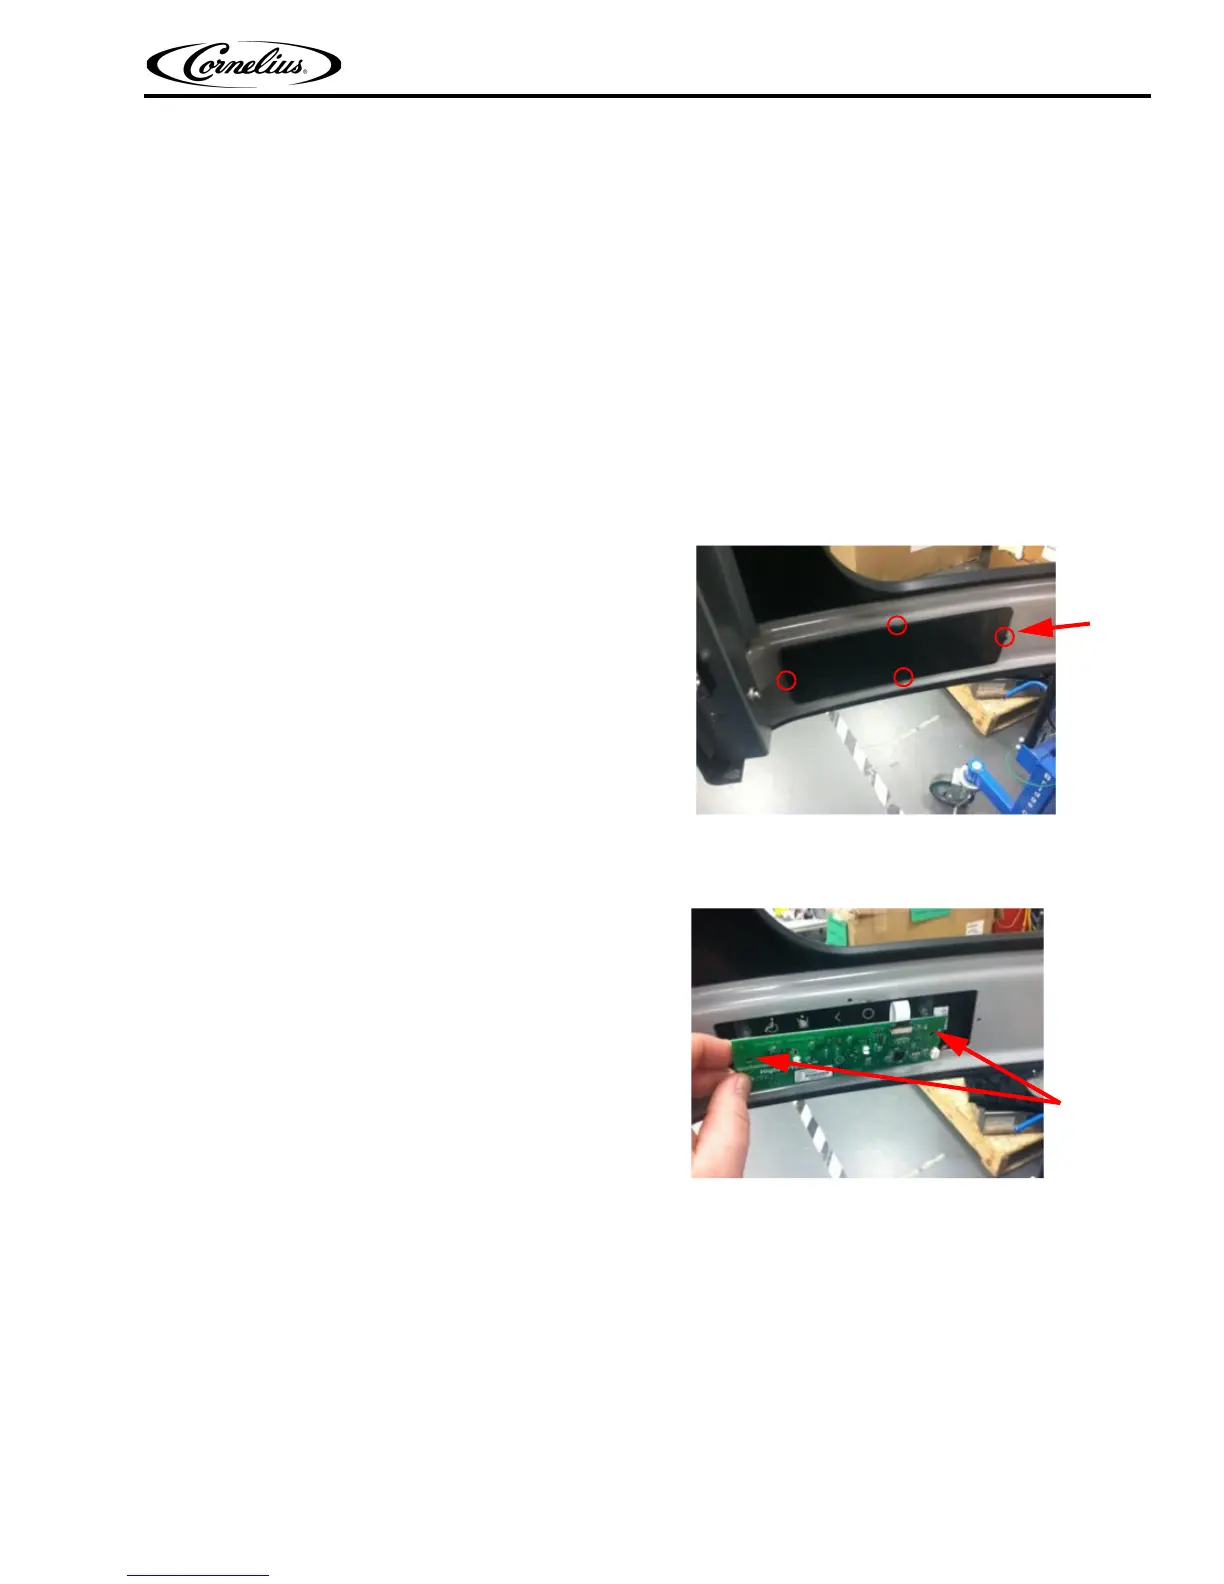
1. Open door and remove ADA service cover by
pulling/removing the 4 panel clips (save the panel
clips).
Figure 55.
2. Unplug ADA power harness and unscrew the 2 mounting screws (new screws come with kit).
3. Carefully pull board assembly out.
Figure 56.
4. Now you’re ready to re-install the new board. To prevent static damage to the board, ESD protection (ESD
wrist strap) is recommended or at a minimum, touch dispenser frame to discharge any static charge
before touching the new board.
5. Clean the back side of bezel, notice the recess where the icons are at. Then carefully slide, board
assembly into, up and forward. The key is to touch sensor board sit into the bezel recess mentioned
earlier.Refer Figure 57 and Figure 58.