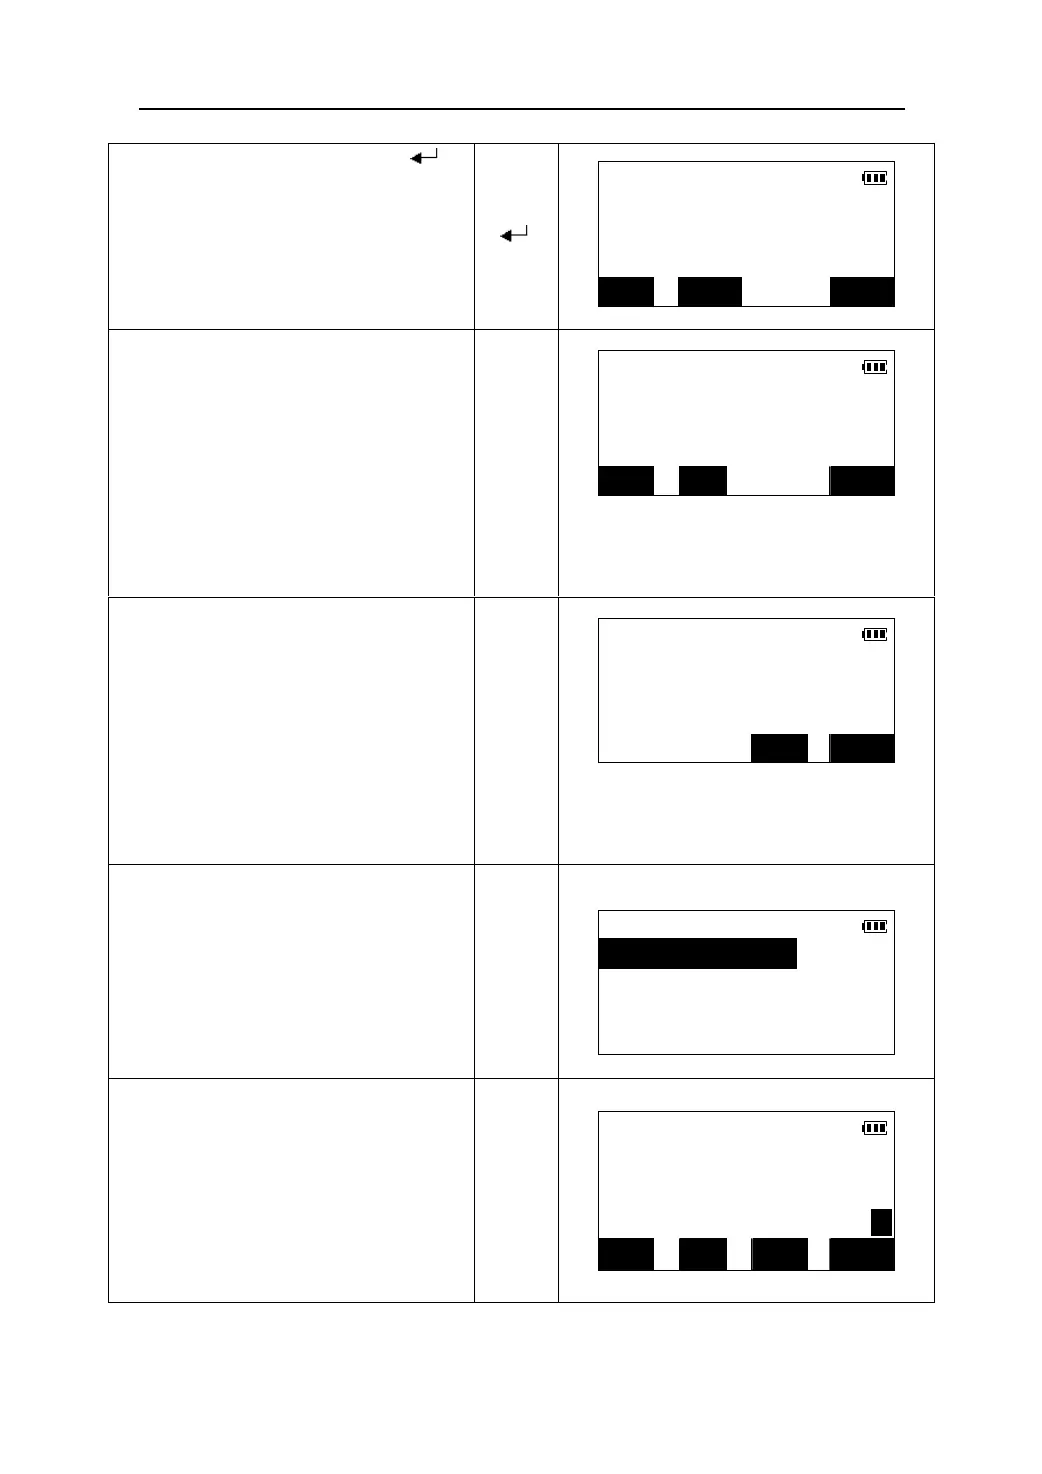
3.Select “1. Tilt offset” and press 【 】
Tilt offset
to start adjustment.
z Pressing 【0SET】can set horizontal angle
to 0.
【 】
TILT -43
HAR 350°19′22″
<Step1> Take F1?
CE 0SET OK
4. Sight the target point in Face 1. Wait for the
display of tilt value to stabilize, and then
press 【OK】.
z Press 【CE】 to cancel the last operation
and redo it.
【OK】
TILT offset
TILT 25
HAR 170°19′26″
<Step2> Take F2?
CE 0SET OK
5. Loosen the horizontal clamp, rotate the top
of the instrument through 180°, and then
sight the same target in Face 2. Wait for the
display of tilt value to stabilize, and then
press 【OK】. If there’s no error in operation,
the new offset value of tilt zero is displayed.
Tilt offset
Offset: -9
Set?
【OK】
CE OK
6.Press 【OK】 to accept the new value for
correction and return to <Instr. ADJ>
Instr. ADJ
Menu.
1.Tilt offset
【OK】
z Press 【CE】to discard the value and
repeat the procedures mentioned above.
2.V0 & Coll. crn
3.Instr. const
7. Press 【ESC】 to return to the Meas mode
and the new correction constant is in effect.
【ESC】
MEAS
H
ZA 99°43′13″
HAR 350°19′23″ P1
DIST SHV HSET EDM
96



 To Next Page