1.
Select “Schedule Setup” according to the
operating procedure shown in page 56.
Before setting an event, refer to page 36 to
determine what kind of event is to be set
and perform the following operations.
The following shows an example of setting
made referring to page 36.
2.
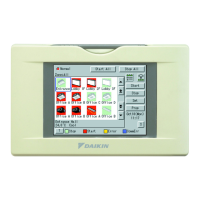
Confirm that the Schedule setup screen
Screen 1 will be displayed as shown in
the left-hand column.
3.
Select a schedule from 1 to set or
change the event(s).
4.
Push the [Event setting] button 2 to
display an event list (Screen 2).
Here, actual schedule operations are
set for each of 17 kinds of days
(Sunday to Saturday, Ex1 to Ex10).
First, use the pull-down menu 3 to
determine a day of the 17 kinds of days
for which events are to be set. Screen
2 indicates that Mon has been selected.
5.
The following describes in order the
functions of buttons 4 to 8 .
4
Add :
Use this button to add the new event.
Pushing this button causes the Event
setup screen Screen 3 on the next
page to be displayed.
For details on event setup operation,
refer to the descriptions given on the
next page.
5
Copy :
Use this button to make the same
setting as for the previously set event.
Select the previously set event from
9 . Push the copy button
5 to copy the event.
Push the [Modify] button 6 (described
below) to modify the copy event.
6
Modify :
Use this button to change the
previously registered event. Select the
event to be changed from 9 and push
the [Modify] button 6 .
7
Delete :
Use this button to delete the
previously registered event. Select
the event to be deleted from 9 and
push the [Delete] button 6 .
8
Edit Schedules :
This button provides the functions
similar to those of the above copy
button. This button can be used to
copy the events set for a set of days
(Sunday to Saturday and Ex1 to
Ex10) to another set of days (Sunday
to Saturday and Ex1 to Ex10). (For
details on Edit Schedules, refer to
page 71 “Convenient Functions.”)
Set Schedule and Event
Screen 1 Schedule Setup
Screen 2 Event List
1
3
10 11
2
4
9
5 6 7
8
System Setup Menu Operation
67
 Loading...


