70
1.
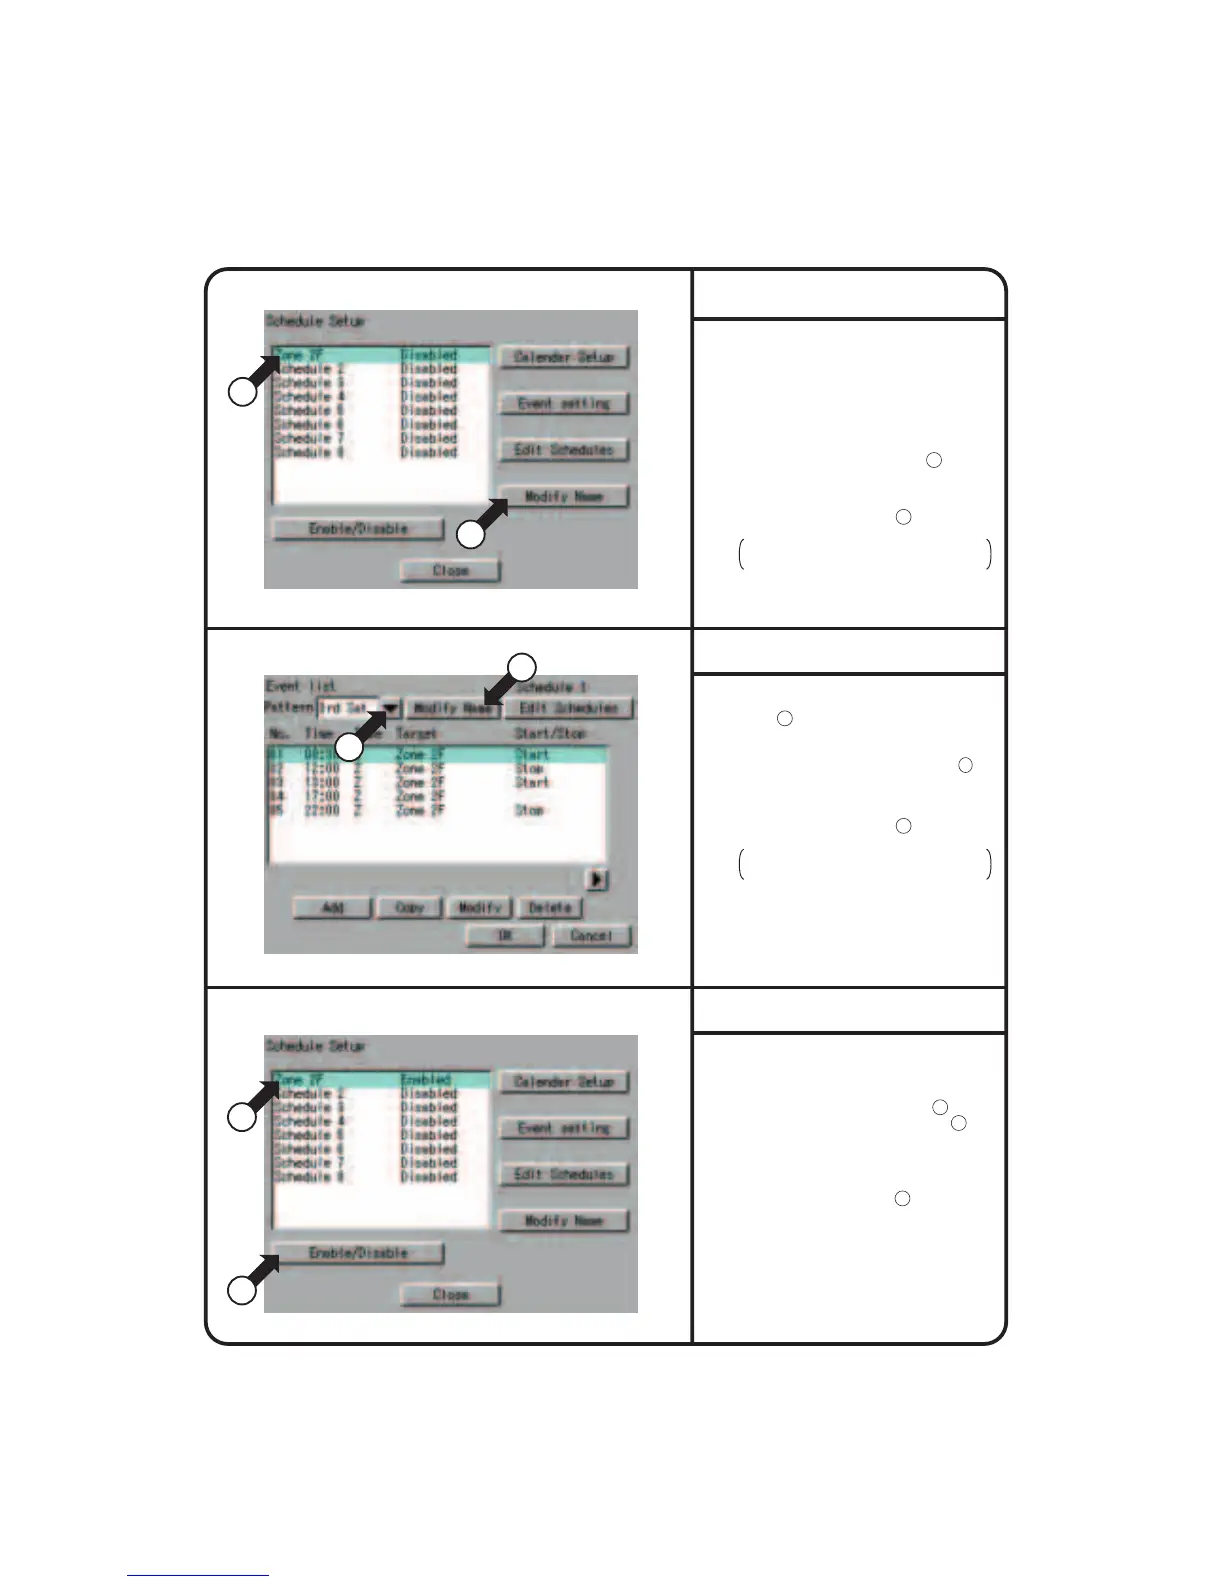
Select “Schedule Setup” according to the
operating procedure shown in page 56.
2.
Confirm that the Schedule setup screen
Screen 1 will be displayed as shown in
the left-hand column.
3.
Select a schedule from the list 1 to
change the name.
4.
Display a keyboard screen by pushing
the [Modify Name] button 2 and enter a
desired schedule name on that keyboard.
A schedule name can be entered in up
to 16 characters.
1.
Select a specify day from the pull-down
menu 1 on the event list screen to
change the name.
2.
Confirm that the [Modify Name] button 2
will be displayed for the selected special day.
3.
Display a keyboard screen by pushing
the [Modify Name] button 2 and enter a
desired special day name.
A special day name can be entered in
up to 8 characters.
1.
Last, enable or disable a schedule.
Perform the following operations on the
schedule setup screen Screen 3.
Select a schedule from the list 1 and
enable or disable the schedule at 2 .
On the confirmation screen, push the
[Yes] button to enable the schedule and
the [No] button to disable it. Then,
check to see the display “Enabled” or
“Disabled” in right side of 1 to confirm
that the schedule has been enabled or
disabled successfully.
Even if the calendar or event is set, no schedule
function works unless the schedule is enabled.
Screen 1 Schedule Setup
Screen 2 Event List
Screen 3 Schedule Setup
2
1
1
1
2
2
Change Schedule Name
Change Special Day Name
Enable or Disable Schedule
System Setup Menu Operation