1.
Select Zone Setup as described on
page 56.
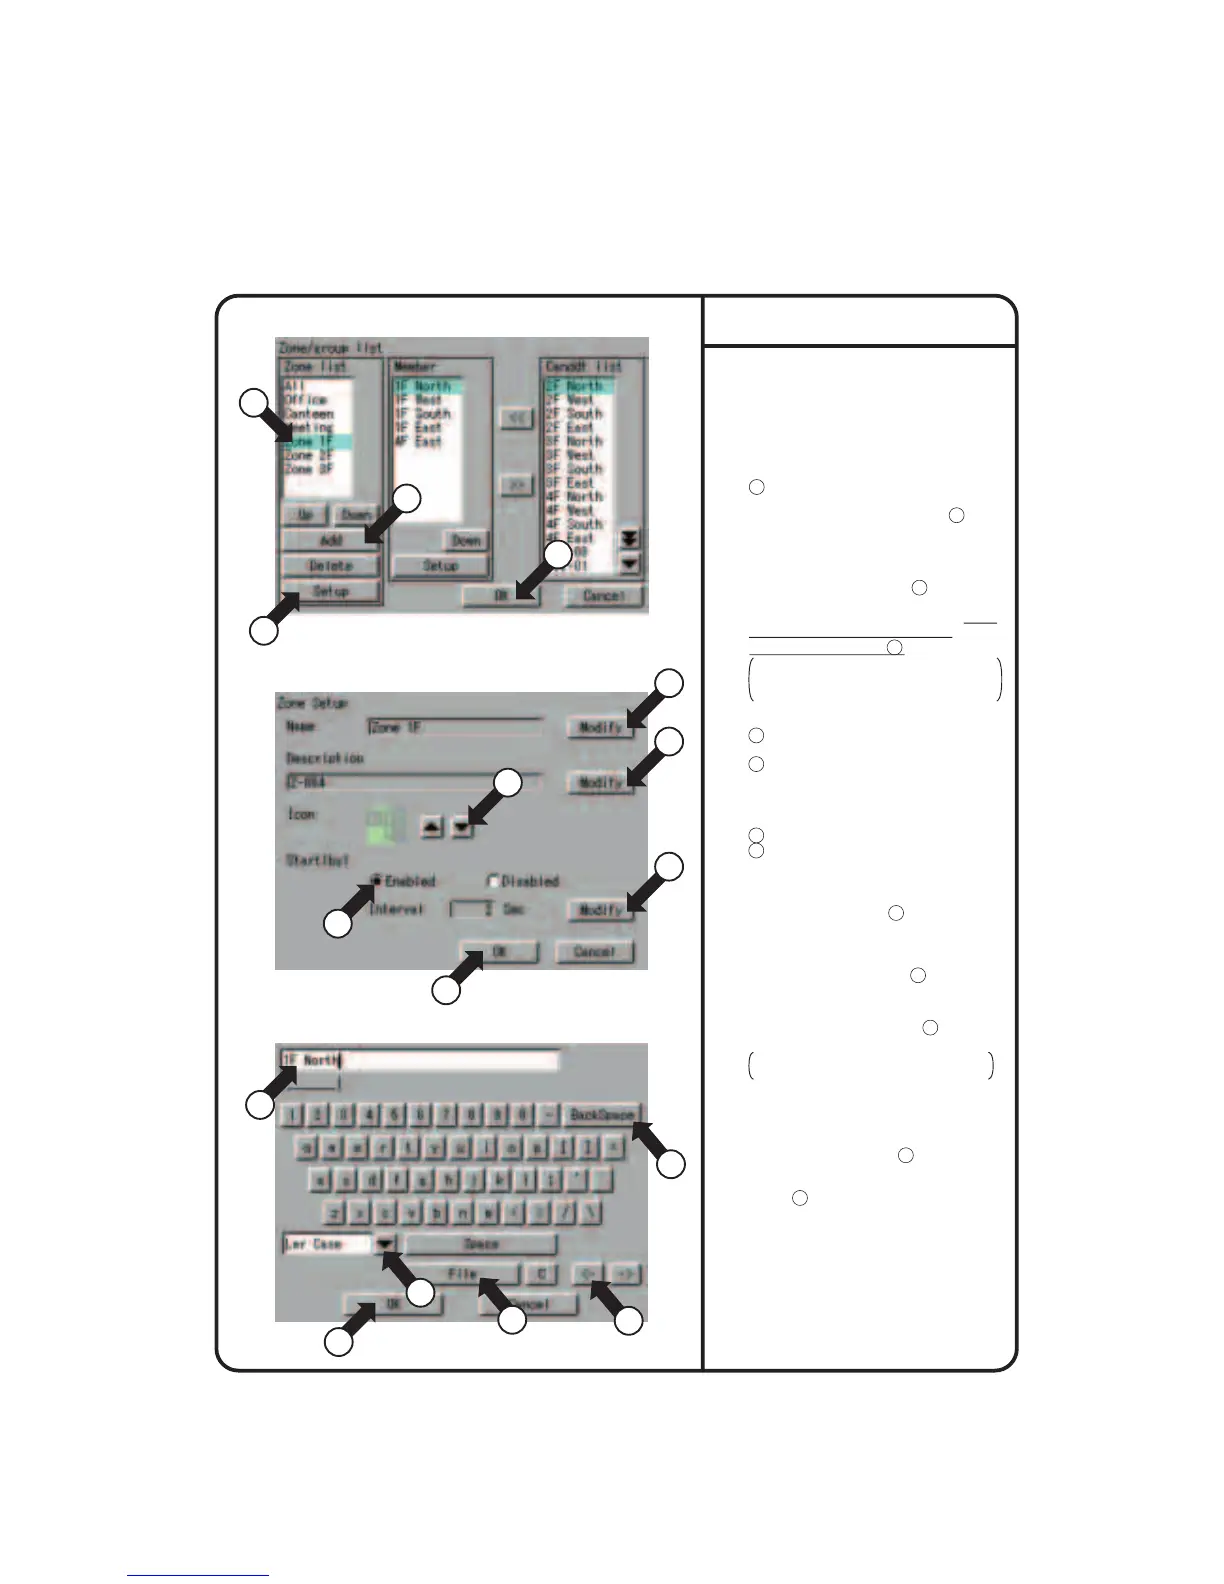
2.
Screen 1 Zone Setup, which is shown
on the left, appears.
To add a zone, press the [Add] button
1 . A zone is added with the name
Z-000.
To modify the zone, select with 2 the
zone to be modified.
Press the Setup button. Zone setup in
screen2 is displayed.
3.
4.
Press the [Modify] button 4 .
Screen 3 Enter Group Name appears.
Use the keyboard on the panel to enter
the name in such a way that it is
contained in the area 5 .
If it is not contained in the area,
reduce the number of characters and
reenter.
5.
Press the [Modify] button
11
and enter
the name as shown in step 4 above.
6.
Press the [▲] or [▼] button
12
to select
an icon.
The selection of icon does not affect
the operation of the group.
7.
For operation by the zone, to start the
groups in the zone one by one rather
than at one time, press the Enable
button for Interval Start
13
. To start the
groups at one time, press Disable.
If you select Enable, press the [Modify]
button
14
and set the interval time for
group sequential start.
(Note) For the zone Collective, the
factory setting is Enable for
Interval Start and 2 (seconds) for
Interval.
Zone setup
[How to use the keyboard]
7 : Button to select between
uppercase and lowercase.
8 : Button to correct wrong entries
made.
Pressing one time deletes one
character leftward starting at the
cursor.
9 : Button to move the cursor.
10
: Candidates for input are displayed.
Words presumed to be input for Name
has already been involed.
When all entries have been made,
press the [OK] button 6 .
To cancel, press the Cancel button.
Screen 2 Group Setup reappears.
Screen 1 Zone Setup
2
3
13
5
6
15
8
9
10
7
1
16
4
11
12
14
Screen 2 Zone Setup
Screen 3 Enter Group Name
System Setup Menu Operation
61