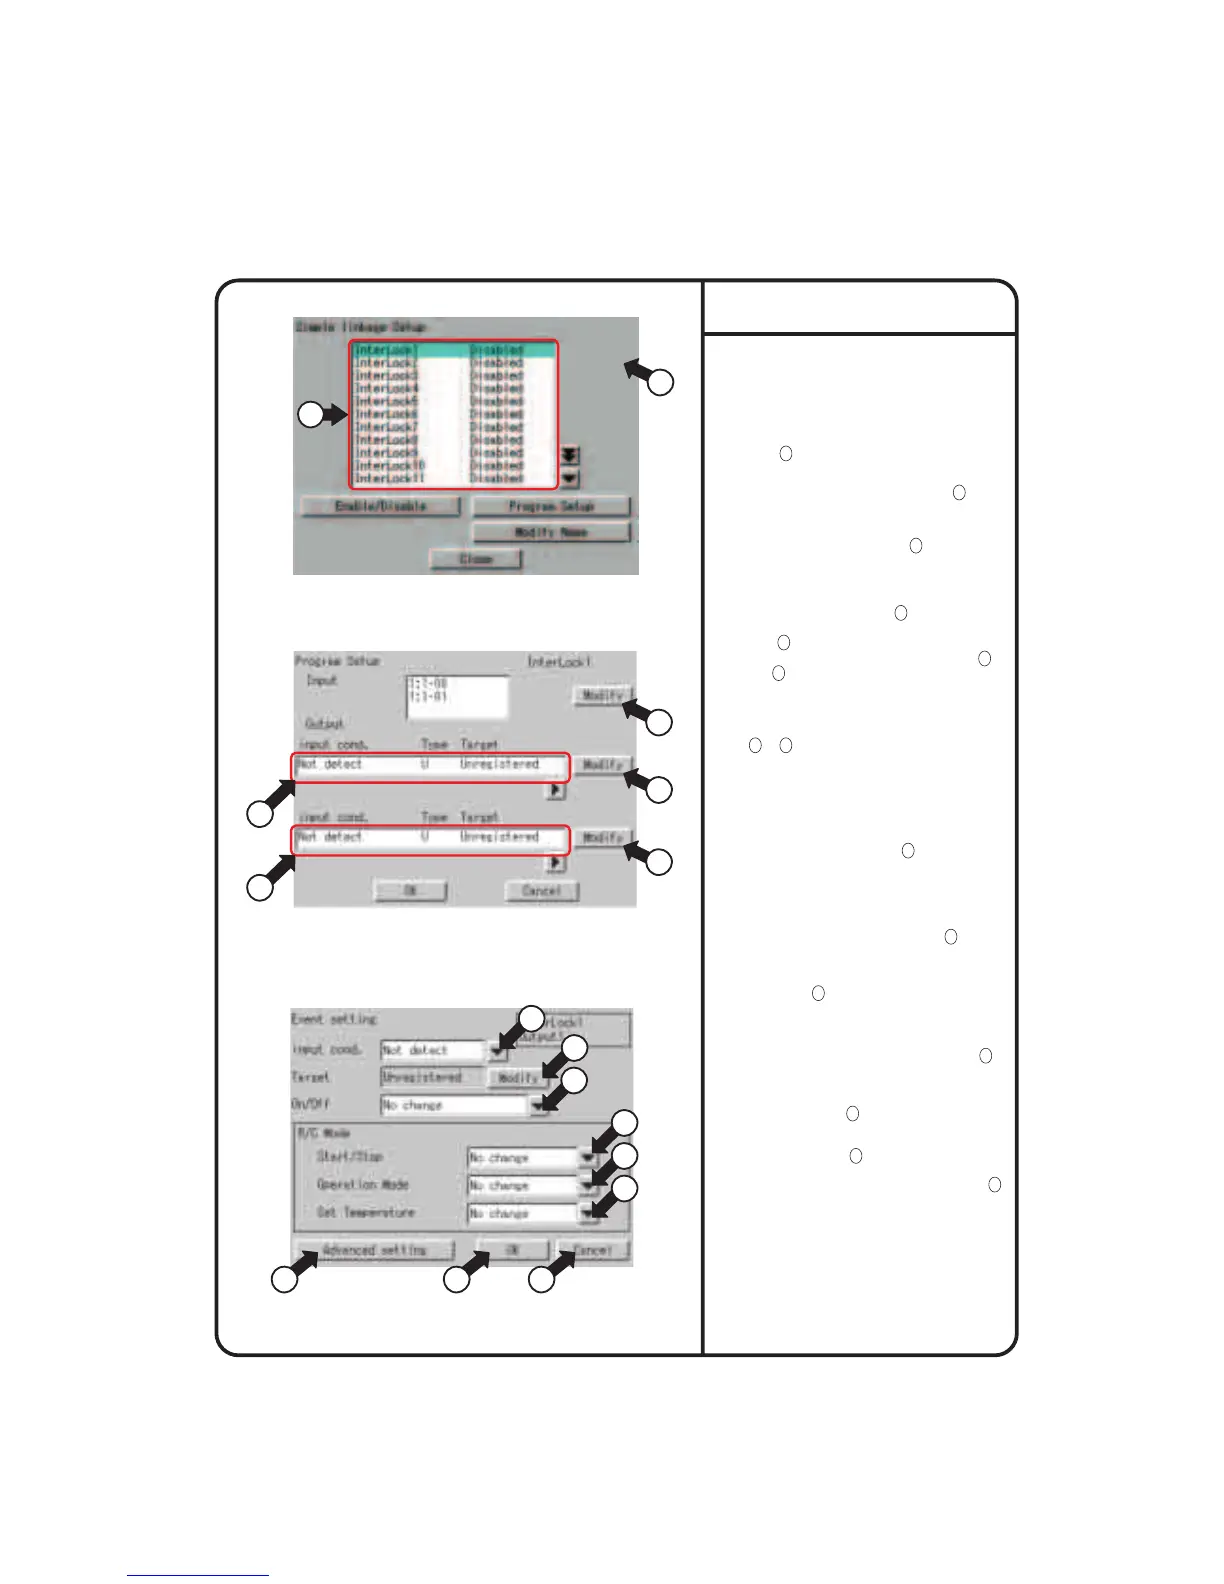
System Setup Menu Operation
Screen 2 Program Setup
Screen 3 Event Setting
1.
Following the steps described on page 56, select
the simple linkage settings.
2.
As shown in the figure of the Screen 1 on the left
side, the linkage Setup setting screen will be
displayed.
3.
From 1 , select a simple interlock program where
you want change the settings.
4.
Press the [Program Setup] button. (See 2 ) As
shown in the figure of the Screen 2, the Program
Setup screen will be displayed.
5.
Press the [Modify] button. (See 3 ) Select a
group/groups to be registered as the input points of
the interlock function. The maximum number of
128 groups can be registered.
6.
In the figure on the left side, 4 indicates the
controlled items by the interlock output 1 and so
does 5 by the interlock output 2. To change these
settings, press either of the [Modify] buttons ( 6
and 7 ) according to your need.
The Screen 3 shows the Event setting screen for
the output 1.
7.
The information displayed in the boxes pointed by
8 to
13
is the current settings of the event.
The items to be able to set are described below, in
ascending order of the number shown in the figure.
• input condition : In this box, select a condition for
the interlock input point to
initiate the interlock control
function. From the pull-down
menu (see 8 ), select either of
Not detect / St. turned ON / All.
turned ON / St. turned OFF / All.
turned OFF.
• Target : In this box, select a target of interlock
control. Press the [Modify] button to
select Zone or Group. (See 9 )
• On / Off : In this box, select an operation
performed when the interlock condition
is met. From the pull-down menu (see
10
), select either of No
change/Start/Stop.
Settings about operations of the hand-held remote
controller
Start / Stop : From the pull-down menu (see
11
),
select either of Permitted / Stop only /
Prohibited / Not change.
Operation Mode : From the pull-down menu (see
12
), select either of Permitted /
Prohibited / No change.
Set Temperature : From the pull-down menu (see
13
), select either of Permitted /
Prohibited / No change.
• Advanced setting : Pressing this button (see
14
)
will move to the Screen 4
shown on the next page and
display the Advanced setting
screen. (This screen will be
described on the next page.)
When the settings on this page and the advanced
settings described on the next page are completed,
press the [OK] button. Otherwise, to go back
without changing any settings, press the [Cancel]
button to go back to the Screen 2. To finish all the
settings, press the [OK] button in the Screen 2.
Screen 1 linkage Setup
Simple linkage Settings
79
1
2
3
6
7
4
5
8
9
10
11
12
13
14 15 16