60
1.
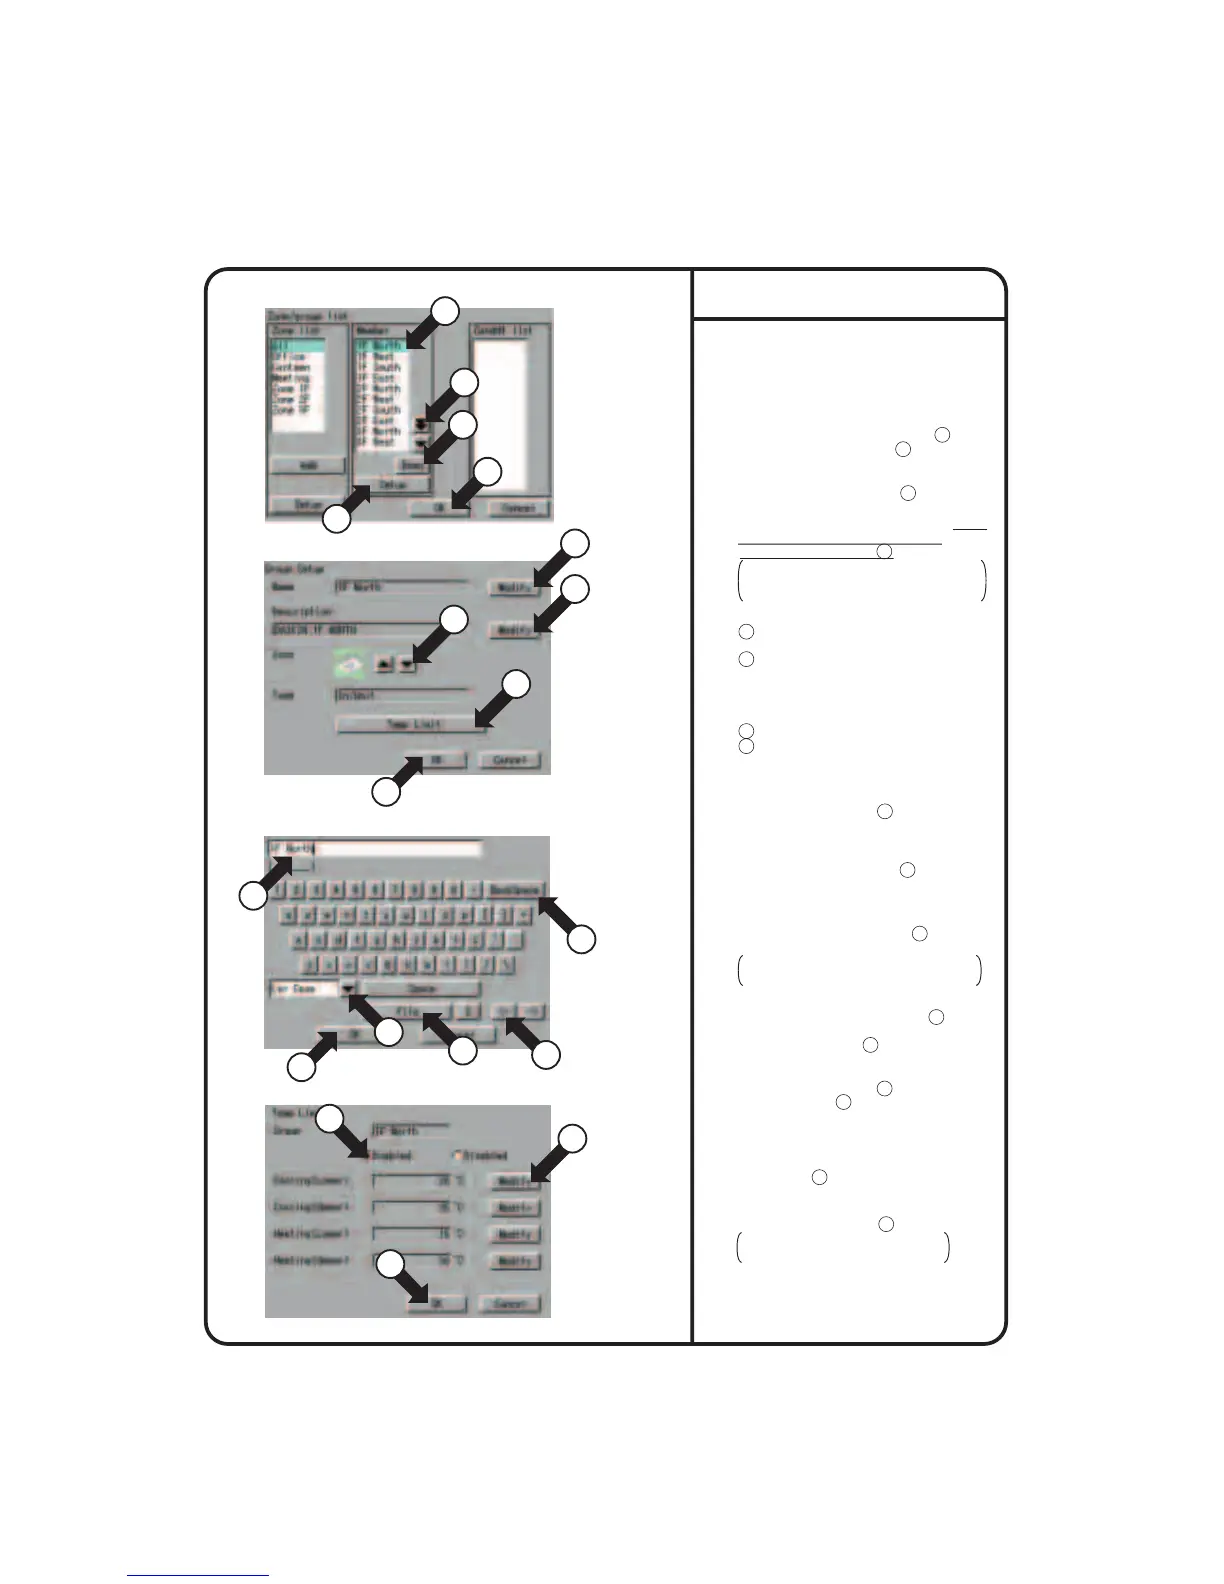
Select Group Setup as described on
page 56.
2.
Screen 1 Group [Setup], which is
shown on the left, appears.
3.
Select the group to be set with 1 .
Press the [Setup] button 2 .
Group setup in Screen 2 is displayed.
4.
Press the [Modify] button 3 .
Screen 2 Enter Group Name appears.
Use the keyboard on the panel to enter
the name in such a way that it is
contained in the area 4 .
If it is not contained in the area,
reduce the number of characters and
reenter.
5.
Press the [Modify] button
10
and enter
the name as shown in step 4 above.
7.
Press the [Temp Limit] button
12
.
Screen 4 Temp Limit appears. Select
Enbled or Dlsabled
13
for Limits Setup
for the group currently selected.
If you select Yes, set the limits by press
the [OK] button
15
. Press the [Modify]
button
14
and set the restriction range.
Screen 2 Group Setup reappears.
8.
Select the position with the [Down] or
[Up] button
17
for showing the group
currently selected within the zone.
9.
6.
Press the [▲] or [▼] button
11
to select
an icon.
The selection of icon does not affect
the operation of the group.
Group setup
System Setup Menu Operation
Screen 1 Group Setup
Screen 2 Group Setup
Screen 3 Enter Group Name
Screen 4 Temp Limit
1
3
10
14
11
12
1
17
18
2
16
4
5
13
15
7
6
9
8
6 : Button to select between
uppercase and lowercase.
7 : Button to correct wrong entries
made.
Pressing one time deletes one
character leftward starting at the
cursor.
8 : Button to move the cursor.
9 : Candidates for input are displayed.
Words presumed to be input for Name
has already been involed.
When all entries have been made,
press the [OK] button 5 .
To cancel, press the [Cancel] button.
Screen 2 Group Setup reappears.
Press the [OK] button
18
.
To cancel the setting, press the
[Cancel] button.
[How to use the keyboard]