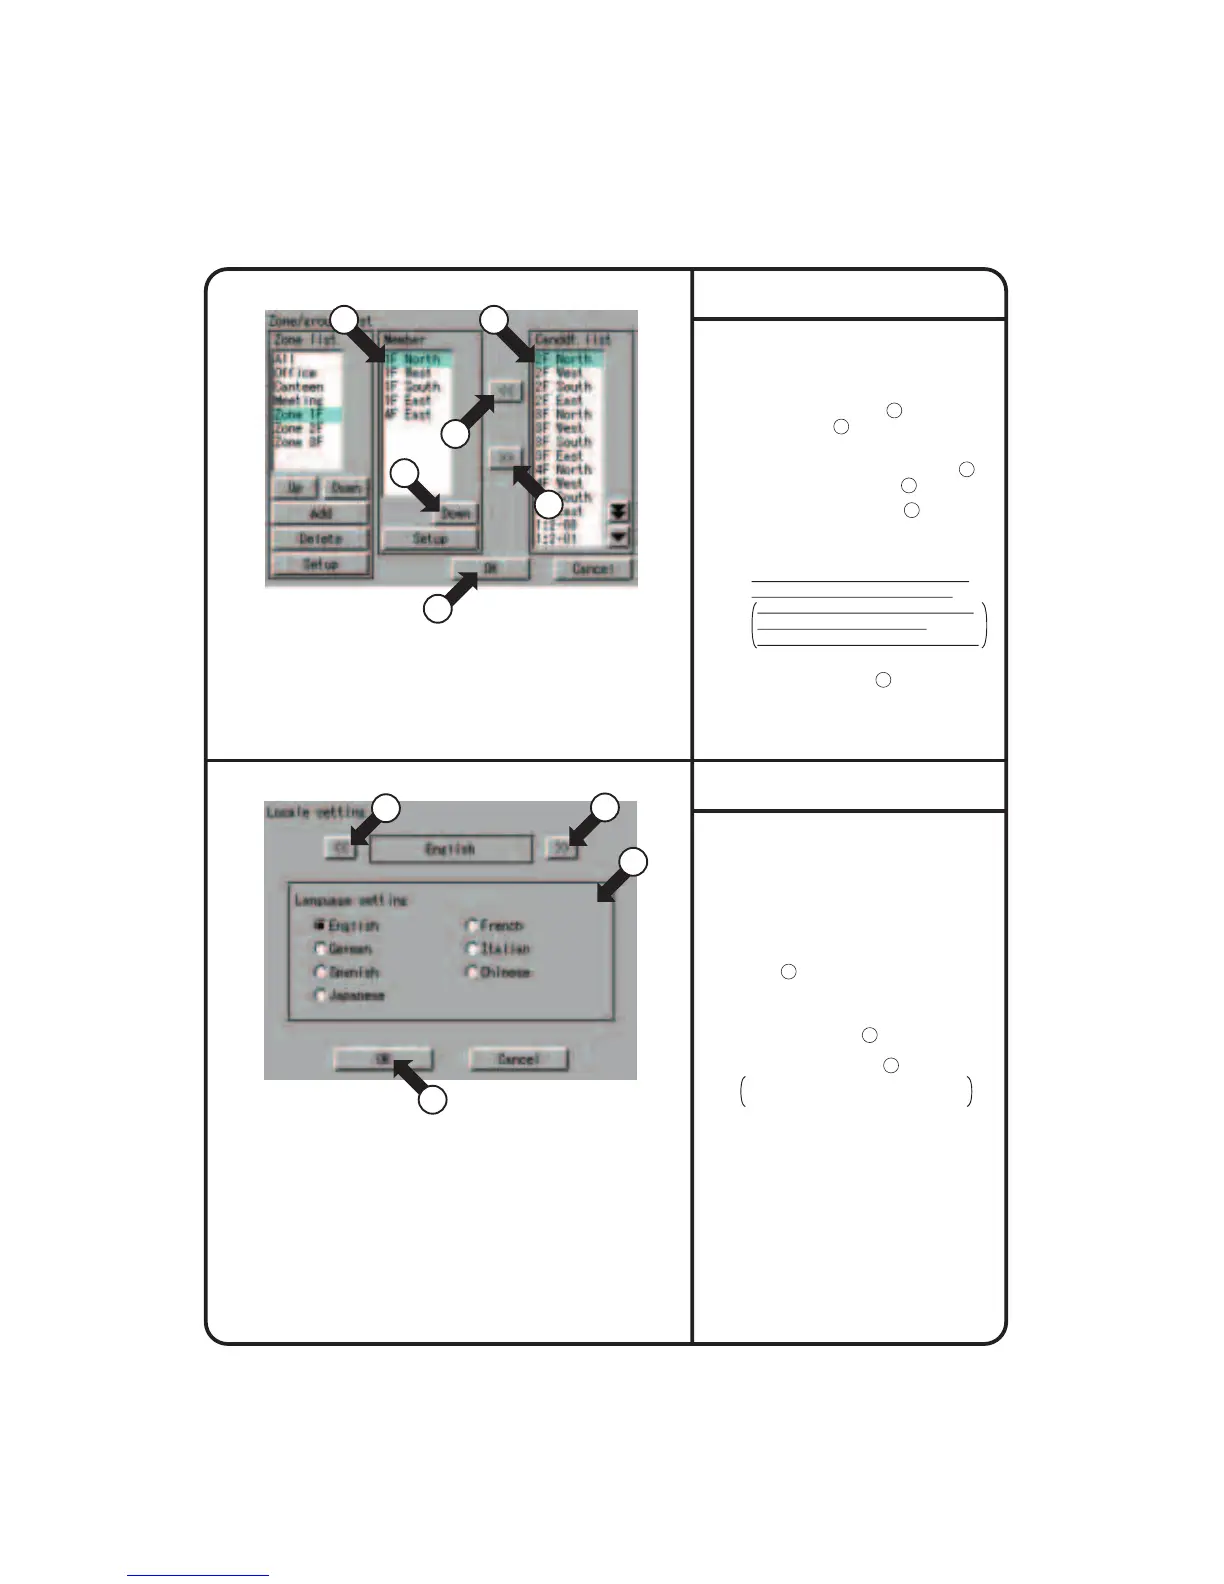
8.
Set the groups to be registered for the
zone currently selected.
To add a group to the zone, select the
group to be added with
17
and press
the [<<] button
18
.
To delete a group registered for a zone,
select the group to be deleted with
19
and press the [>>] button
20
The [Up] or [Down] button
21
allows
changing the order in display of groups
in the zone currently selected on the
Monitoring screen.
The group shown on the top is the
representative unit for the zone.
In the example of Screen 3 shown
on the left, 1F Lobby is the
representative unit for the zone 1F.
When all editing has been completed,
press the [OK] button
22
.
To cancel the setting, press the
[Cancel] button.
Zone setup 2
Screen 3 Registered Groups Edit
19 17
21
18
22
20
System Setup Menu Operation
1.
Select “Locale Setting” according to the
operating procedure shown in page 56.
2.
Confirm that the Locale setting screen
Screen 1 will be displayed in the
left-hand column.
3.
Select a language by pushing [<<], [>>]
button 1 on the Locale setting screen.
(The details of settings remain unchanged.)
4.
Select a language via the Language
setting radio button 2 .
5.
Last, push [OK] button 3 .
To cancel the settings made, push
[Cancel] button.
Locale Setting
Screen 1 Locale setting
3
1
1
2
62