Troubleshooting
3-2
3.2.1 Problem Isolation
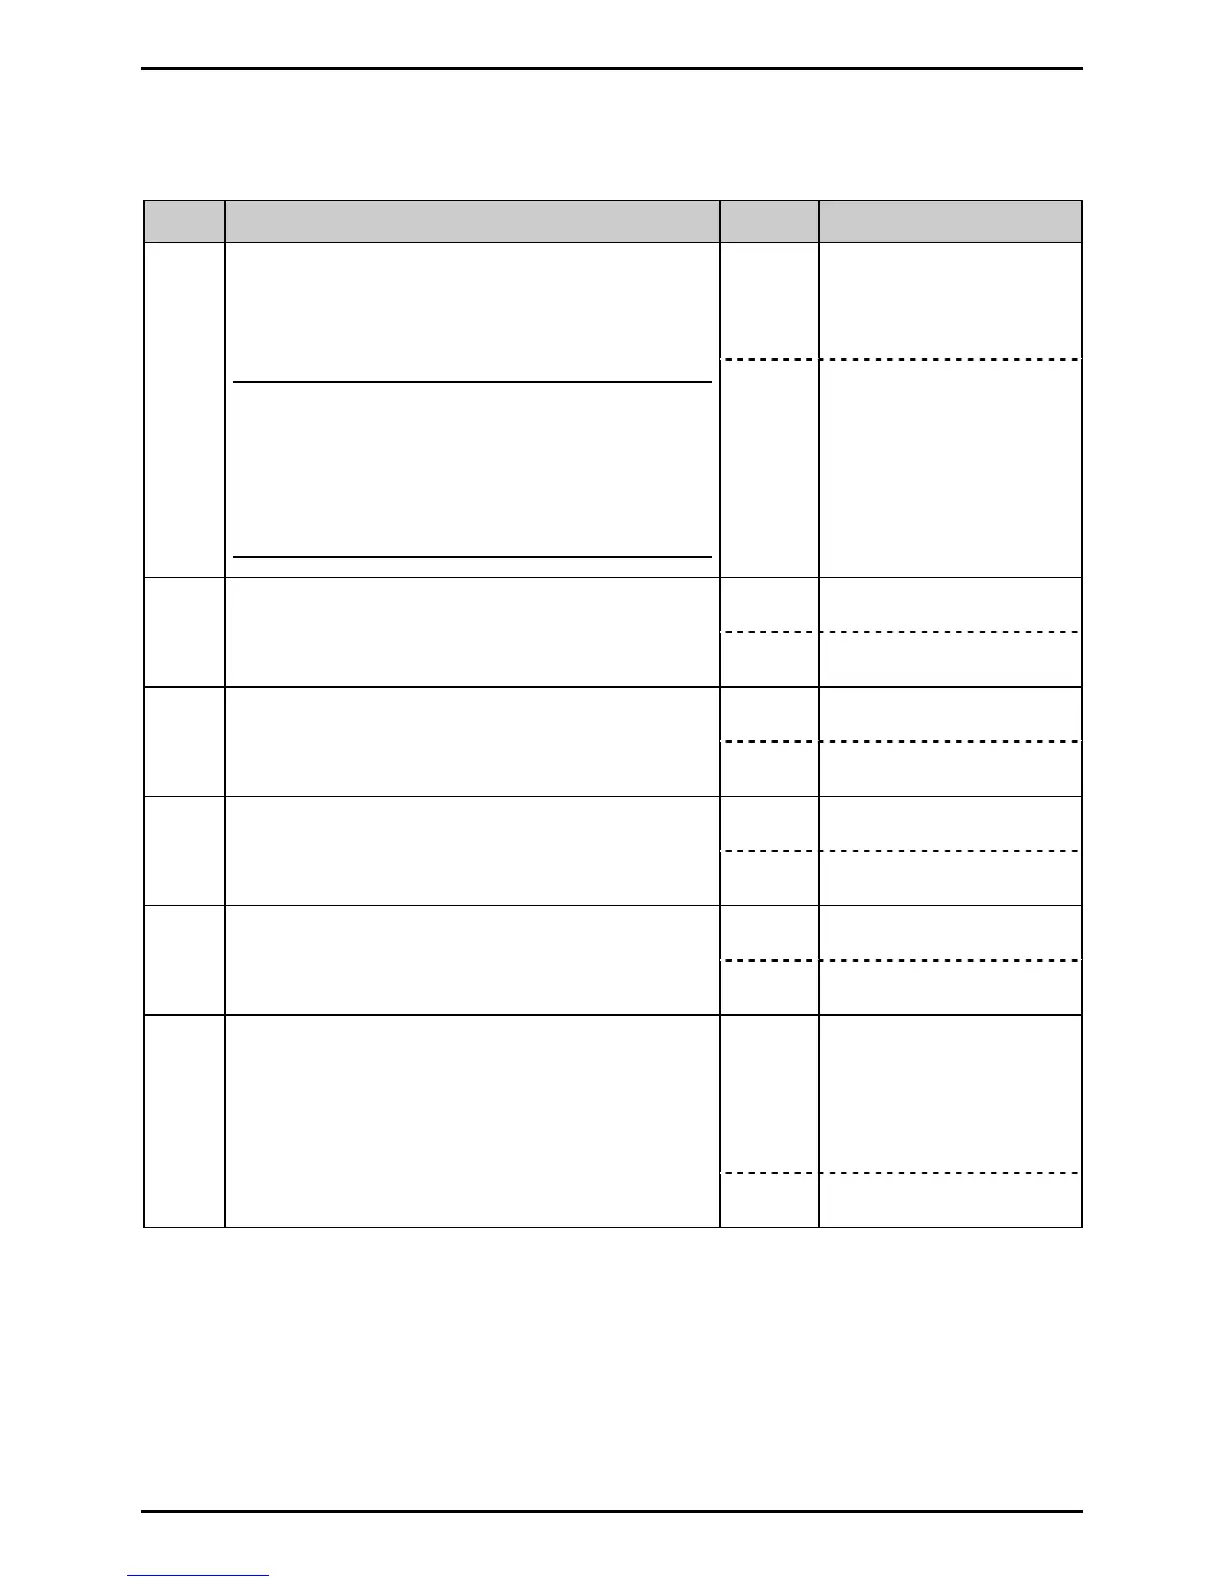
Step Procedure Result Action
Yes
Replace the Main Logic
PCB; see Section 4.4.
1
Plug in and turn ON the printer. Wait for
initialization, about one minute.
Do all three Indicator Lights remain ON?
Note: (1) Initialization may take longer
when equipped with certain options;
and, (2) display-equipped models
only, if the display remains dark,
press and hold MENU to adjust the
contrast; otherwise, if it does not
change, see Section 4.2.1.
No Go to Step 2.
Yes Go to Step 3.
2
Press FEED.
Does the printer attempt to move media?
No Go to Section 3.2.1.1.
Yes Go to Section 3.2.1.2.
3
Press FEED.
Is the ERROR Light ON?
No Go to Step 4.
Yes Go to Section 3.2.1.3.
4 Is the STOP Light ON?
No Go to Step 5.
Yes Go to Step 6.
5
Print a Print Quality Label.
Are labels printed with acceptable quality?
No Go to Section 3.2.1.4.
Yes
Test complete. If
problems continue,
check the parameters
of your labeling
program or code.
6
Send a label format from the host.
Was the format printed?
No Go to Section 3.2.1.5.

 Loading...


