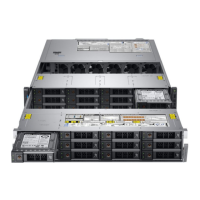
Figure 26. Installing air shroud for system with the rear drive conguration
Next steps
1 If removed, install the buttery riser.
2 Install the system cover.
3 Place the system into the rack. For more information, see the Rail Installation Guide available at www.dell.com/poweredgemanuals.
4 Open the drive bays, install all drives, and then close the drive bays.
5 Install the power supply units.
6 Follow the procedure listed in After working inside your system.
Internal PERC riser
Removing the internal PERC riser
Prerequisites
1 Follow the safety guidelines listed in Safety instructions.
2 Power o the system and all attached peripherals.
3 Disconnect the system from the electrical outlet, and disconnect the peripherals.
4 Open the drive bays, remove all drives, and then close the drive bays.
5 Remove the power supply units.
6 Remove the system from the rack and place it on an ESD work bench. For more information, see the Rail Installation Guide available at
www.dell.com/poweredgemanuals.
7 Remove the system cover.
8 Remove the air shroud.
9 If installed, remove the rear drive cage.
54
Installing and removing system components

 Loading...


