CAUTION: When removing drives, it is very important to label each drive with its slot number so you can put
each drive back into its correct position once the DM5500 is installed in the rack. If you do not put the drives
back in the correct slots, the appliance may not function properly. It is recommended that you temporarily label
each drive with its slot number using painter or gaffer tape as you remove each drive from the chassis. You
should remove the drives in a top to bottom order.
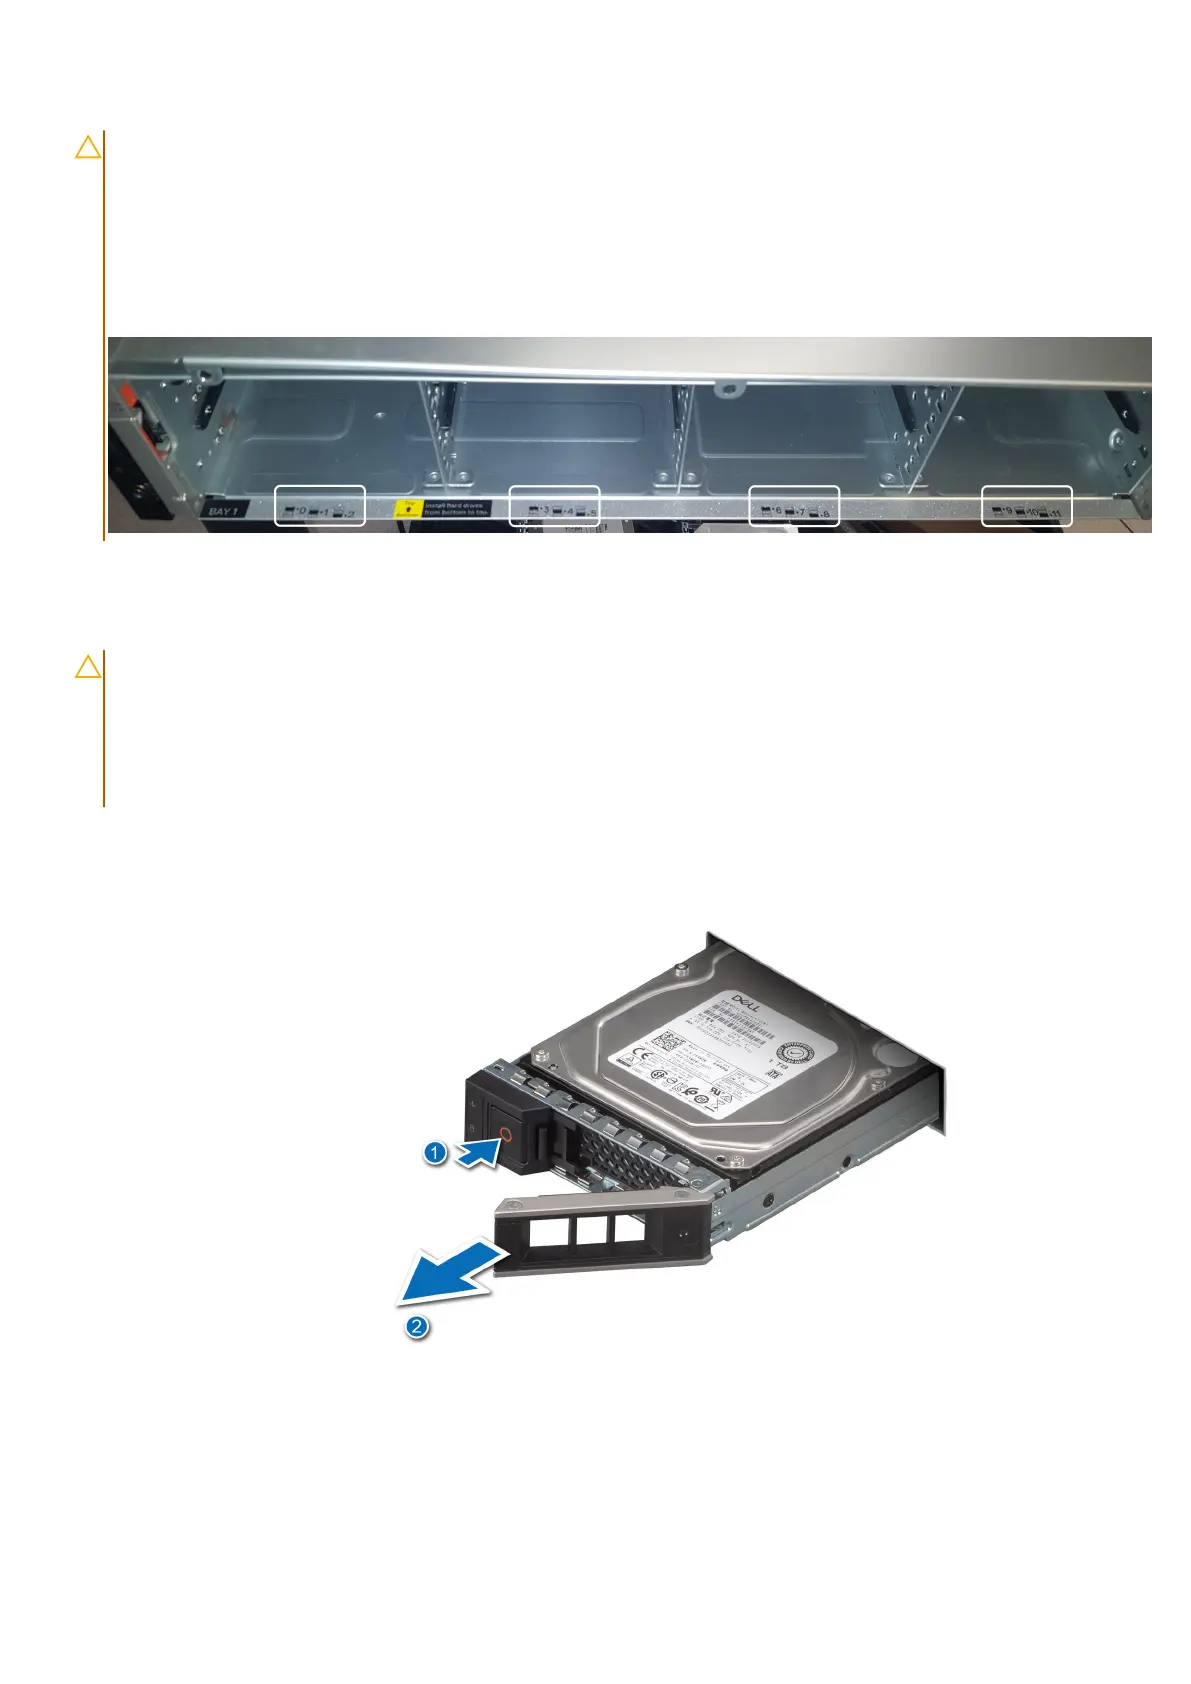
Slots are numbered 0 through 23 in the two drive bays, and there is an imprint at the bottom of each bay
denoting the slot number, as shown in the following image.
To access the front drives for removal, you must remove the bezel.
To access the middle drives in drive bay 2 for removal, you must open the drive bay.
If your system contains drive blanks, follow the procedure to remove drive blanks.
CAUTION: After you have completed the initial DM5500 appliance configuration that is described in this install
guide, it is important to know that the drives specified in the PowerProtect Data Manager Appliance UI do not
contain the physical slot number of the drive, but the logical slot number of the drive. Physical drive positions
are numbered 0 through 23. Logical drive positions are numbered 1 through 24. For example, the disk drive
that resides in physical slot 6 in the DM5500 server is specified as Disk=7 in the PowerProtect Data Manager
Appliance UI.
Steps
1. Press the release button to open the drive carrier release handle.
2. Holding the handle, slide the drive carrier out of the drive slot.
Figure 22. Removing a drive carrier
Next steps
Close the drive bays.
Install the DM5500 in the rack
31