4-10
Dell OptiPlex Gn and Gn+ Systems Service Manual
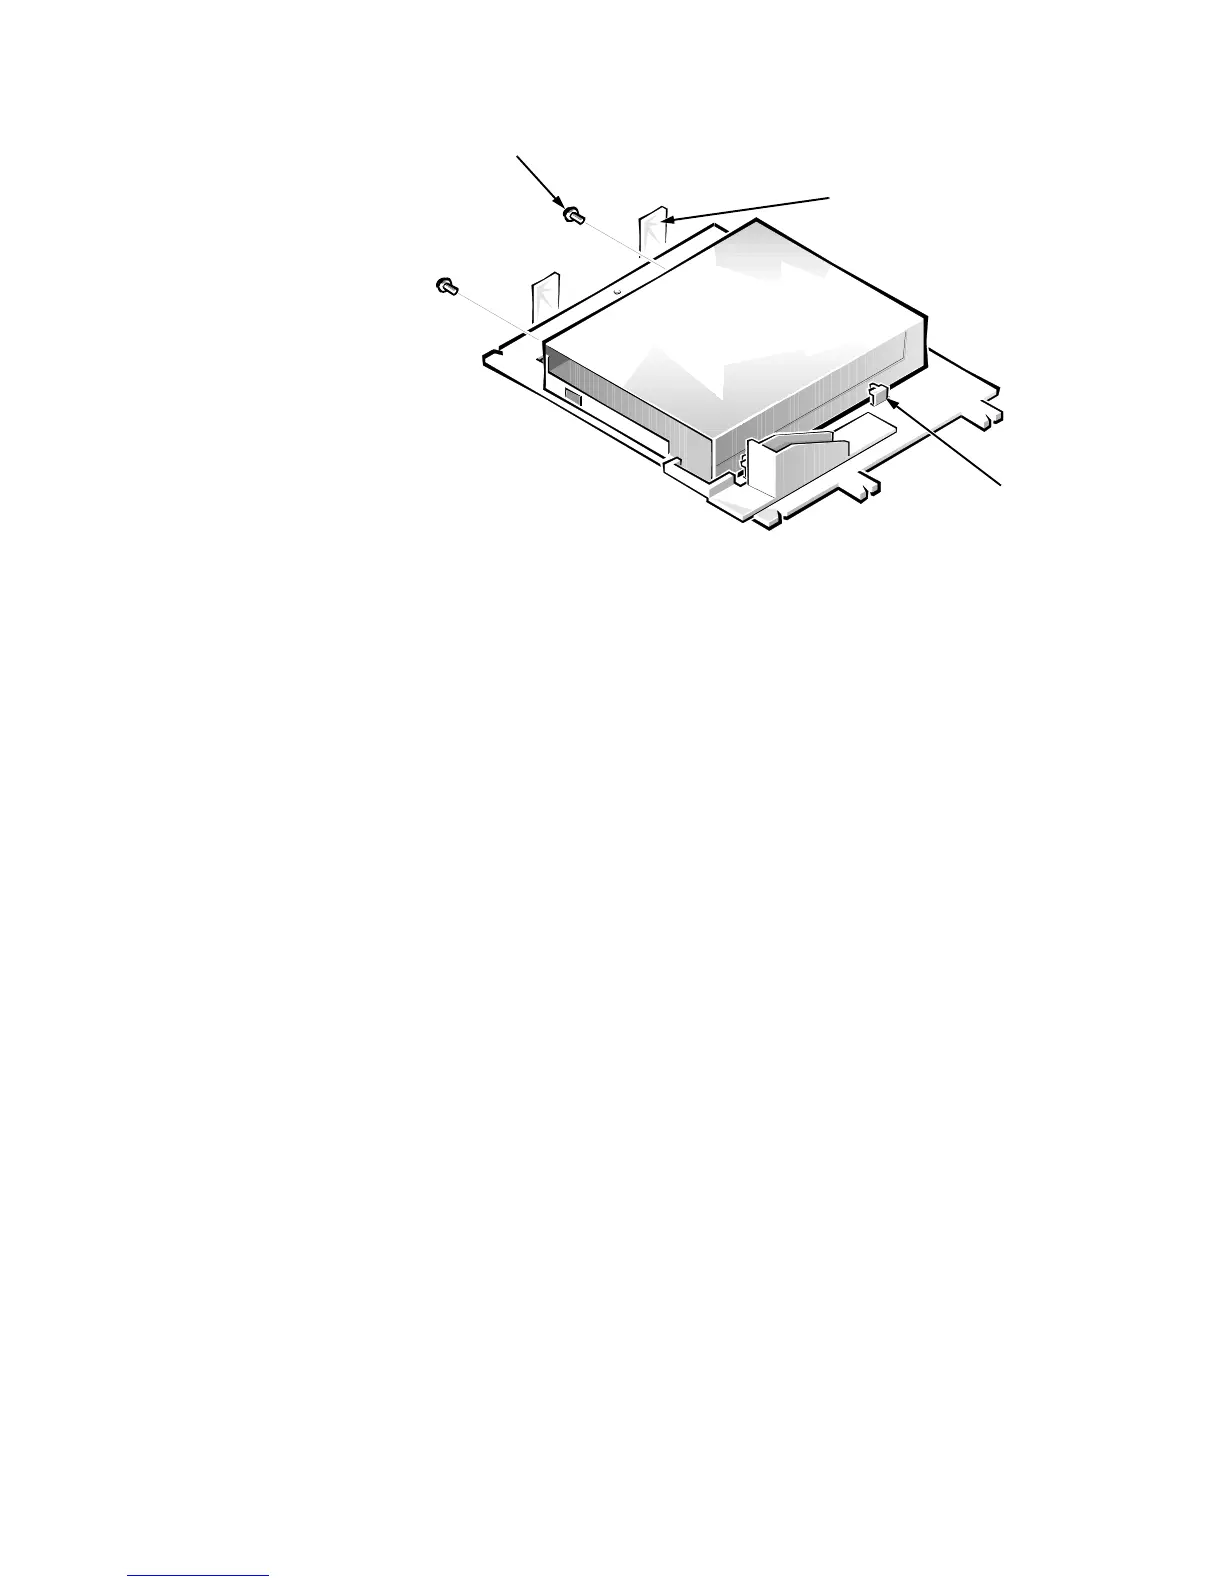
3.5-Inch Diskette Drive Assembly
Figure 4-9. 3.5-Inch Diskette Drive Removal
To remove the 3.5-inch diskette drive assembly, follow these steps:
1. Disconnect the DC power cable and the interface cable from the back of
the diskette drive.
2. Push outward on the two 3.5-inch diskette-drive assembly latches to
release the assembly.
Rotate the left side of the assembly up, and lift the assembly out of the
chassis.
3. Remove the two drive-mounting screws from the left side of the drive,
and remove the drive from the bracket.
When you replace the 3.5-inch diskette drive, be sure the mounting holes on the
right side of the drive engage the two hooks on the bracket.
drive-mounting screws (2)