4-12
Dell OptiPlex Gn and Gn+ Systems Service Manual
Hard-Disk Drive Assembly
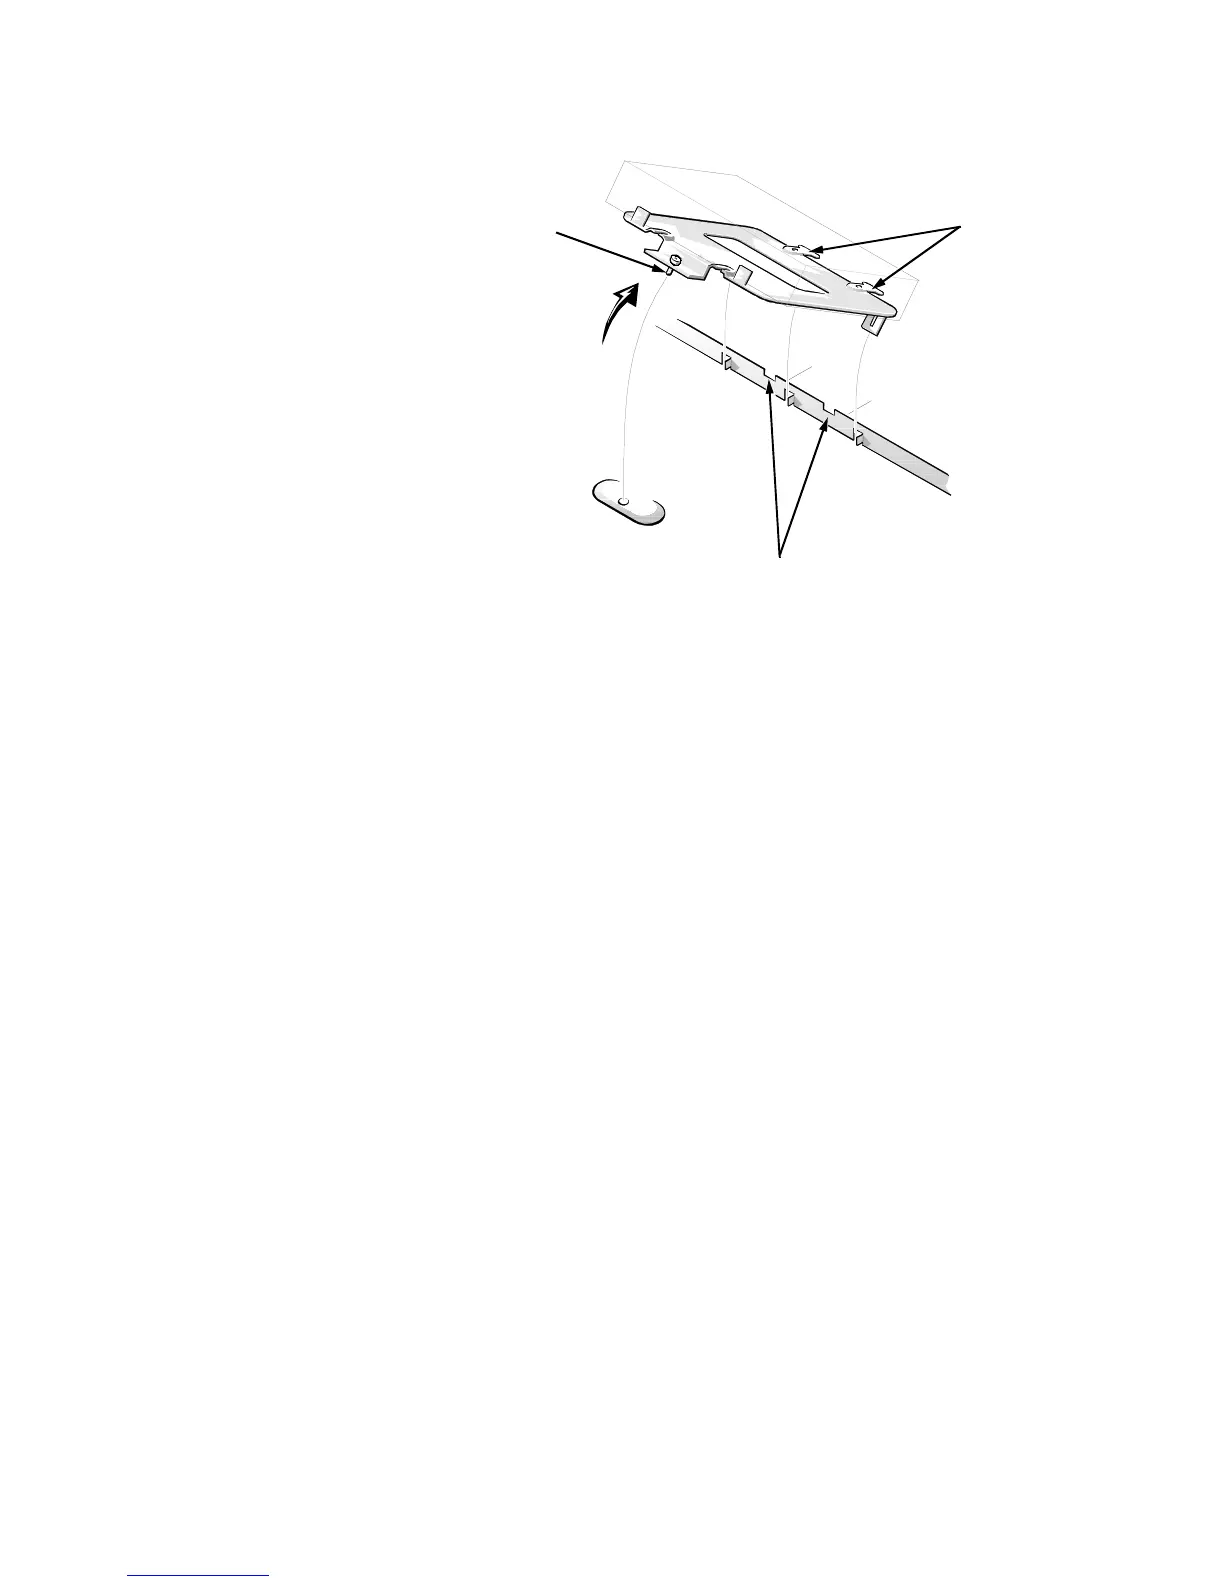
Figure 4-11. Hard-Disk Drive Assembly Removal
To remove the hard-disk drive assembly, follow these steps:
1. Disconnect the DC power cable and the interface cable from the back of
the drive.
2. Loosen the captive screw that secures the hard-disk drive bracket to the
chassis.
3. Pivot the hard-disk drive assembly up, and then lift it out of the chassis.
4. Remove the four hard-disk drive mounting screws that attach the hard-
disk drive to the hard-disk drive bracket.
When you reinstall the hard-disk drive assembly, be sure the tabs on the back of
the mounting plate fully engage the notches on the chassis before you rotate the
assembly into place.