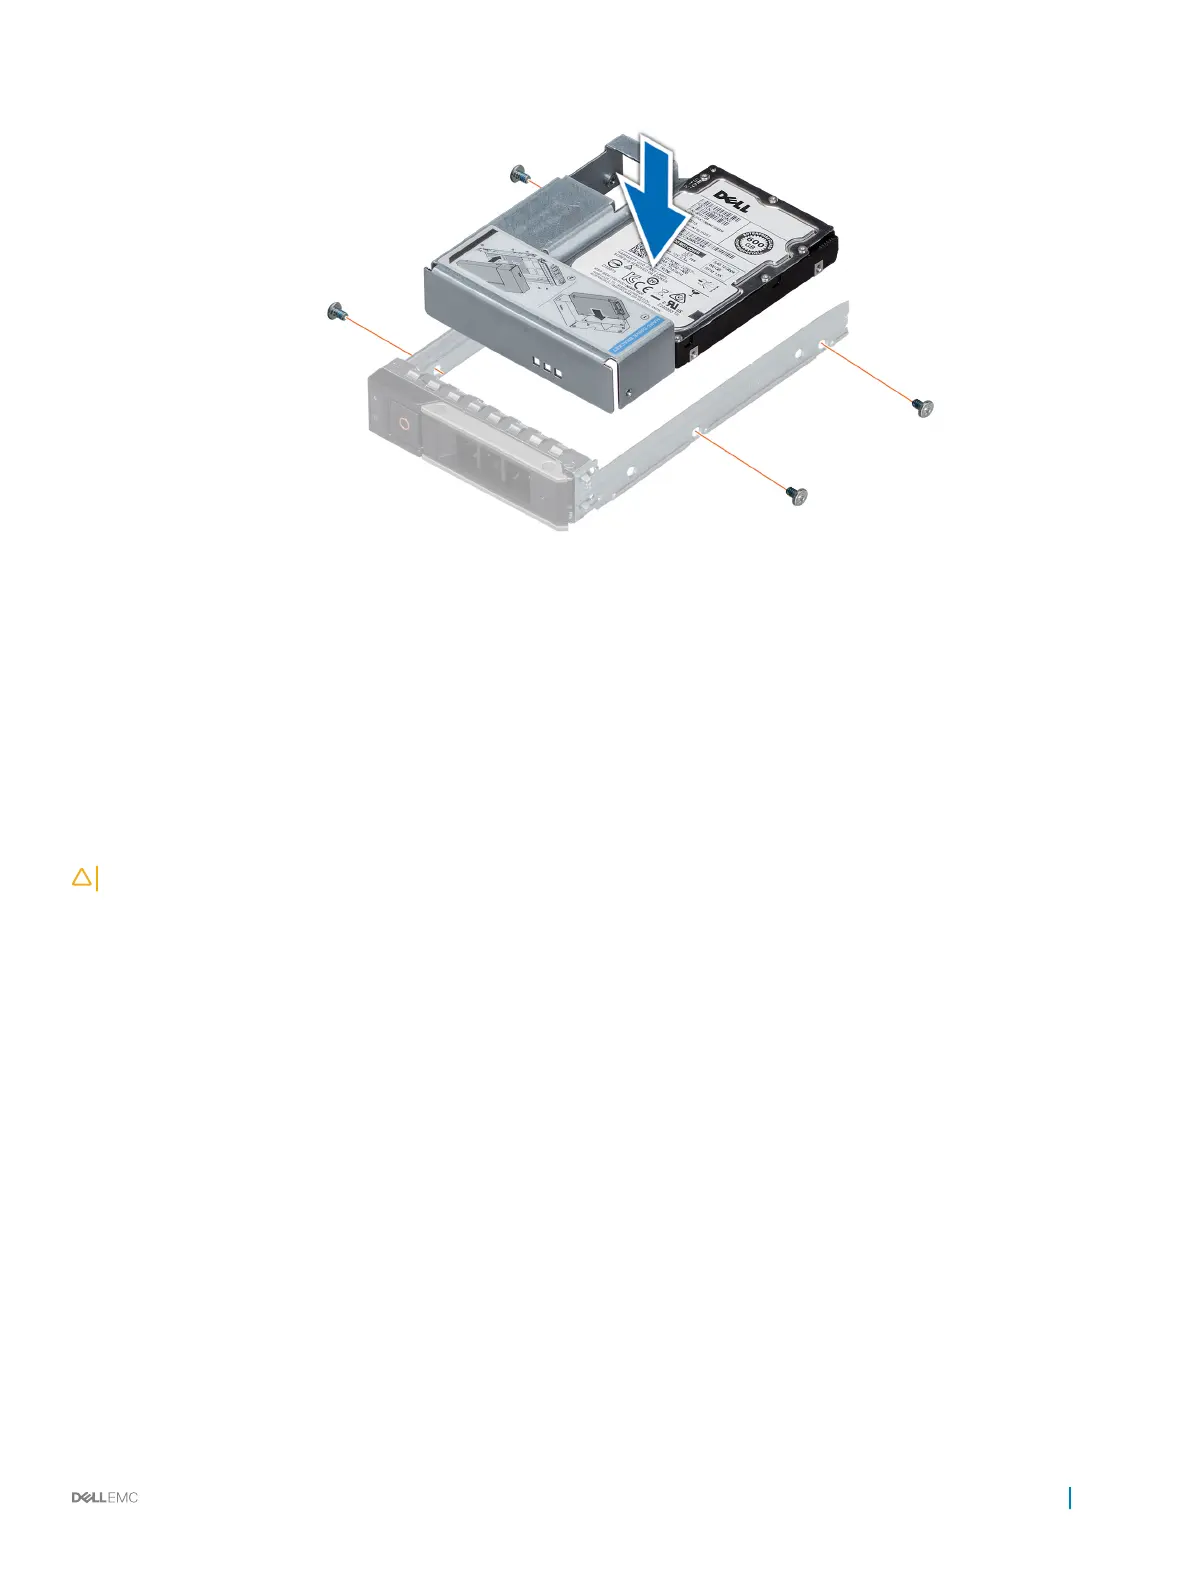
Figure 54. Installing a 3.5 inch adapter into a 3.5 inch drive carrier
Next steps
1 Install the 3.5 inch drive carrier into the system.
2 Follow the procedure listed in After working inside your system.
Removing the drive from the drive carrier
Prerequisite
CAUTION
: Mixing drives from previous generations of PowerEdge servers is not supported.
Steps
1 Using Phillips #1 screwdriver, remove the screws from the slide rails on the drive carrier.
2 Lift the drive out of the drive carrier.
Installing and removing system components
105

 Loading...


