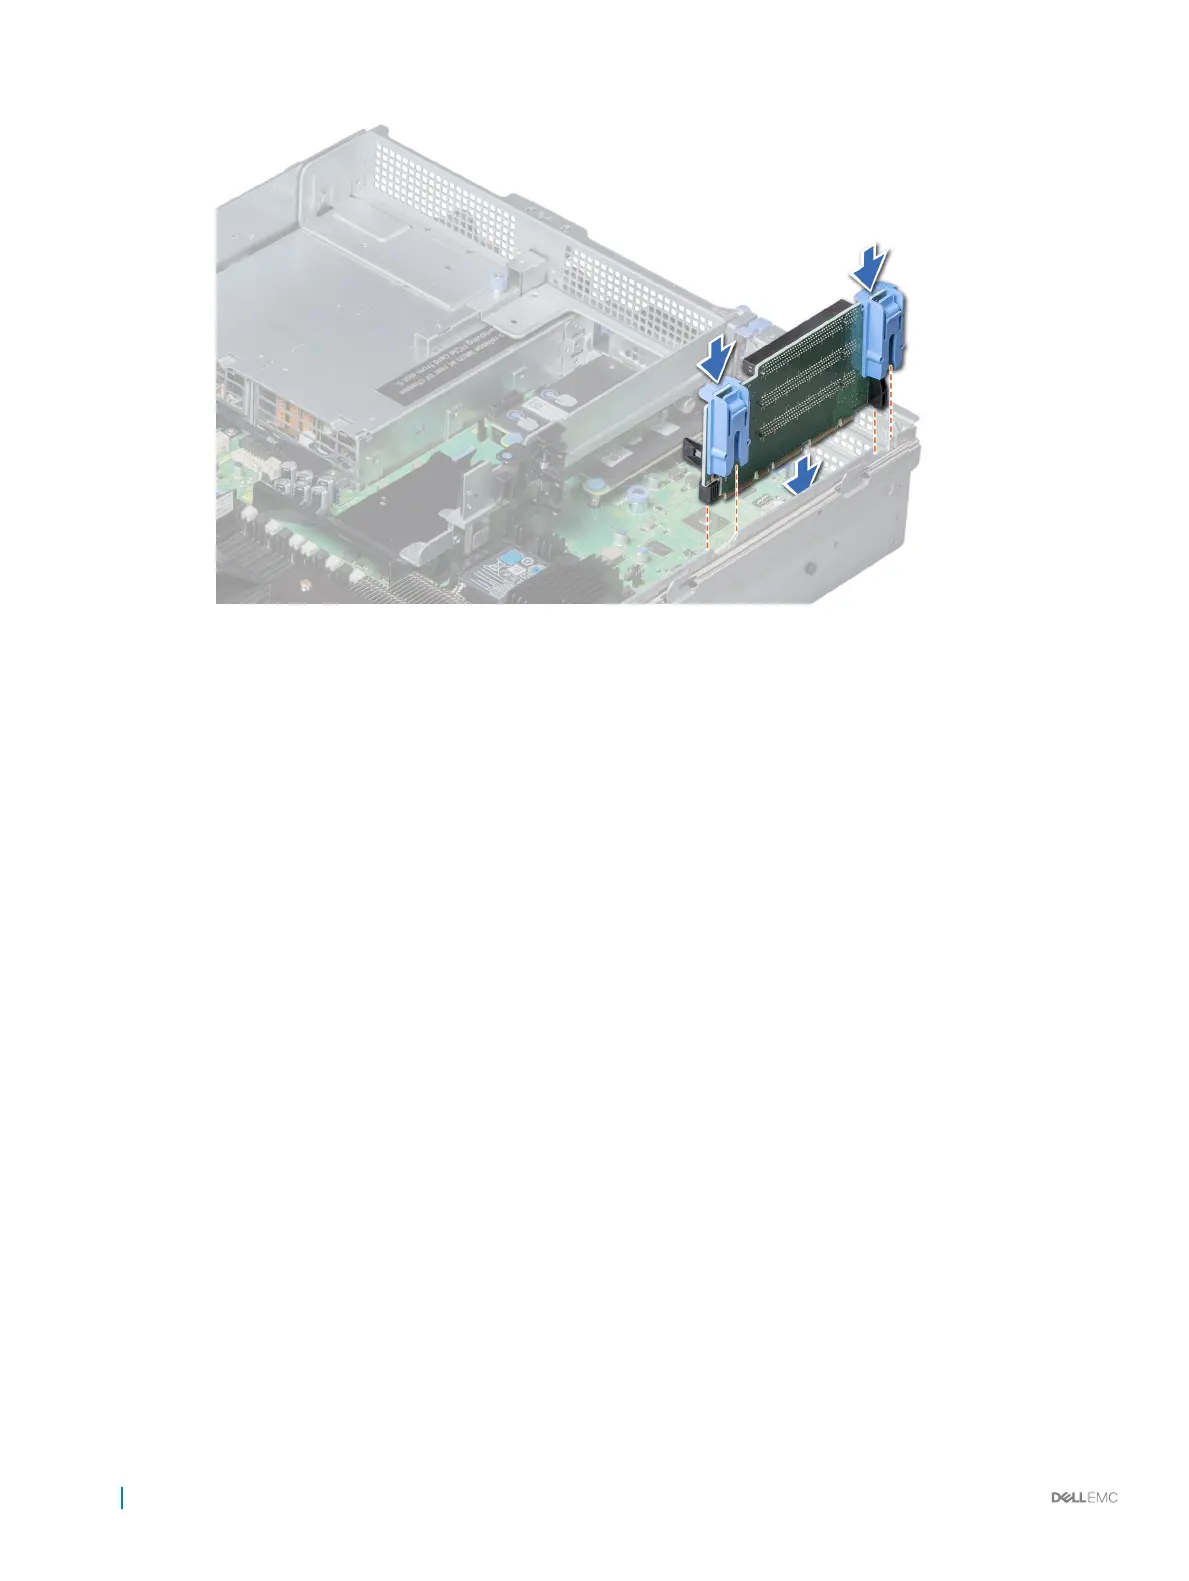
Figure 88. Installing expansion card riser 1
Next steps
1 If removed, install expansion cards into the riser.
2 Follow the procedure listed in After working inside your system.
3 Install any device drivers required for the card as described in the documentation for the card.
Related link
Installing expansion card into expansion card riser
Removing expansion card riser 2
Prerequisites
1 Follow the safety guidelines listed in Safety instructions.
2 Follow the procedure listed in Before working inside your system.
3 If applicable, close the PCIe card holder latch on the air shroud to release the full length card.
4 If installed, remove expansion cards installed on the riser.
5 Remove the air shroud.
6 Disconnect any cables connected to the riser.
Steps
1 To remove expansion card riser 2A:
a Using Phillips #2 screwdriver, loosen the screws that secure the riser to the system.
b Press the release tab, and holding the riser by its edges, lift the riser from the riser connector on the system board.
140
Installing and removing system components

 Loading...


