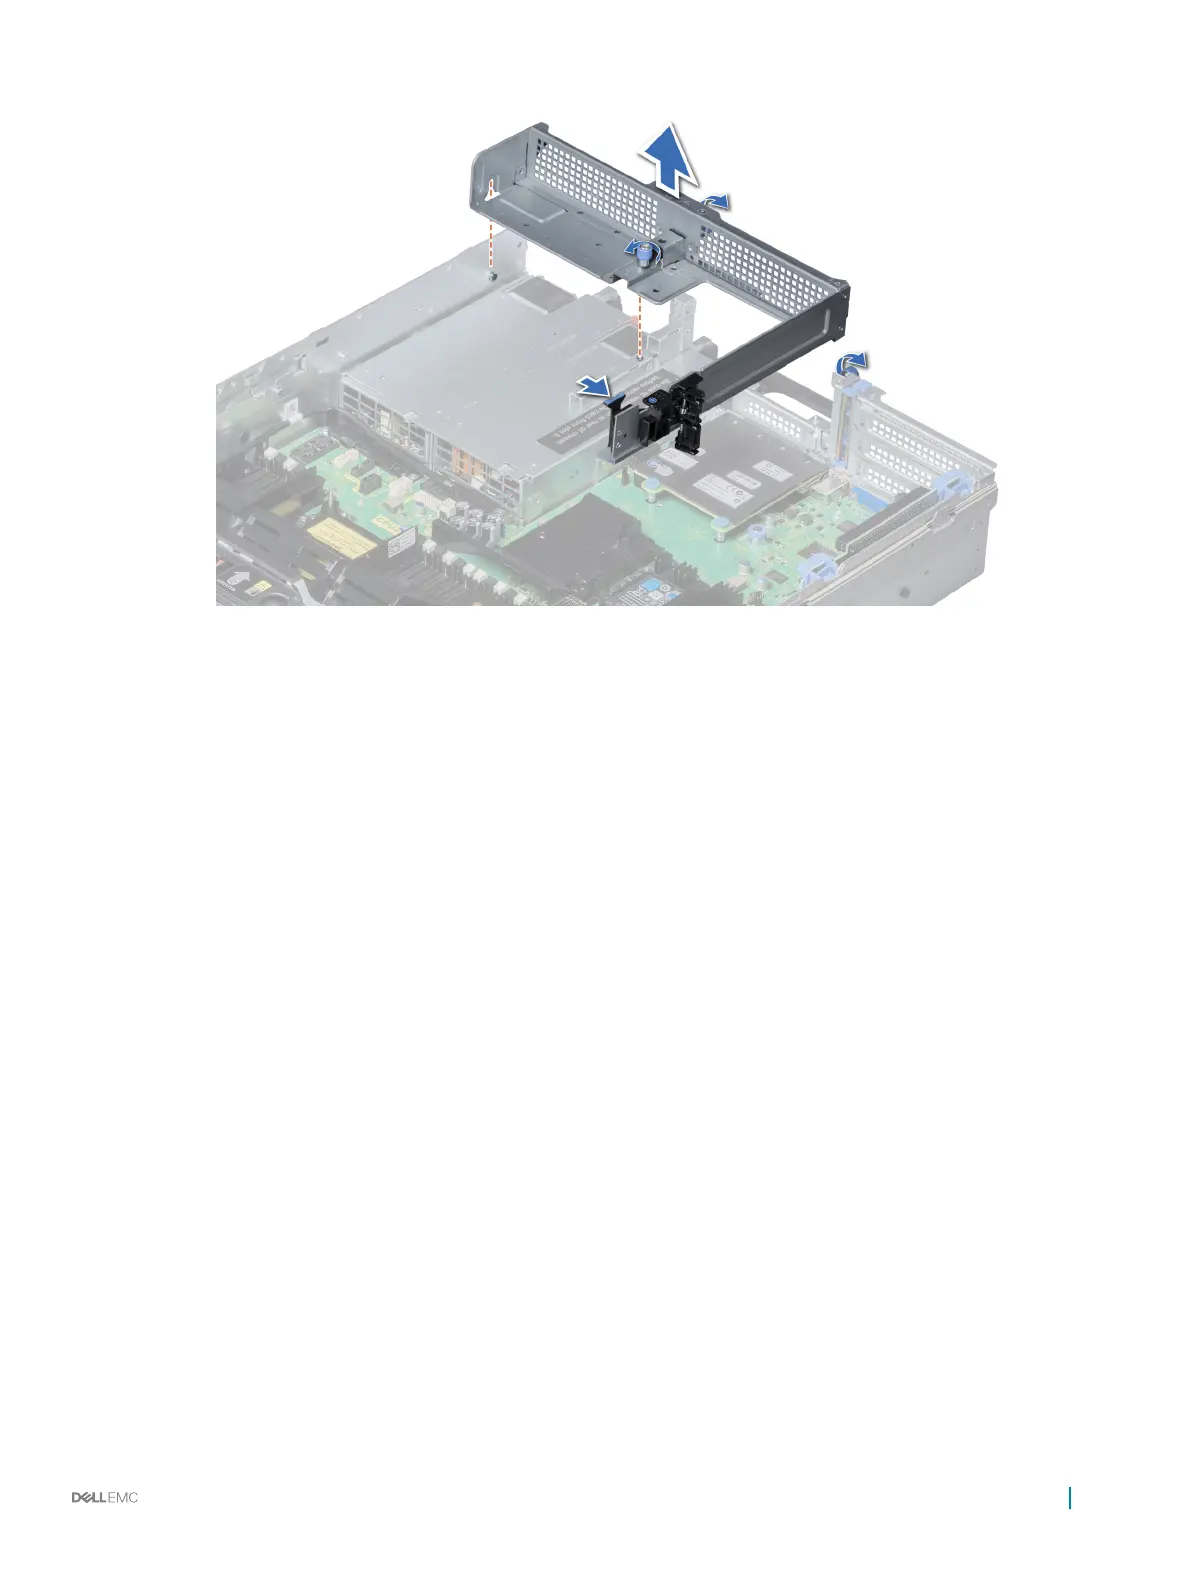
Figure 83. Removing riser 2 and 3 blank
Next step
Install the riser 2 and 3 blank.
Related link
Removing the air shroud
Installing riser 2 and 3 blank
Installing riser 2 and 3 blank
Prerequisite
Follow the safety guidelines listed in Safety instructions.
Steps
1 Align the screw and guide rail on the riser blank with the screw hole and stando on the system.
2 Lower the blank into the system until the release tab clicks into place.
3 Tighten the screws to secure the riser blank to the system.
Installing and removing system components
135

 Loading...


