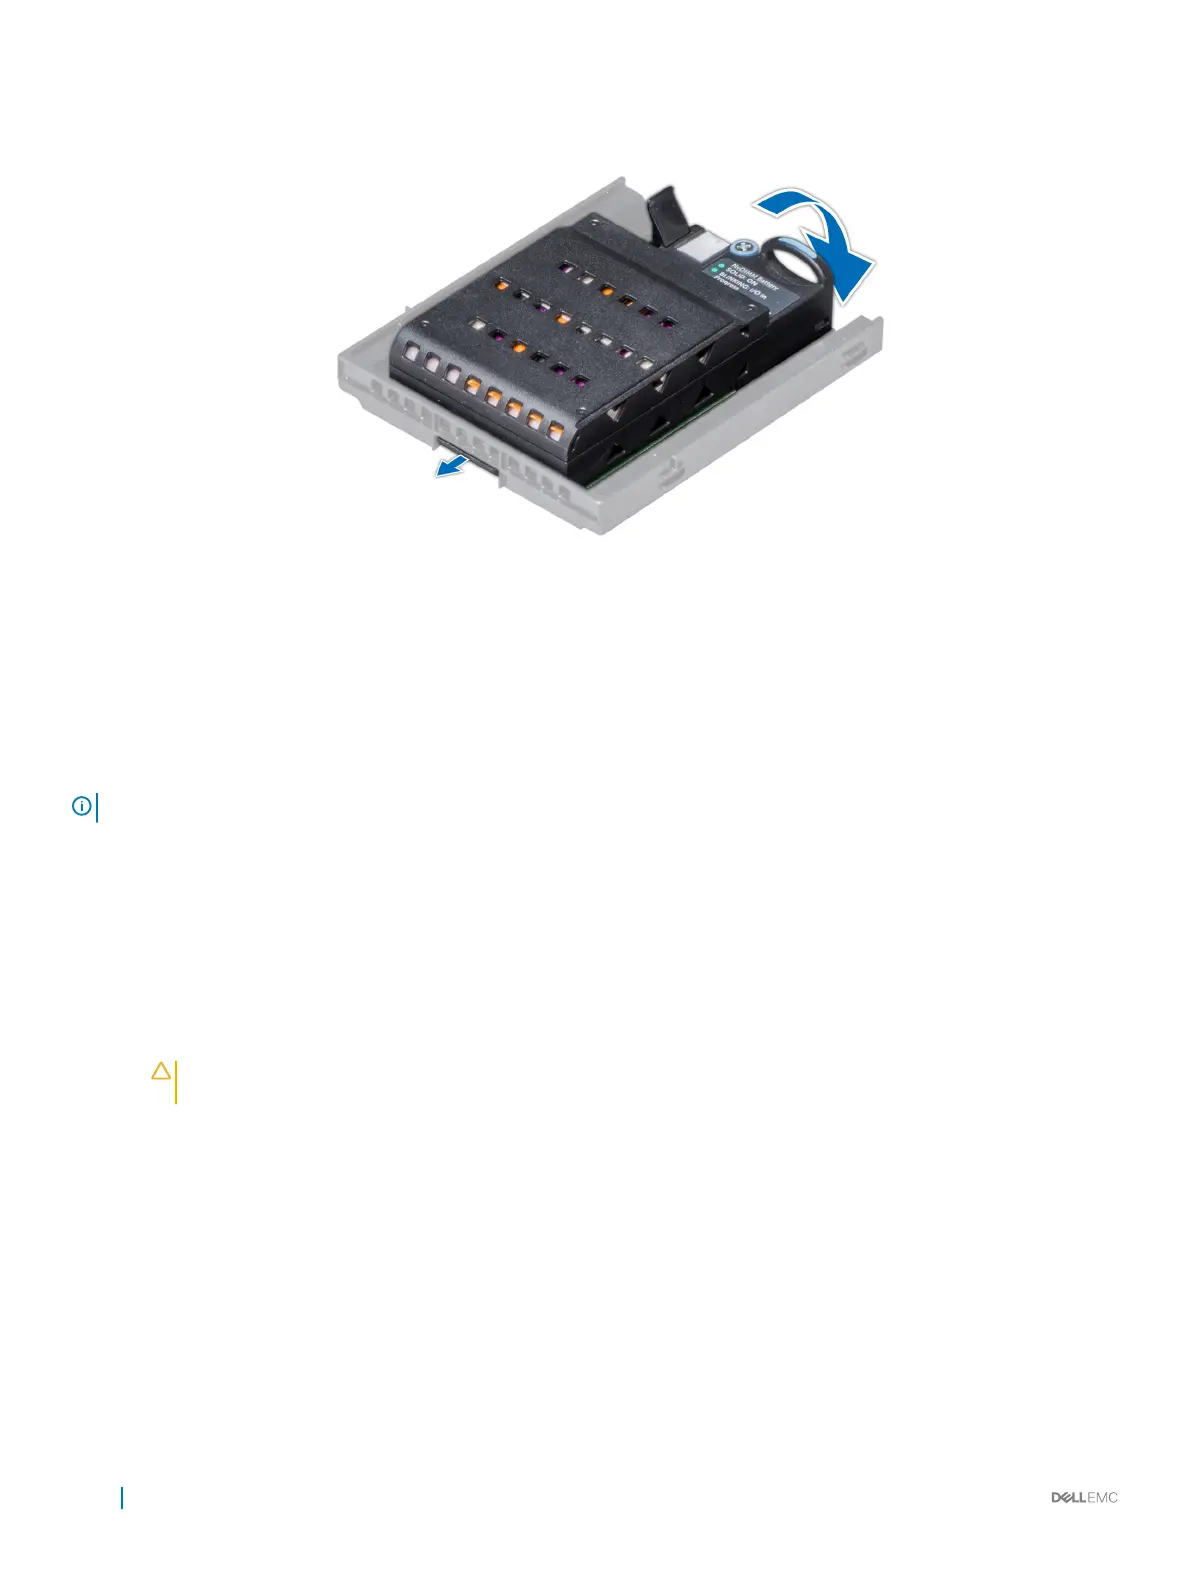
Figure 38. Installing NVDIMM-N battery into the bracket
Next step
Follow the procedure listed in After working inside your system.
Mid drive tray
The mid drive tray is located behind the cooling fan assembly. It supports up to four 2.5 inch or four 3.5 inch drives.
NOTE
: Systems that support the internal mid drive tray require low-prole heat sinks and do not require or support an air shroud.
Removing mid drive tray
Prerequisites
1 Follow the safety guidelines listed in Safety instructions.
2 Follow the procedure listed in Before working inside your system.
3 Disconnect all the cables from the drive backplane.
CAUTION
: The drive tray is hot to touch for some time after the system has been powered down. Allow time for the
drive tray to cool before handling it.
Steps
1 Lift the drive tray handles 90 degrees upward.
2 Hold the drive tray handles, and lift the drive tray out of the system.
88
Installing and removing system components

 Loading...


