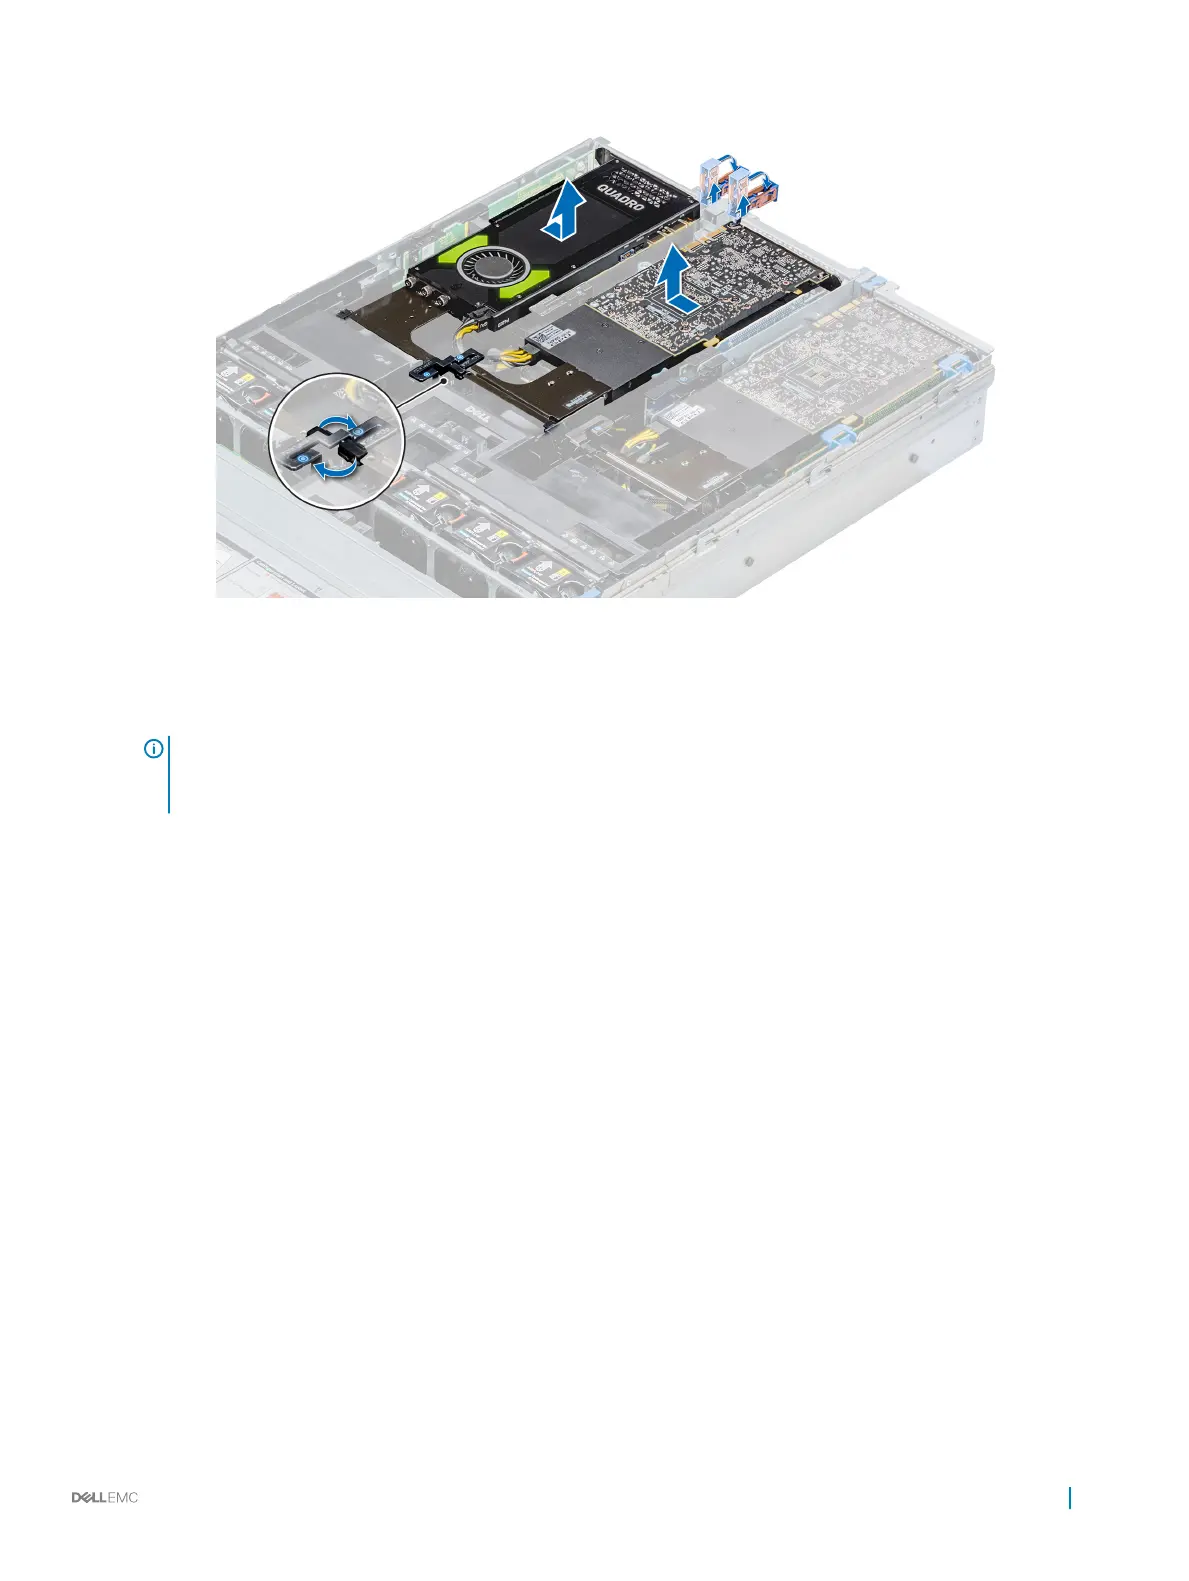
Figure 97. Removing GPU 2 and 3
4 Disconnect the GPU power cable from the GPU and system board.
5 If you are removing the GPU permanently, install a ller bracket over the empty slot opening, and close the expansion card latch.
NOTE
: You must install a ller bracket over an empty expansion card slot to maintain Federal Communications
Commission (FCC) certication of the system. The brackets also keep dust and dirt out of the system and aid in proper
cooling and airow inside the system. The ller bracket is necessary to maintain proper thermal conditions.
Next step
Install a GPU.
Installing a GPU
Prerequisites
1 Follow the safety guidelines listed in Safety instructions..
2 Remove the air shroud.
3 Remove the heat sink.
4 Remove the cooling fans and replace them with Install the cooling fans.
5 Unpack the GPU cards and the GPU kit.
6 Install the heat sink from the kit.
7 Install the risers.
8 Install the GPU air shroud on the system.
Installing and removing system components
147

 Loading...


