Steps
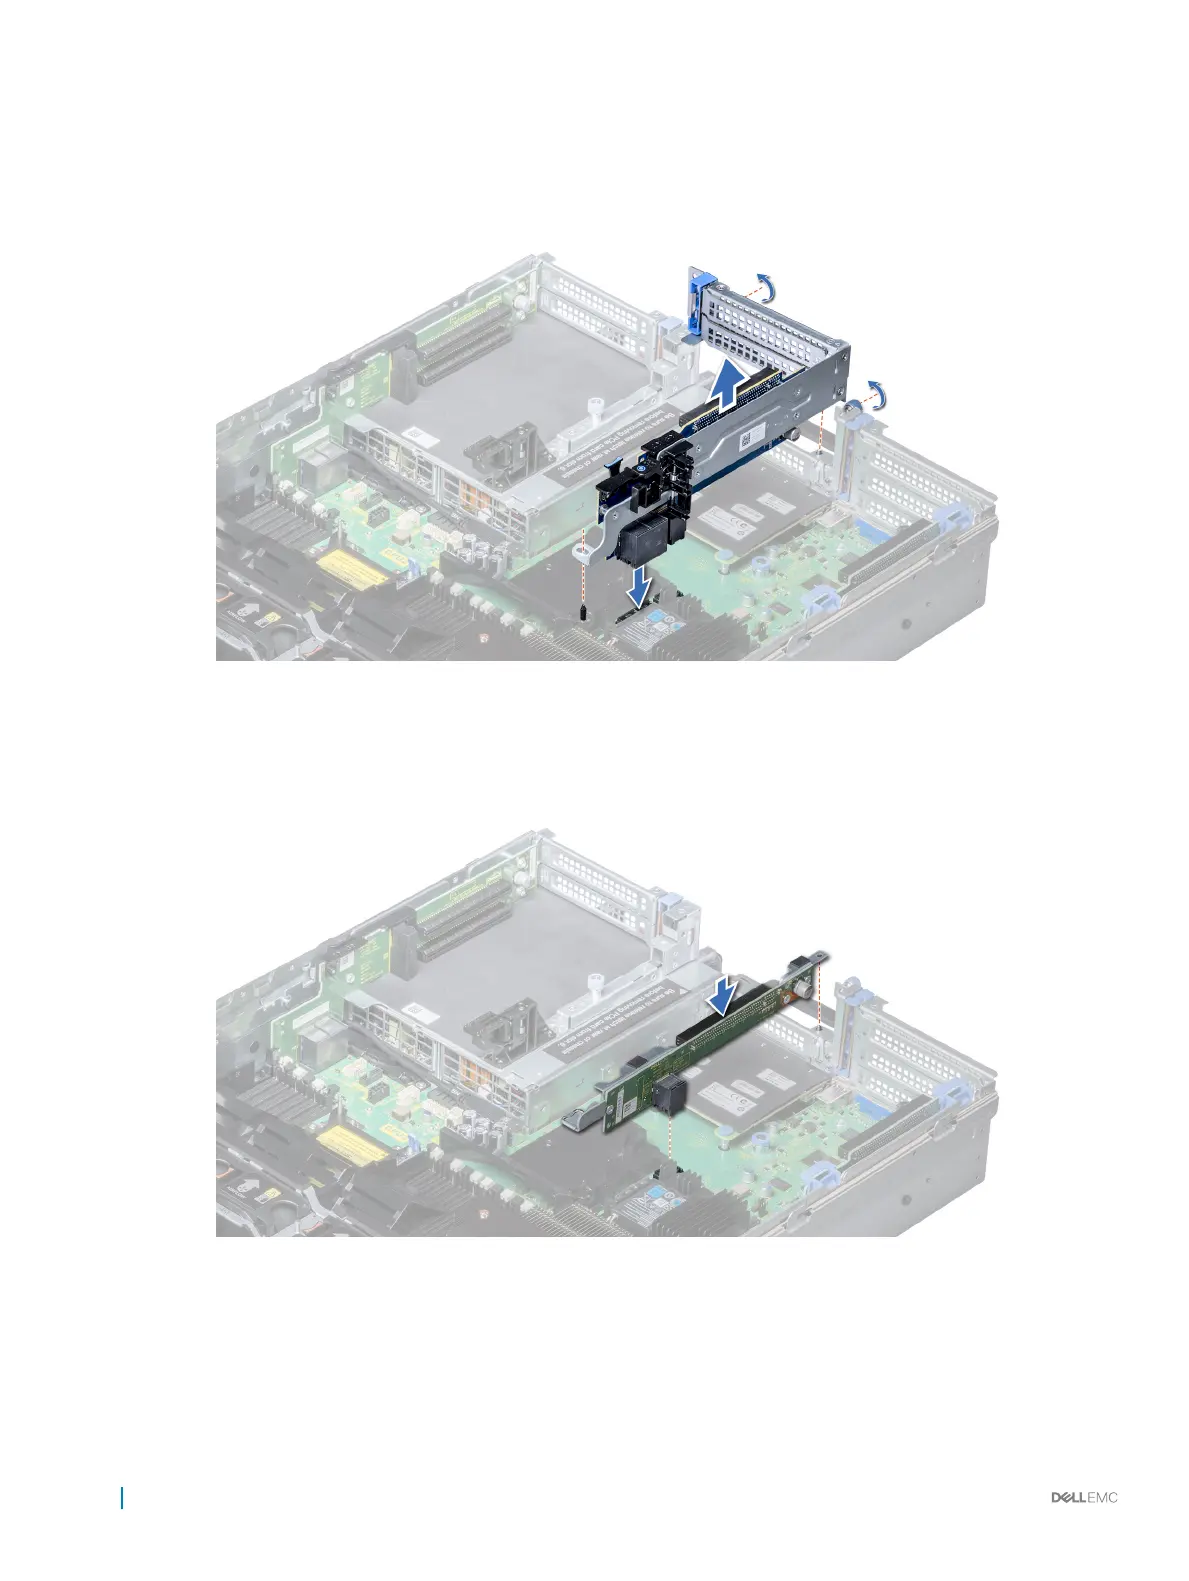
1 To install expansion card riser 2A:
a Align the screw and tab on the riser with the screw hole and slot on the system.
b Lower the riser into the system until the riser connector engages with the connector on the system board.
c Using Phillips #2 screwdriver, tighten the screws to secure the riser to the system.
Figure 91. Installing expansion card riser 2A
2 To install expansion card riser 2B or 2C:
a Align the slot on the riser with the stando on the system.
b Lower the riser into the system until the riser card connector engages with the connector on the system board.
Figure 92. Installing expansion card riser 2
Next steps
1 Install the air shroud.
2 If removed, install the expansion cards into the riser.
142
Installing and removing system components

 Loading...


