DS-320SA
Instruction Manual - 46 -
www.doallsaws.com
11.2 BAND REPLACEMENT
When replacing the saw-band, it is absolutely important to disconnect the
machine from the mains socket and turn it on again after the installation of a
new band and closing the pulley and band guards.
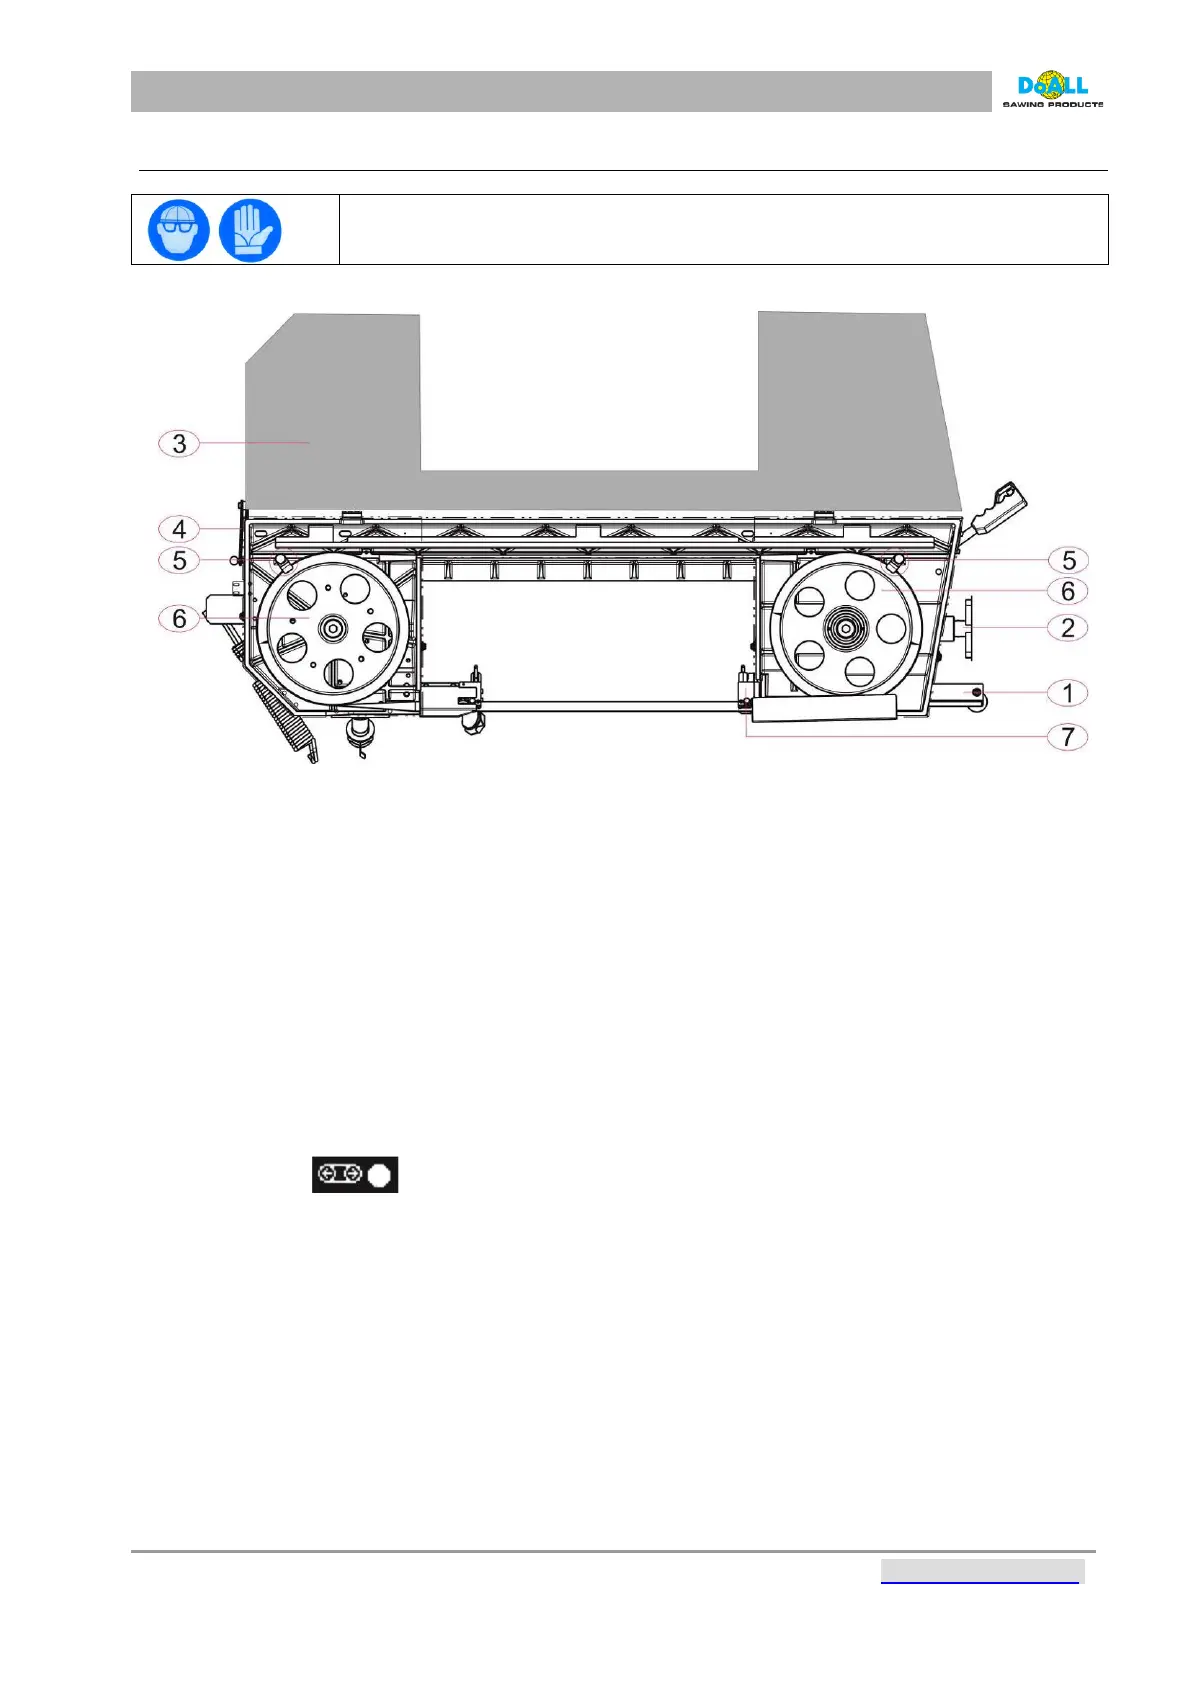
pic: 11-1
1.
Set the turn table to the 0° position and
move the arm so that it makes an angle of
20 – 30° to
the horizontal plane. Turn the
main switch to the 0 position and unplug the
mains plug.
2.
Make sure that the band guides are as
close together as possible. Loosen the
crank and move
the suspension bar with
guide (No. 1) far from the tensioning pulley.
Then loosen the tensioning
screw (No. 1).
3.
After uncovering the band guard (No. 3),
and the locking lever (No. 4), remove the
band from
the safety clips (No. 5). Remove
the band from pulleys (No. 6) and from the
guides (No. 1, 7).
4.
Always check the condition of the pulleys
and guides; all parts coming into contact
with the band
must always be cleaned
carefully.
5.
First slide the new band into the guides and then put on the pulleys. Push the band into the
pulleys’
shoulders with its flank and tighten slightly (screw No. 2). Check that the band is in the
correct position
against the pulleys’ shoulders and that it is correctly placed in the guides.
6.
Close the pulley guards and install the band guard. Plug in the mains socket and turn the main switch
to
position 1.
7.
Start tightening the tensioning screw (No. 2). The band is correctly tensioned when the light on the
control panel is active.