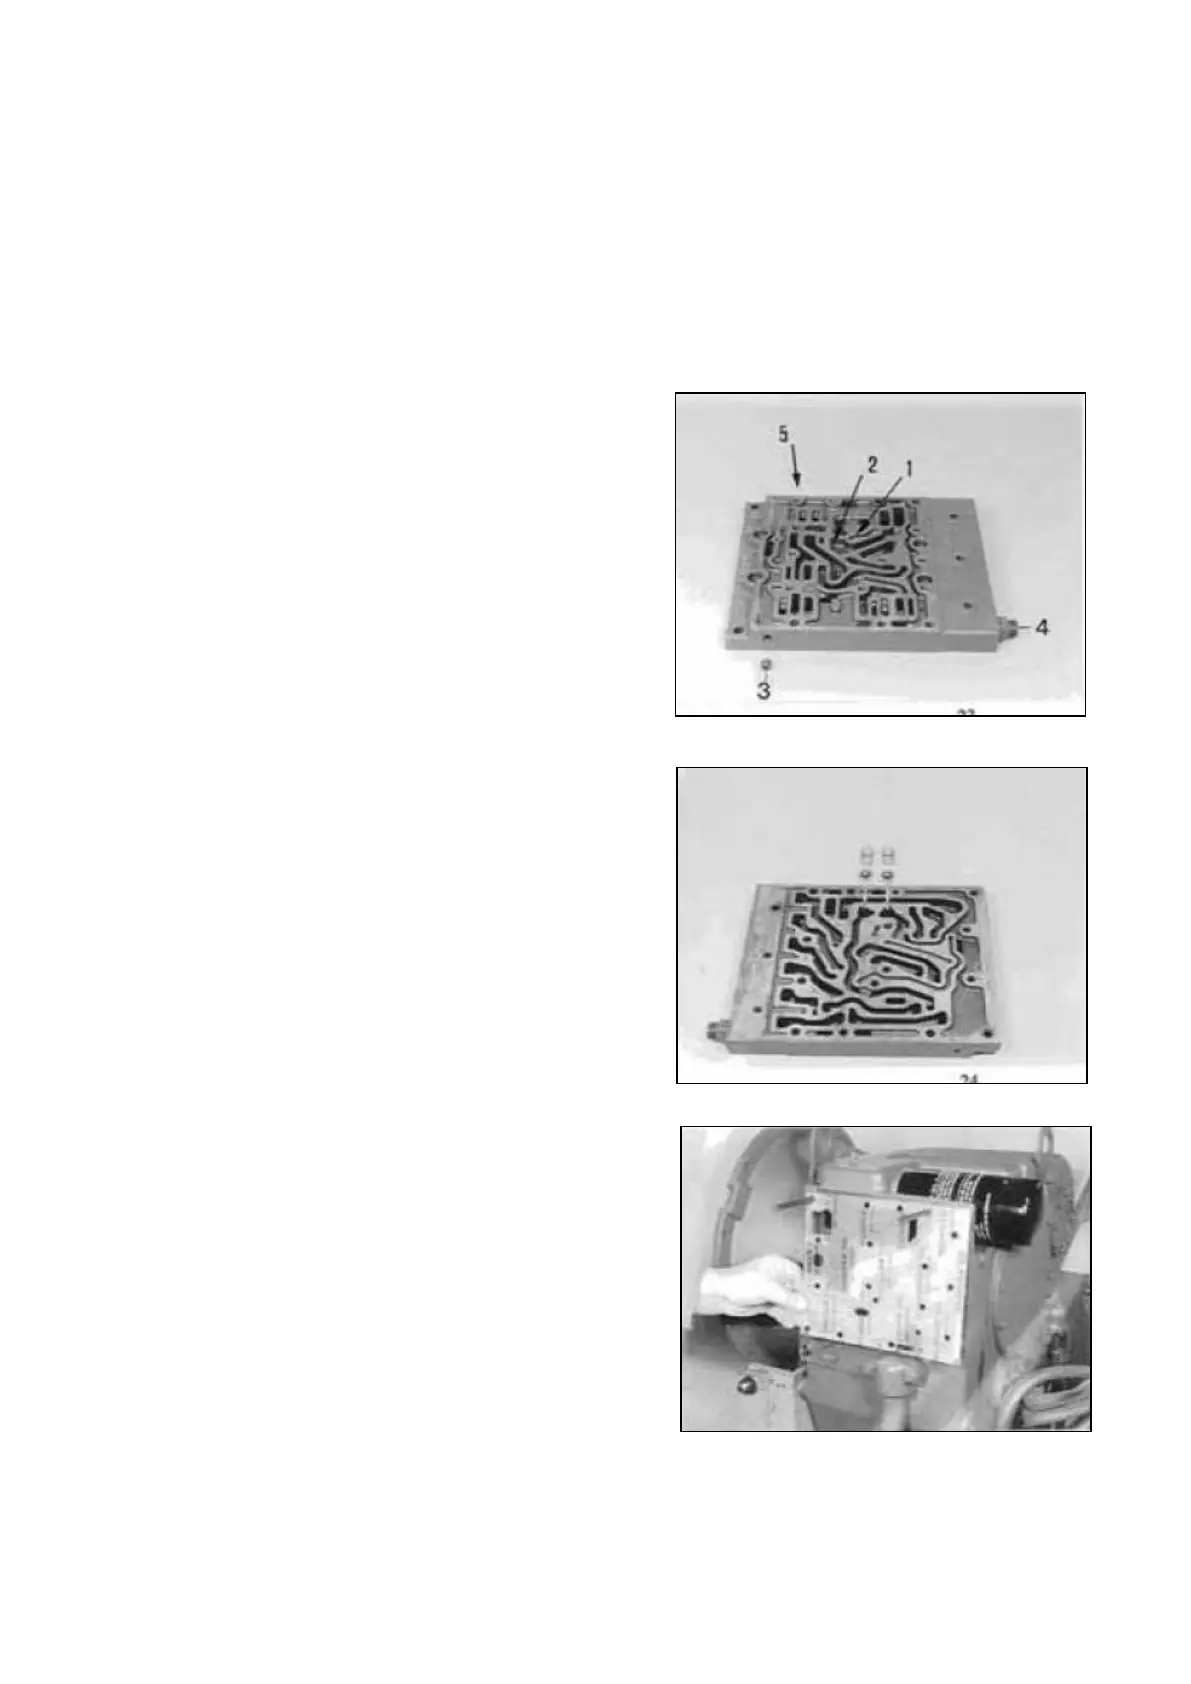
Pre-assemble channel plate (Figure 23 and 24)
NOTE :
According to the gearshift Version, different channel
plate variants are possible !
Pay attention to the Perspective Illustrations in the
corresponding Spare Parts List !
The following Reassembly Instruction is treating the
Standard Version (with control diaphragm and
diaphragm for the backfeed) !
Wet thread of control diaphragm with Loctite (Type-
No. 27C), install control diaphragm (Position, see
Arrow 1), and secure it additionally by means of
center punch.
Now, clean diaphragm from Loctite residues by
means of compressed air.
Install diaphragm for the backfeed (Position, see
Arrow 2) accordingly.
Insert thread plug (3) with Loctite (Type-No. 270).
Employ new sealing ring for connecting plug (4) and
screw plug (Position, see Arrow 5), and install them.
Insert the two check valves (composed of balls and
springs) in the channel plate.
Attach channel plate and gearbox control (Figure
25 ... 30)
Install housing gasket.
NOTE :
Pay attention to the different gaskets, see Figure 25
and 26 !
( S ) Adjusting screws (M8) 5870 200 011
Transmission and Torque Converter SPC000007
Page 21