1.2.2.2 REASSEMBLY
see also Illustrated Tables, Page
1.35and1.37 !
NOTE:
Check all components for damage and renew if
necessary !
Check free travel of the moving parts in the housing
prior to the installation !
Spools can be exchanged individually !
Oil components prior to the reassembly !
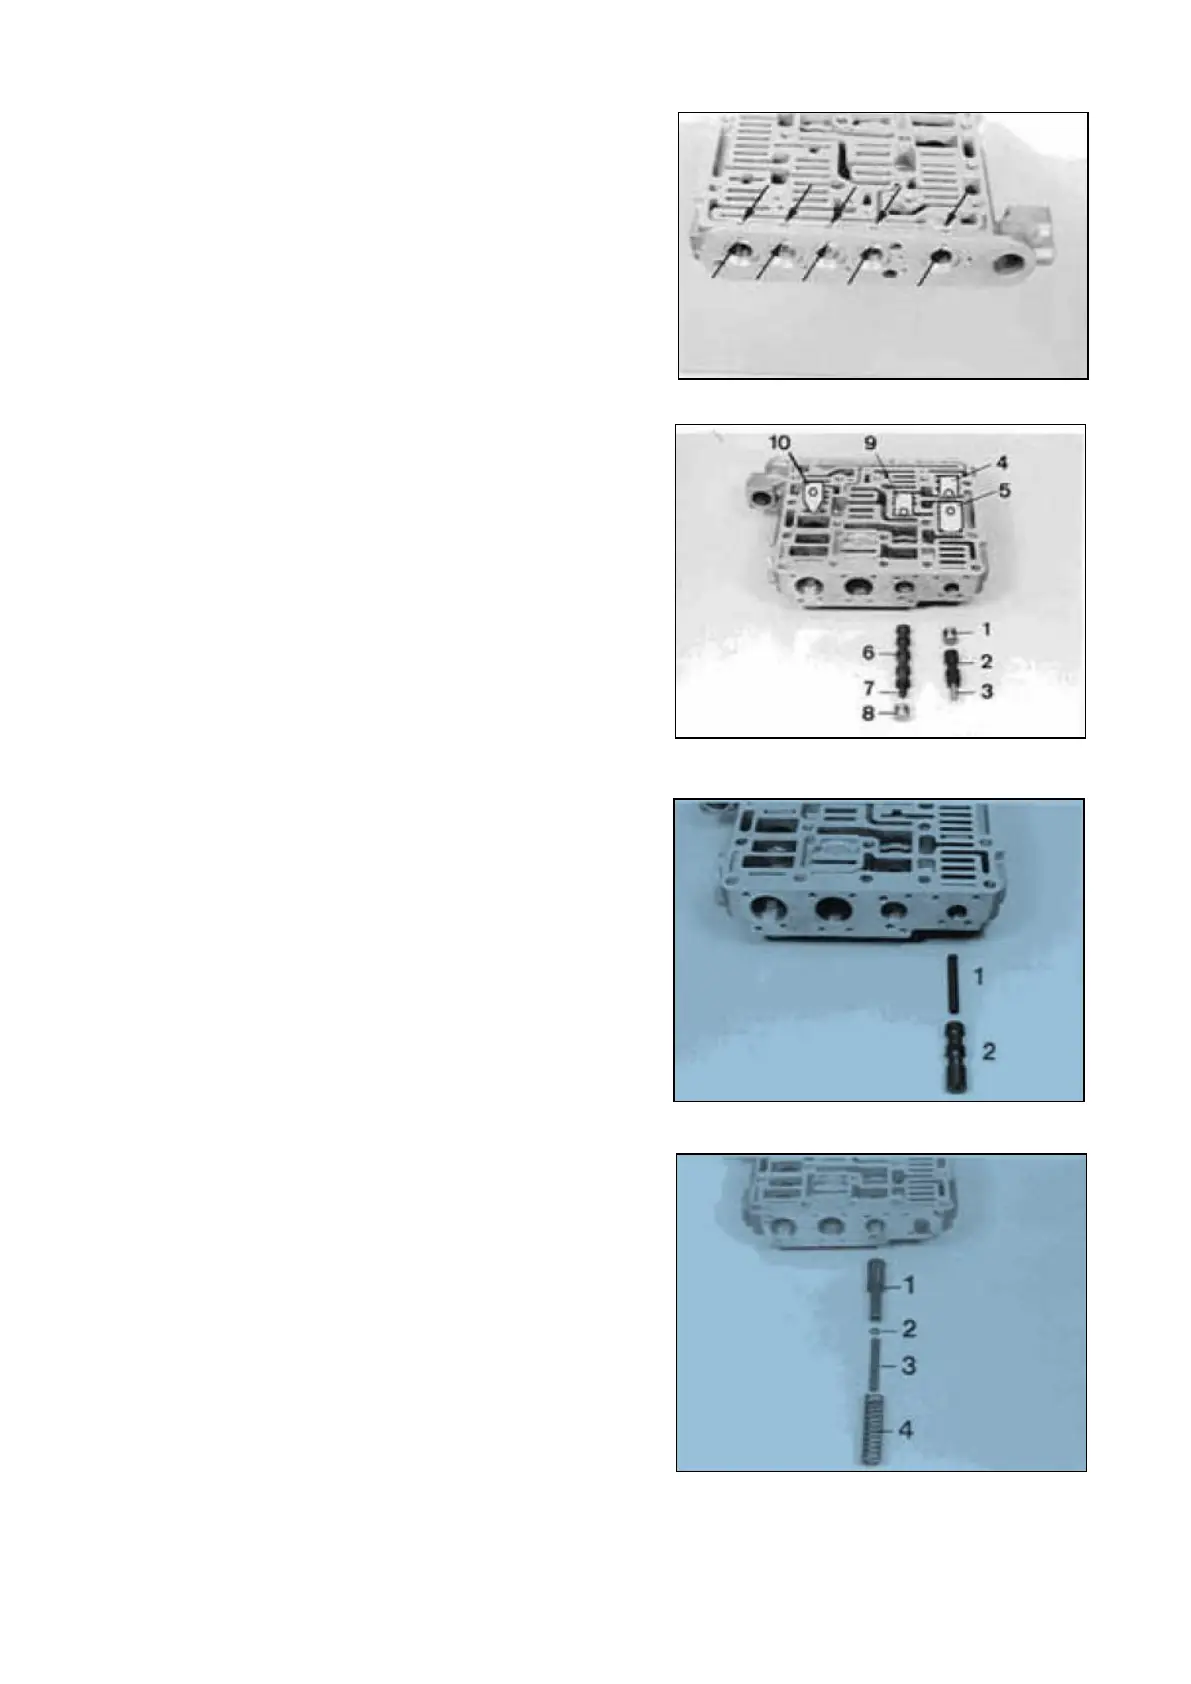
Close the bores by means of balls (10 piecesΦ 4,50
mm) !
Introduce detent block 1 and fix it by means of the
stop plate 4.
Install subsequently spool 2 and spring 3 (Lo = 51,3
mm), and fix them by means of the stop plate 5.
Install spool 6, spring 7 (Lo = 53,4 mm) and detent
block 8, and fix them by means of the stop plate 9.
Insert detent block 10.
NOTE :
Pay attention to the installation position of the
different stop plates, see Figure on the right !
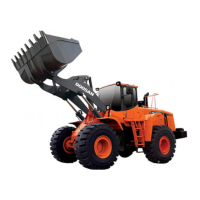
Gearshift valve :
Install components.
1 = Spring (Lo = 53,40mm)
2 = Spool
Reset spool :
Install components.
1 = Spool
2 = Disk(s) (optional)
3 = Spring(Lo = 53,40 mm)
4 = Spring(Lo = 65,40 mm)
NOTE :
p2 is determined by the disk 4
(pay attention to Notes, Page 12 … 14) !
Transmission and Torque Converter SPC000007
Page 39