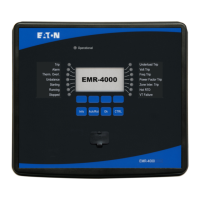
2.3 Input, Output and LED Settings
2.3.1
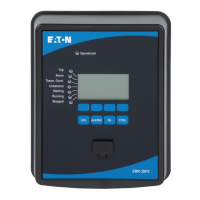
LEDs
LED Conguration
The LEDs can be congured within the menu: [Device Para / LEDs]
CAUTION!
Attention must be paid to ensure that there are no overlapping functions due to double or
multiple LED assignment of colors and ashing codes.
Apart from the LED for System OK (that has a xed function), each LED can be congured
via the following parameters:
• »Trigger signals«: The parameters [Device Para / LEDs /
LED x] »Assignment 1« to »Assignment 5« can be used to assign up to 5 trigger
signals to “LED number x”.
• »Inverting«: The parameters »Inverting 1« to »Inverting 5«, if set to “Active”, can be
used to invert the respective trigger signal.
Note that for a non-assigned trigger signal (i. e. »Inverting n« = “-”) the inverting is
ineective, so that the trigger signal is always simply treated as a binary “0” (False/
Inactive).
• »Latching/self holding function«: With the setting »Latched« = “Active”, the state
that is set by the trigger signals is permanently stored. (See section “Latching”
below, ╚═▷ “2.3.1 Latching”.)
If »Latched« = “Inactive”, the LED always adopts the state of the assigned signals.
• »Ack signal«: This setting is available only if »Latched« = “Active”. It assigns a signal
that will reset the latching of the LED. (This, however, is eective only if all assigned
trigger signals have dropped out.)
•
»LED Active Color«: The LED lights up in this color if at least one of the assigned
trigger signals is active. Available setting values are: “-” (No assignment), “Green”,
“Red”, “Red ash”, “Green ash”.
• »LED Inactive Color«: The LED lights up in this color when none of the allocated
functions is active. (The available settings are the same as for the active color
above.)
»INFO« Push-Button
Via the »INFO« button it is always possible to display the signals that are currently
assigned to an LED.
Main LED overview:
If the »INFO« key is pressed once, the »main overview of the left LEDs« are displayed.
103www.eaton.comEMR-3MP0
2 Hardware
2.3 Input, Output and LED Settings
 Loading...