125
© 2017 Eaton. All rights reserved
2018.12.12
Range Synchronizer Disassembly and Assembly | Service Procedures TRSM0940
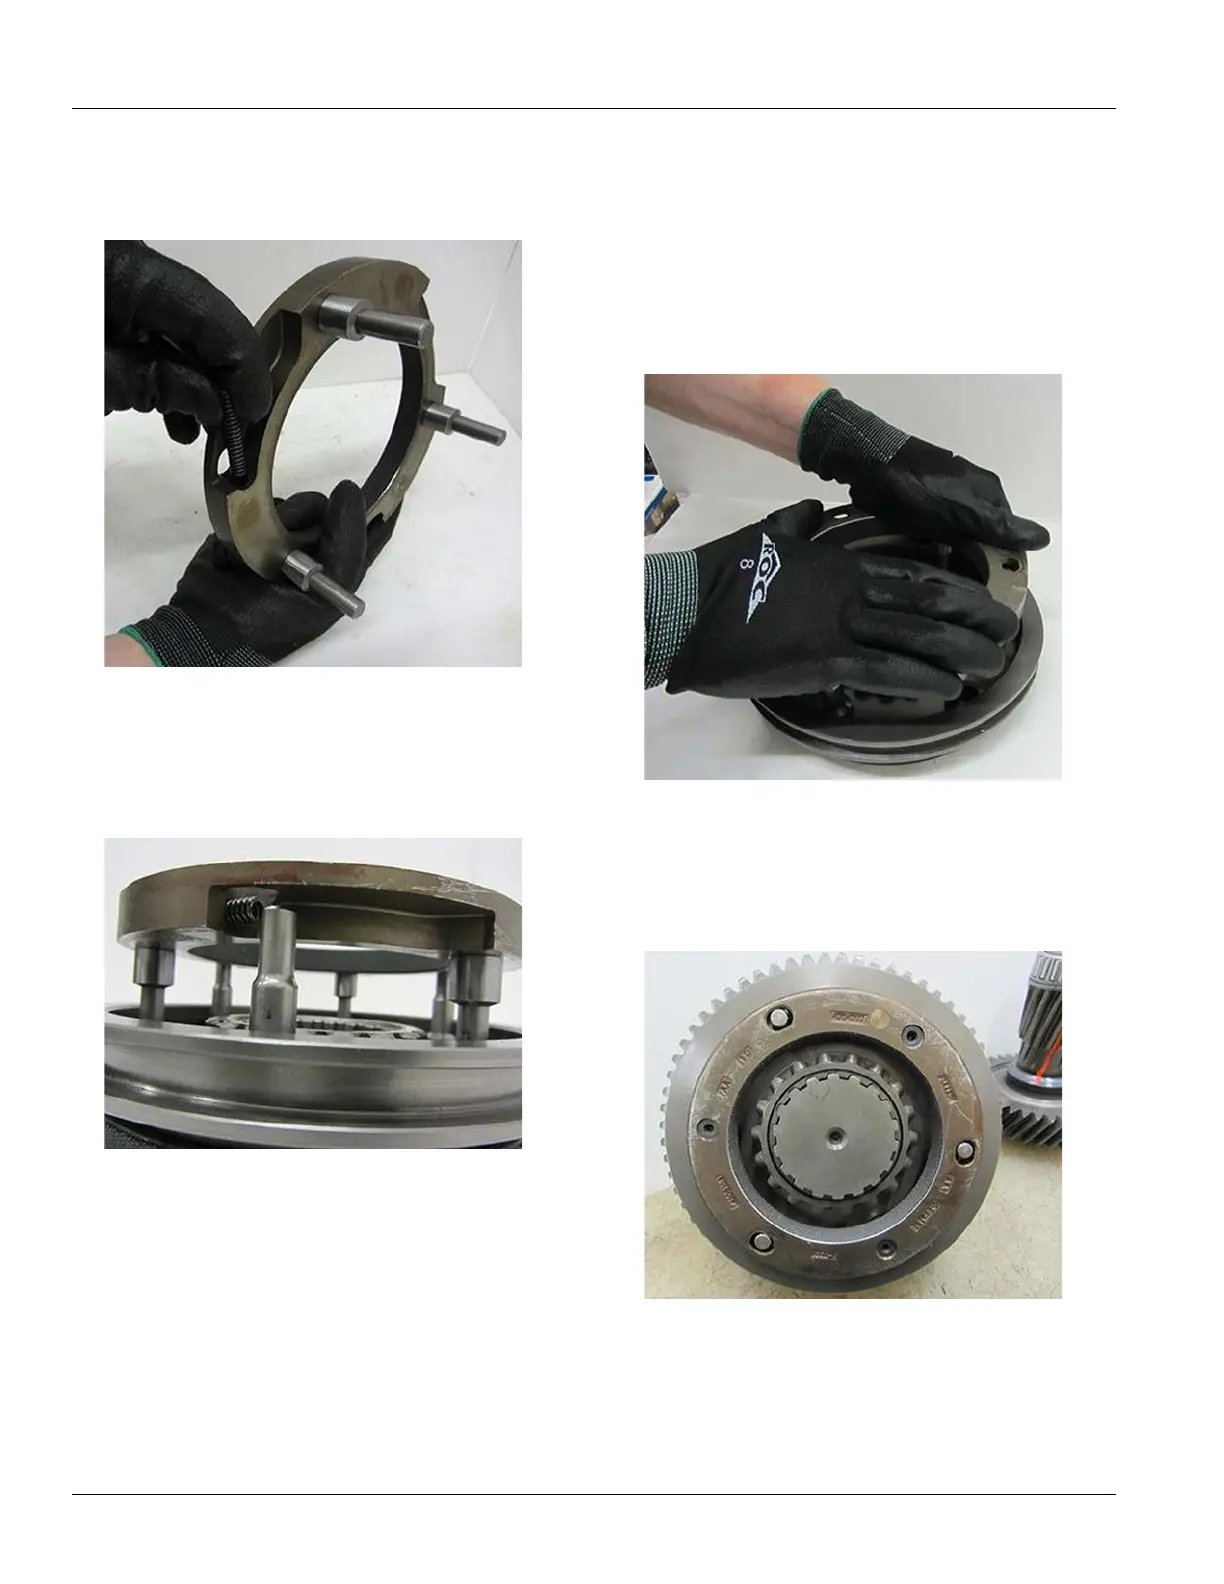
2. Install the three springs into the bores of the HI range
synchronizer ring.
3. Place the
HI range synchronizer ring over the blocker
pins of the LO range synchronizer, seating the springs
against the pins.
4. Cover with
shop rag, and apply downward pressure to
the HI range synchronizer ring while twisting counter-
clockwise to copress the springs and fully seat the ring
on the blocker
pins of the LO range Synchronizer.
Note: To preve
nt losing springs, it is helpful to cover
the synchronizer with a shop rag as downward pres-
sure is applied.
5. Install the synchronizer assembly on the
splines of the
auxiliary main shaft with the synchronizer seated
against the range reduction gear.
 Loading...