46 Installation and Service Guide: Printer Controller EB-34
Replacing Parts
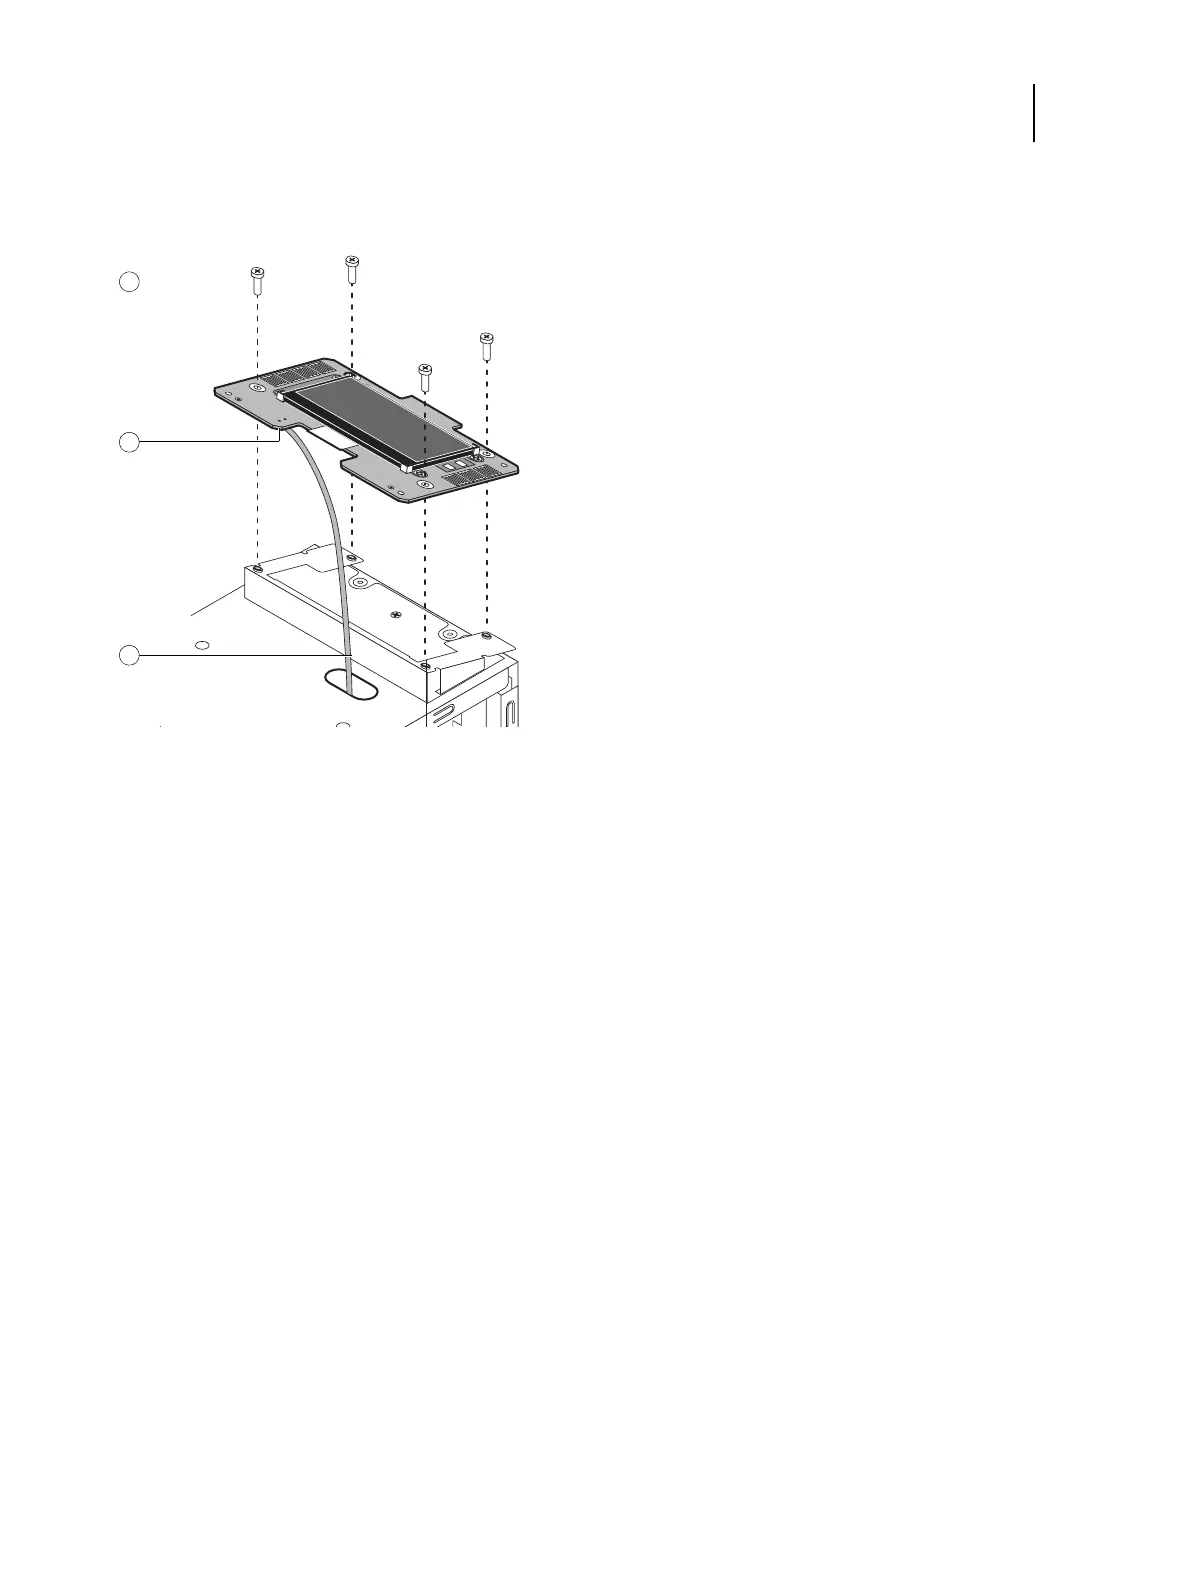
4 Lift the UIB off the mount.
Figure 16: Removing/replacing the User Interface Board
5 Place the UIB in an antistatic bag.
6 Attach the UIB cable to the connector on the top of the UIB (see Figure 16 on page 46).
7 Secure the UIB to the mount on the top panel.
Replace the four screws that secure the UIB to the mount on the top panel. Be sure to use the same screws that you
removed earlier.
8 If you are replacing the UIB cable with a new cable, attach the new UIB cable to the connector on the top of the
UIB, and then route the cable through the hole in the top of chassis and connect it to a USB port on the
motherboard.
9 Replace the top panel (see page 40).
10 Reassemble the EB-34 and verify its functionality (see page 72).
Motherboard
This section describes the battery and default jumper settings on the EB-34 motherboard, as well as procedures for
removing and replacing the motherboard.
Note: Do not move or change any of the default jumper configurations on the motherboard.
1 Screw (1 of 4)
2 UIB cable connector
3UIB cable