65 Installation and Service Guide: Printer Controller EB-34
Replacing Parts
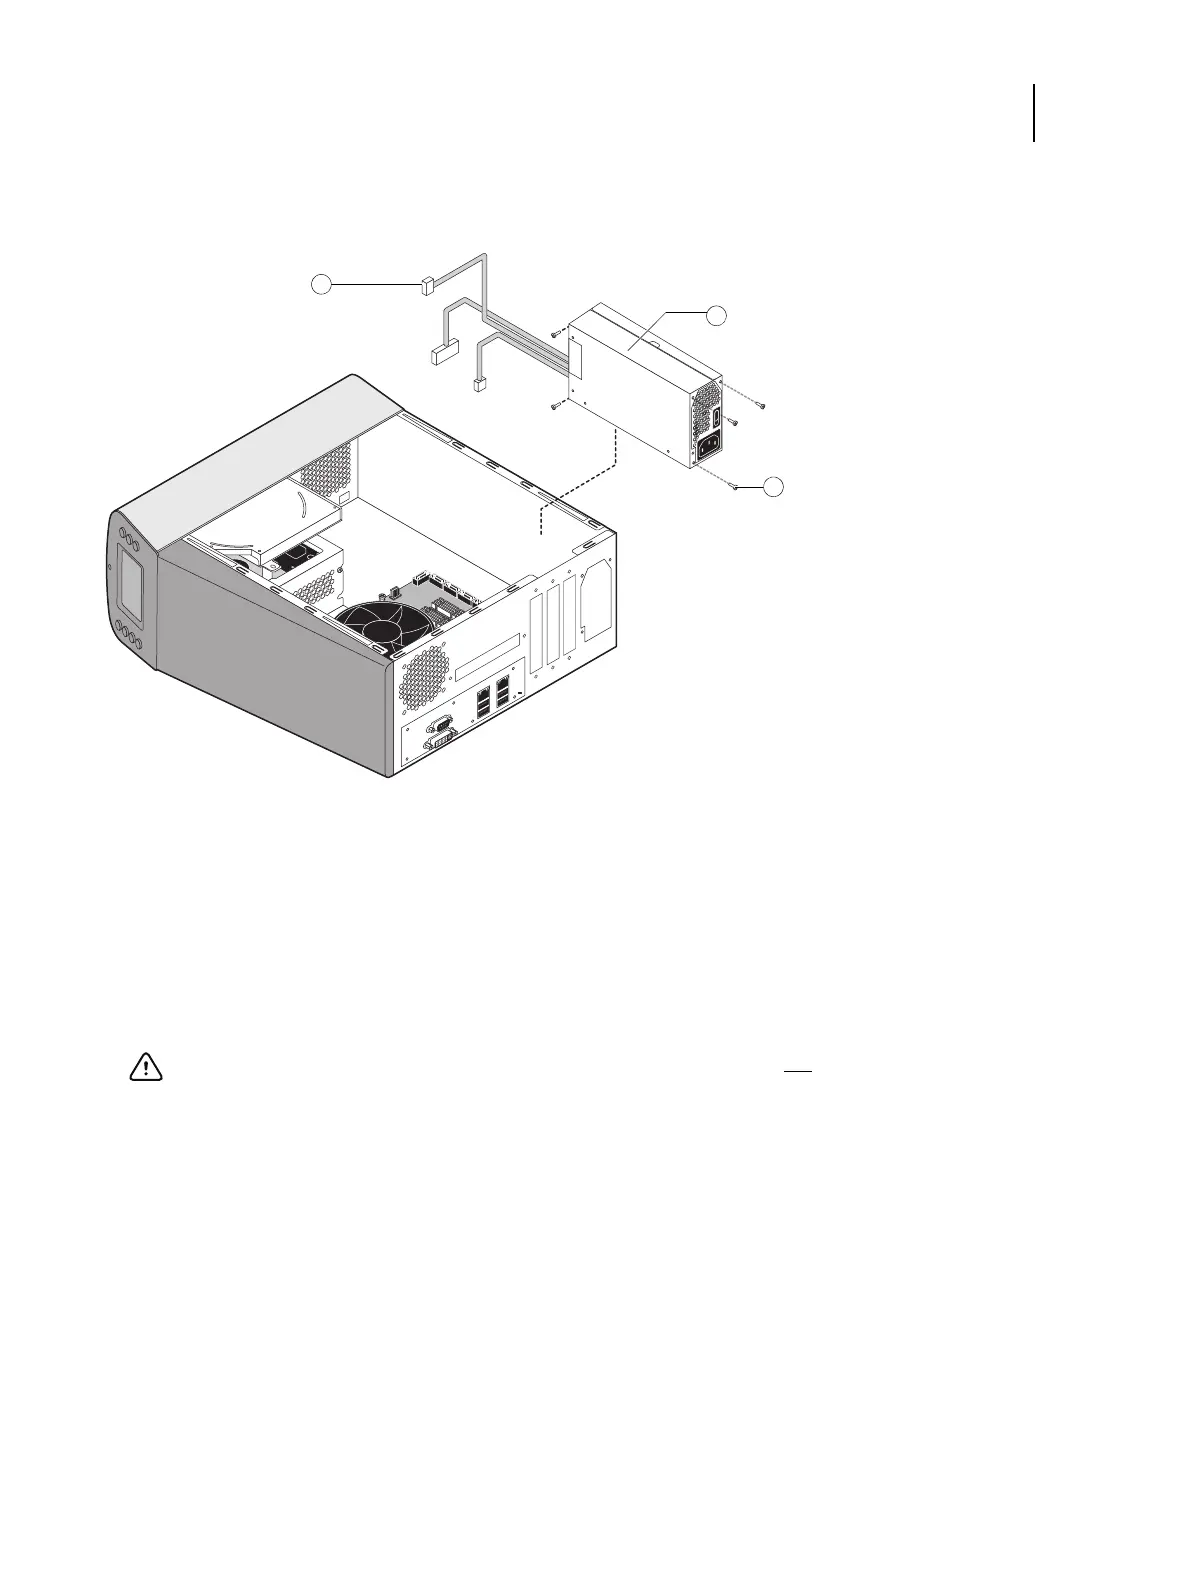
9 Lift the power supply out of the chassis, taking care to gather the power supply cables.
Figure 27: Removing/replacing the power supply
To replace the power supply
1 Attach the power switch leads to the terminals on the power switch.
You can attach the power leads to either terminal on the power switch.
2 Place the power supply inside the chassis and align the mounting holes.
3 Attach the power supply to the chassis with the five screws that you removed earlier
(see Figure 27 on page 65).
If you are installing a new power supply, make sure to use the screws that came with it to attach the new power
supply to the chassis.
4 Connect the 4-pin CPU power cable to the motherboard (for location, see Figure 19 on page 49).
5 Connect the 20-pin motherboard power cable to the motherboard (for location, see Figure 19 on page 49).
1 Power supply cables
2Power supply
3 Screw (1 of 5)
Important: If you are replacing the power supply with a new one, you do not need to remove the original
power switch and replace it with the switch provided with the new power supply. The original switch is
designed to remain mounted inside the chassis.