Add additional arrays
151
Complete Phase 3 Installation
EMC CONFIDENTIAL
Complete the following steps to make an additional array available to the Data
Movers:
1. Use a secure, encrypted, remote login application on a computer connected to the
customer’s network. This computer must have network connectivity to the public
network port on the Control Station
2. Use the public network IP address of the Control Station.
3. Log in with username nasadmin and password nasadmin.
4. At the prompt, type:
# /nas/sbin/add_clariion -i
The script begins. Complete the following steps, using the Tab key to move
between fields, and pressing the Enter key to select the values.
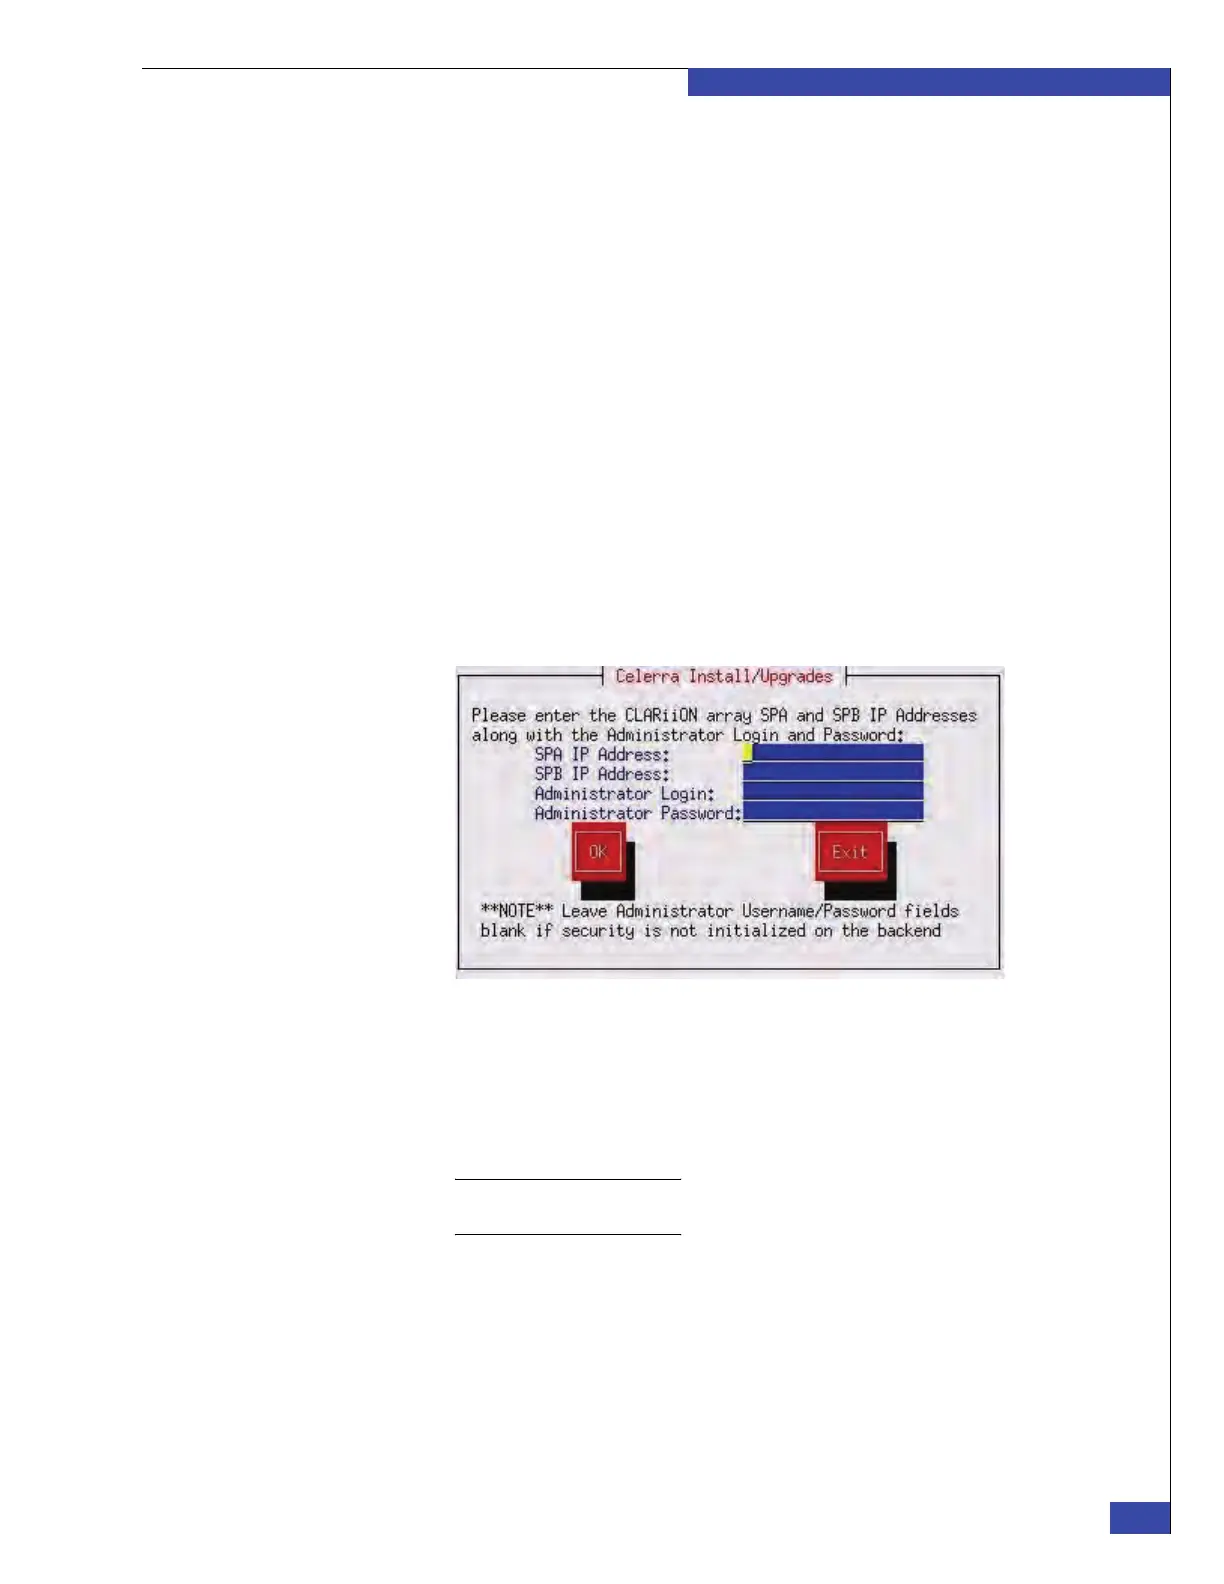
a. In the dialog box shown in Figure 95, type the array SP A and SP B IP
addresses. Get the values from the “VNX boot array worksheet,” on page 276.
If security is initialized on the backend, type the username and password for
the array. Otherwise, leave these fields blank. Press Ta b to select OK, and then
press Enter. The system will now verify the IP addresses.
Figure 95 SP settings
The system prompts you to select the number of fibre switches to use
(Figure 96 on page 152).
b. Type the number of Fibre Channel switches to zone for the new array and
press Tab to select Ok, and then press Enter.
Note: Unlike FC switches, you must manually zone FCoE switches because the setup
script does not support FCoE configuration.