Product Description
UiWtJ
Service
Mhnual
1.4 OPERATING INSTRUCTIONS
.“
“II
This section describes control panel operation
~ctions,
self-test, hexadecimal dump, ~n
~
~
demonstration functions, and printer initialization methods.
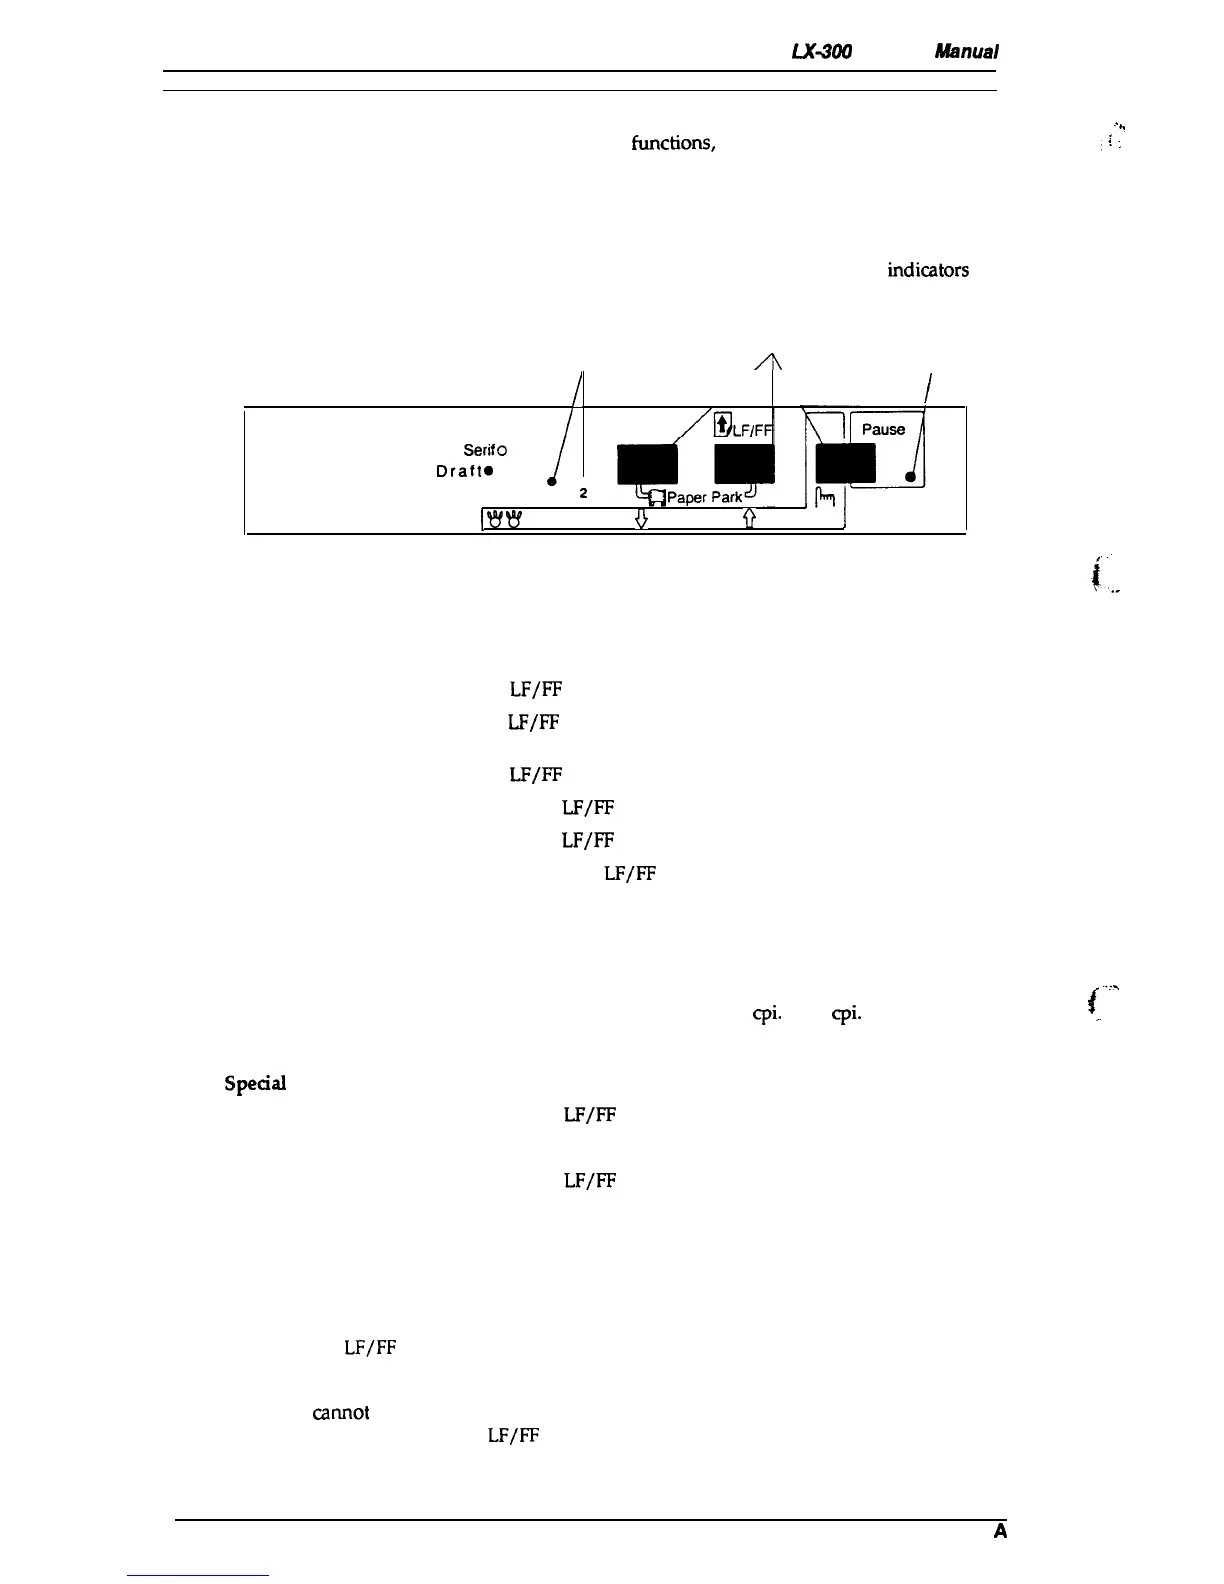
1.4.1 Control Panel Operation
The printer control panel contains three non-lock-type push buttons and three LED
indimtors
for
easy operation of the various printer functions.
Buttons
Lights
A
Light
/
/
Roman O O
Font
Saris
SerifO ●
Draft.
o
●
Draft Condensed. ● I
2
I
W
W
Micro Adjust
o
Q
3sec
Paper Feeding
Load:
Load (manual insertion):
Line feed:
Eject cut sheet:
Form feed (continuous):
Paper park (continuous):
Tear-off (continuous):
Character Selection
Font selection:
Pitch selection:
Condensed selection:
Enter
Speaal
Mode
Self-test mode:
Default-setting mode:
Hex dump mode:
Demonstration mode:
Figure 1-8. Panel Apperance
Press the
LF/FF
button.
Press the
LF/FF
button or the printer waits 2 seconds after insertion
of a cut sheet to load paper automatically.
Press the
LF/FF
button once.
Hold down the
LF/FF
button continuously.
Hold down the
LF/FF
button continuously.
Press the FONT and
LF/FF
buttons at the same time.
Only uses auto tear-off function.
Press the FONT button.
Selectable indefault-setting mode: 10
cpi.
or 12
cpi.
Press the FONT button. Only draft condensed is selectable.
Hold down the
LF/FF
button and turn on the printer.
Hold down the FONT button and turn on the printer.
Hold down the
LF/FF
and FONT button and turn on the printer.
Not available.
1.4.2 Self-test Function
This section explain how to run the self-test.
1.
Hold down the
LF/FF
button and turn on the printer to start the self-test.
2. If paper is not loaded, the printer attempts to load it.
3. If the printer
camot
load paper, it indicates this by turning on the PAUSE light. In this case,
insert paper again and press the
LF/FF
button.
4. The printer prints alphanumeric characters continuously.
5. Quit self-test mode printing by pressing the PAUSE button and turning the printer off.
1-14
Rev.
A
,,
.
L
~..,,
.

 Loading...


