EasyManuals Logo

Epson LX-300 Service Manual

Epson LX-300
107 pages
To Next Page IconTo Next Page
To Previous Page IconTo Previous Page
Page #68 background imageLoading...
Page #68 background image
LX-300
Samica
Manual
DiaassemblyandAssembly
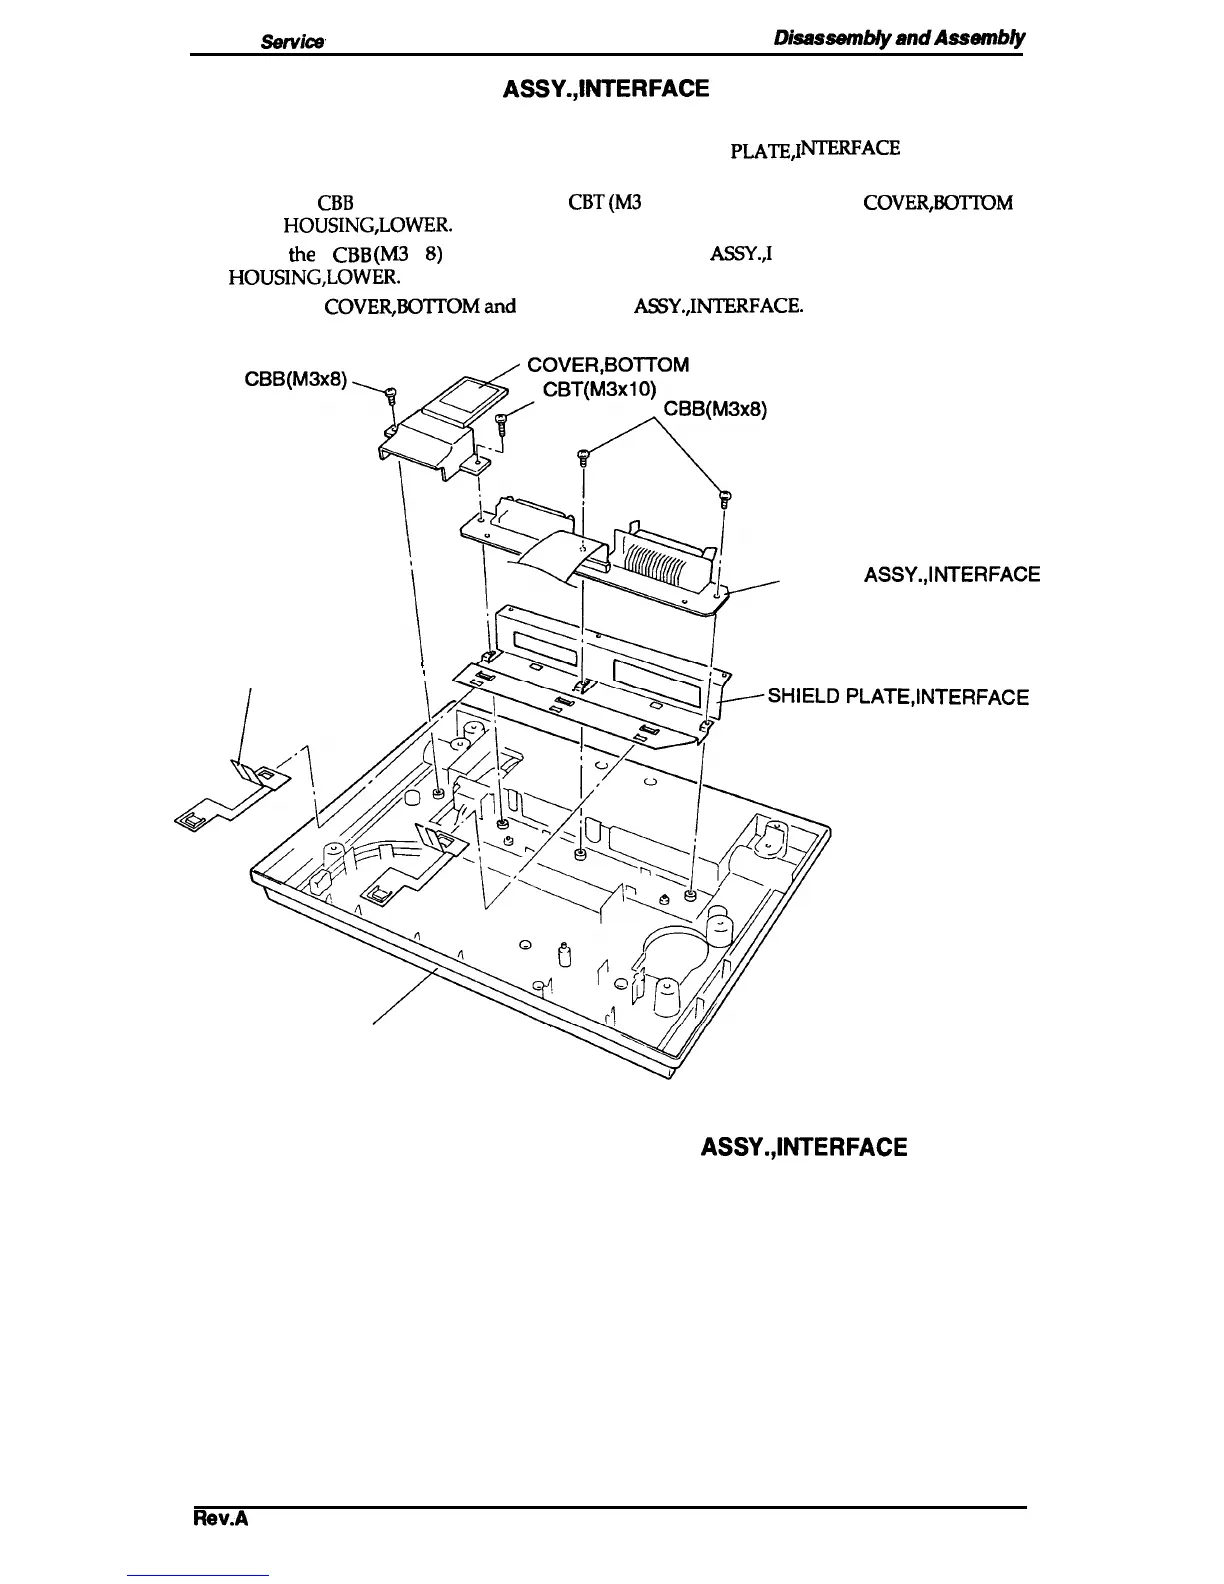
3.2.5 Removing the BOARD ASSY.,INTERFACE
1.
Remove the printer mechanism (see Section 3.2.4).
2. Remove the GROUNDING PLATE connecting the SHIELD
PLATE,I
NIERFACE
and the
SHIELD PLATE.
3. Remove the
CBB
(M3
x8) screw
and the
CBT(M3
x 10) screw attaching the
COVER,BO’IIOM
to the
HOUSING,LOWER.
4. Remove
the
2
CBB
(h43
x
8)
screws attaching the BOARD
ASSY.,1
NTERFACE to the
HOUSING,LOWER.
5. Remove the
COVER,BOTTOMand
the BOARD
ASSY.,INTERFACE.
BOARD ASSY.,INTERFACE
GROUNDING PLATE
I
IWATE,,NTERFACE
HOUSING, LOWER
Figure 3-18. Removing the BOARD ASSY.,INTERFACE
Rev.A
3-17

Table of Contents

Other manuals for Epson LX-300

Questions and Answers:

Question and Answer IconNeed help?

Do you have a question about the Epson LX-300 and is the answer not in the manual?

Epson LX-300 Specifications

General IconGeneral
Print Method9-pin impact dot matrix
InterfaceParallel
Paper HandlingFriction feed, tractor feed
Weight4.4 kg
Operating EnvironmentTemperature: 5 - 35°C, Humidity: 10 - 80%

Related product manuals