Disassembly and Assembly
LX-300 Service Manual
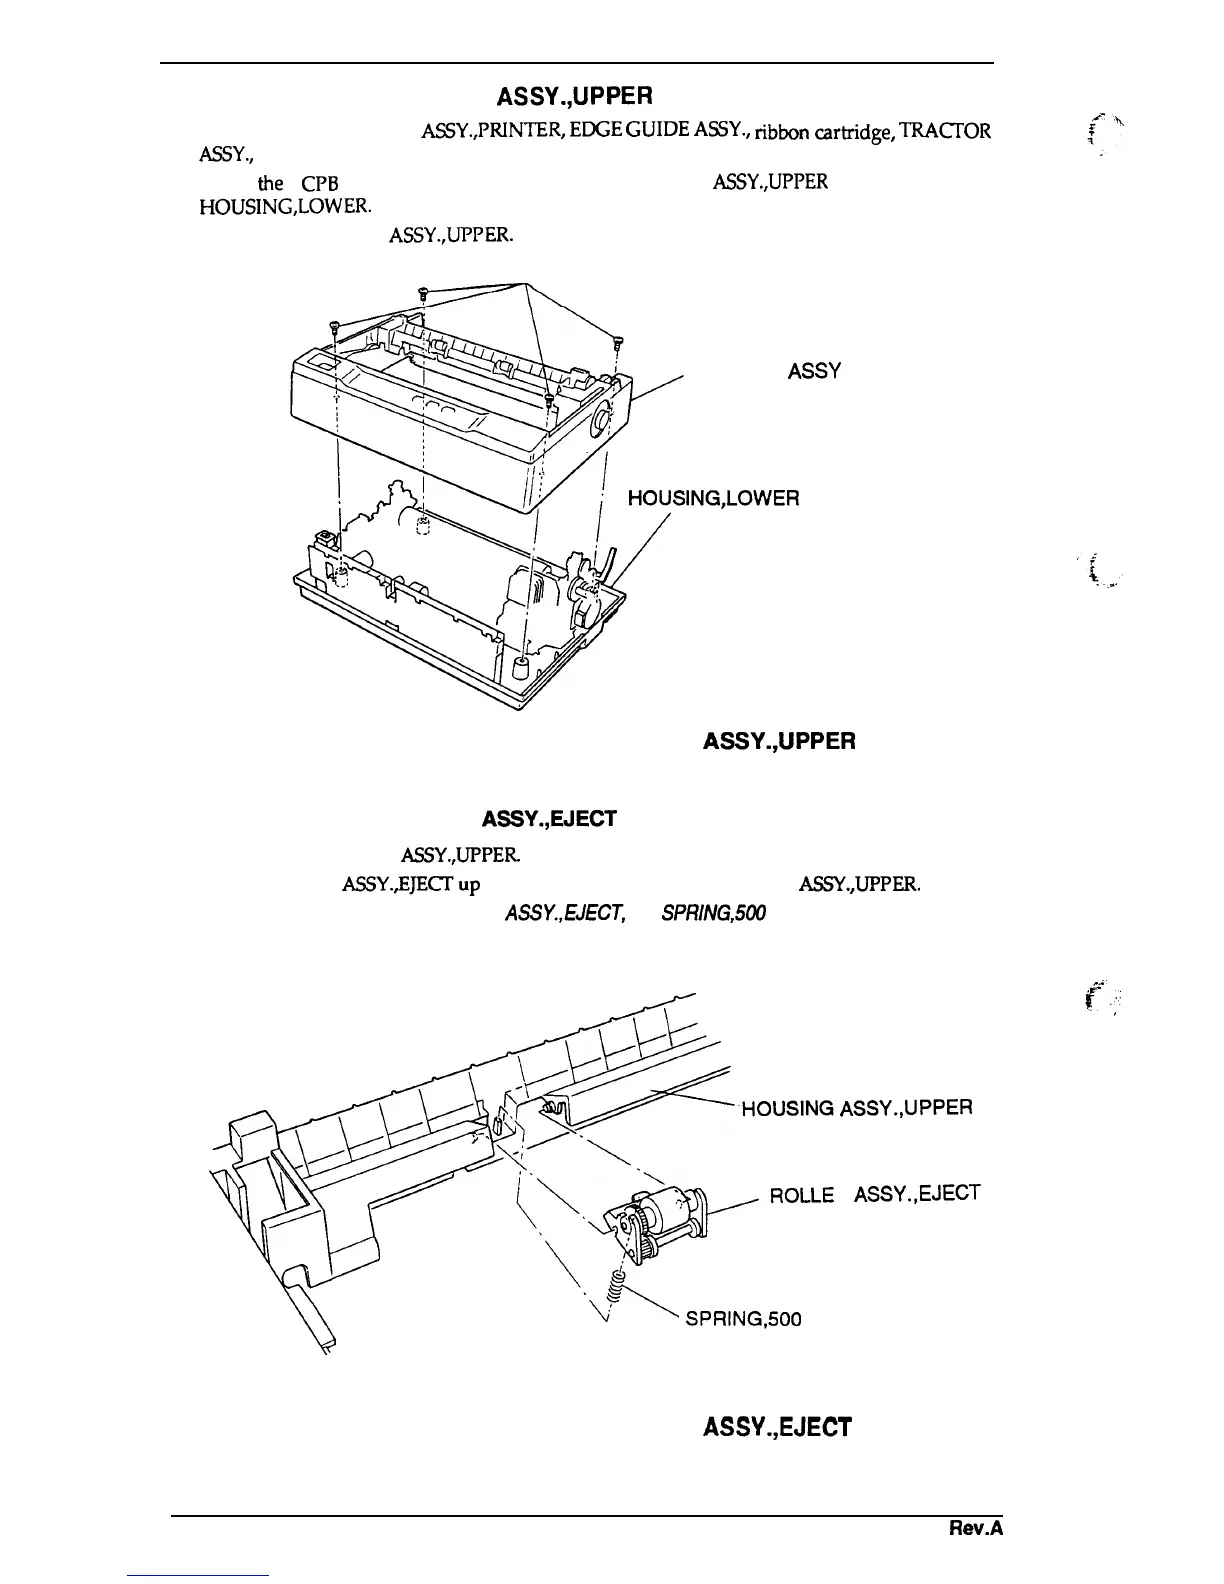
3.2.2 Removing the HOUSING ASSY.,UPPER
1.
Remove the COVER
ASSY.,pM~R,
EDGE
GUIDE
AssY.,
ribbon
c=tidge,
TRACI’OR
ASSY.,
PLATEN KNOB, and optional color upgrade kit.
2. Remove
the
4
CPB
(M4 x 14) screws attaching the HOUSING
ASSY.,UPPER
to the
HOUSING,LOWER.
3. Liftoff the HOUSING
ASSY.,UPPER.
CPB(M4X14)
~’~
HOUSING ASSY
ING,LOWER
., UPPER
Figure 3-3. Removing the HOUSING ASSY.,UPPER
3.2.2.1 Removing the ROLLER
ASSY.,EJECT
1.
Remove the HOUSING
ASSY.,UPPER.
( see Section 3.2.2.1).
2. Lift the ROLLER ASSY.,EJE~up and atananglefrom the HOUSING
ASSY.,UPPER.
Note:
When removing the ROLLER
ASSY.,EJECT,
the
SPRING,5U0
may pop out.
ASSY.,UPPER
R
ASSY.,EJECT
,,.-4. %
f
,,,
.., . . . .
.
Figure 3-4. Removing the ROLLER ASSY.,EJECT
\
3-6
Rev.A

 Loading...


