EasyManuals Logo

Epson LX-300 Service Manual

Epson LX-300
107 pages
To Next Page IconTo Next Page
To Previous Page IconTo Previous Page
Page #62 background imageLoading...
Page #62 background image
LX-31M
Service Manual
Disasaambly
and
Assambly
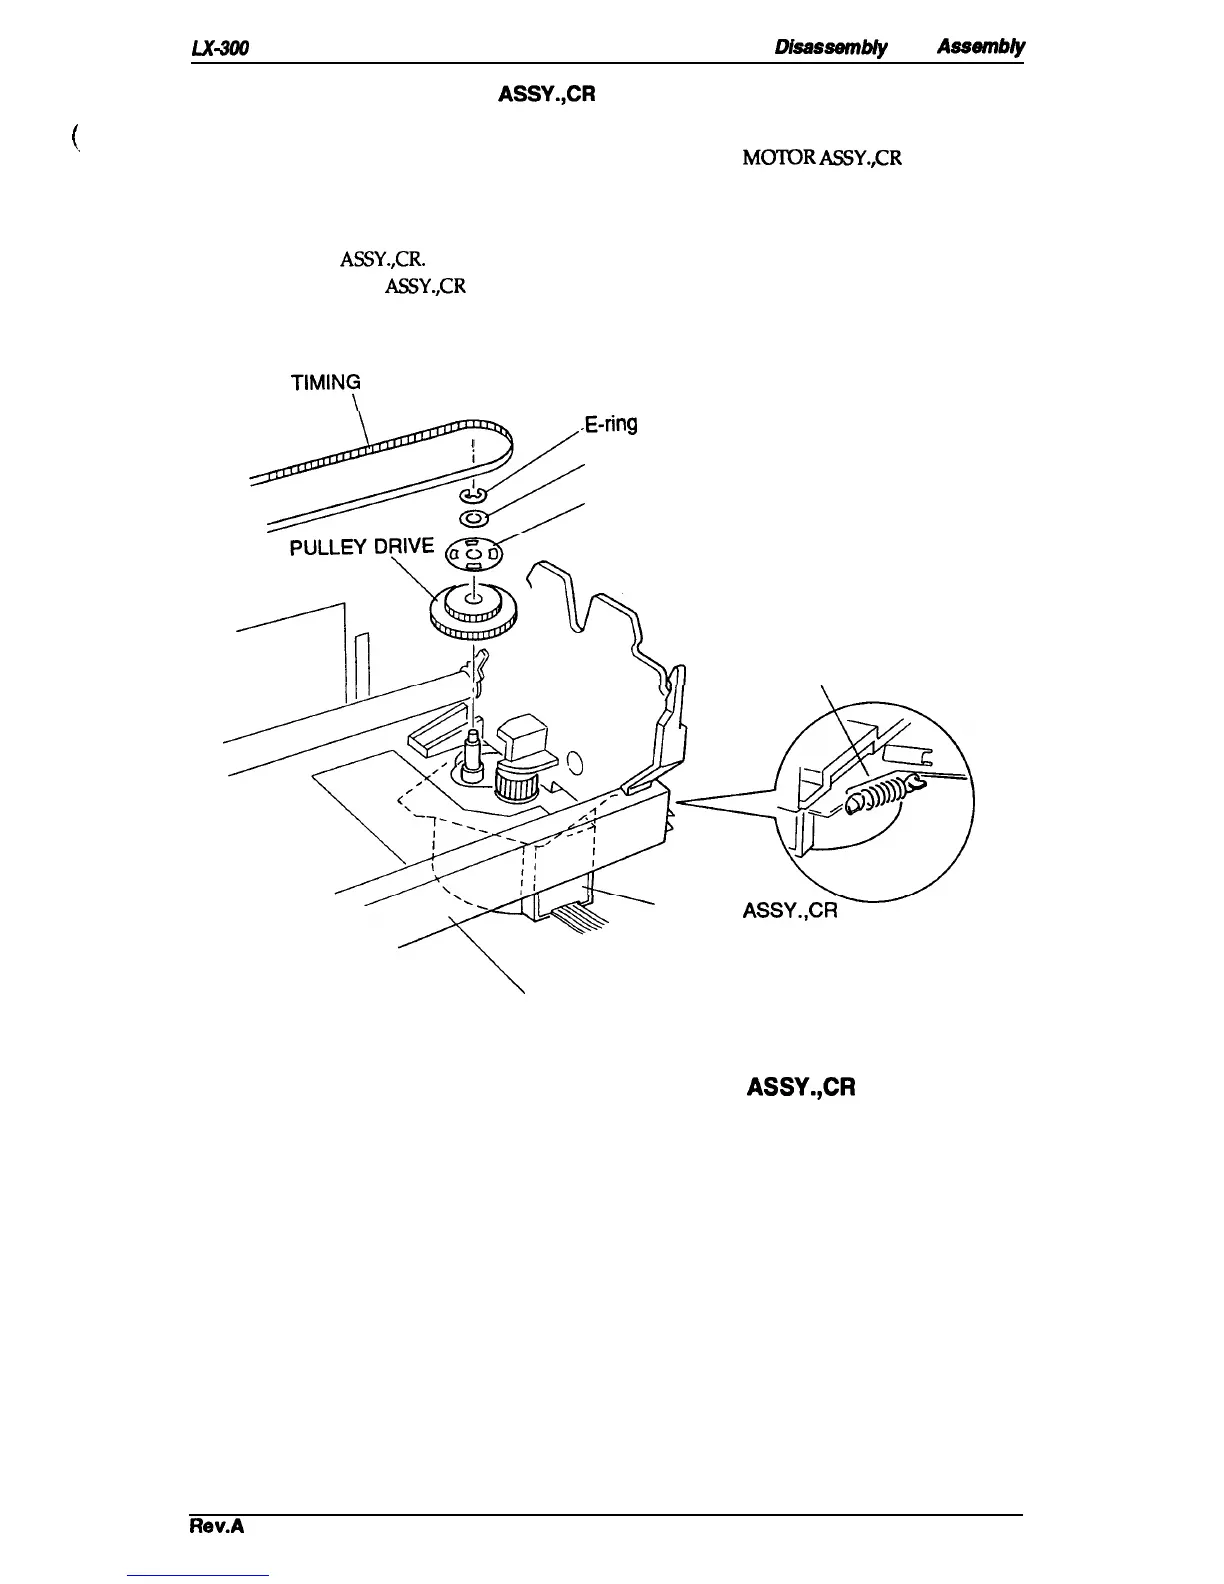
3.2.4.2 Removing the MOTOR
ASSY.,CR
(
1.
Remove the Printer Mechanism (see Section 3.2.4).
~,
2. Remove the BELT TENSION SPRING from the hook on the
MOTOR
ASSY.,CR
and the hook
on the FRAME, BASE.
3. Remove the TIMING BELT from the PULLEY DRIVE.
4. Remove the E-ring, PULLEY WASHER, BELT PULLEY FLANGE, and PULLEY DRIVE
from
the
MOTOR
ASSY.,CR.
5. Rotate the MOTOR
ASSY.,CR
counterclockwise and remove it.
TIMIN~
BELT
.E-ring
Q&
I
i
PULLEY WASHER
:/
BELT PULLEY FLANGE
BELT TENSION SPRING
MOTOR
ASSY.,CR
\
FRAME, RIGHT
Figure 3-10. Removing the MOTOR ASSY.,CR
Rev.A
3-11

Table of Contents

Other manuals for Epson LX-300

Questions and Answers:

Question and Answer IconNeed help?

Do you have a question about the Epson LX-300 and is the answer not in the manual?

Epson LX-300 Specifications

General IconGeneral
Print Method9-pin impact dot matrix
InterfaceParallel
Paper HandlingFriction feed, tractor feed
Weight4.4 kg
Operating EnvironmentTemperature: 5 - 35°C, Humidity: 10 - 80%

Related product manuals