LX-300 Service Manual
Product Description
1.4.8.2 Changing the Default Settings
You can change some parameters that the printer refers to at printer initialization.
1.
To enter the default setting mode, turn on the printer while holding down the FONT button.
The printer prints out the firmware version.
If paper is not loaded, insert a sheet of paper.
2. The printer automatically loads the paper and prints a table of languages to choose from:
English, French, German, Italian, and Spanish. The Footlights indicate the currently selected
language, as shown in the table below.
Table 1-18. Font Lights and Language Selection
FONT Light 1
FONT Light 2
Language
OFF
ON
English
OFF
Blinks
French
ON
OFF
German
ON
ON
Italian
ON
Blinks
Spanish
3.
Press the FONT button to change the language, and press the LF/FFbutton to select.
4. Press the FONT button again after selecting a language. The printer prints help text to guide
you in setting defaults. The pMted instructions include submenu tables listing all the settings
you can change and showing you how the
mntrol
panel lights appear for each selection.
5. To change the settings, press the FONT button to move down and press the
LF/FF
button to
move up in the menu of options shown below. The printer beeps once each time you press the
FONT button while you are in this menu.
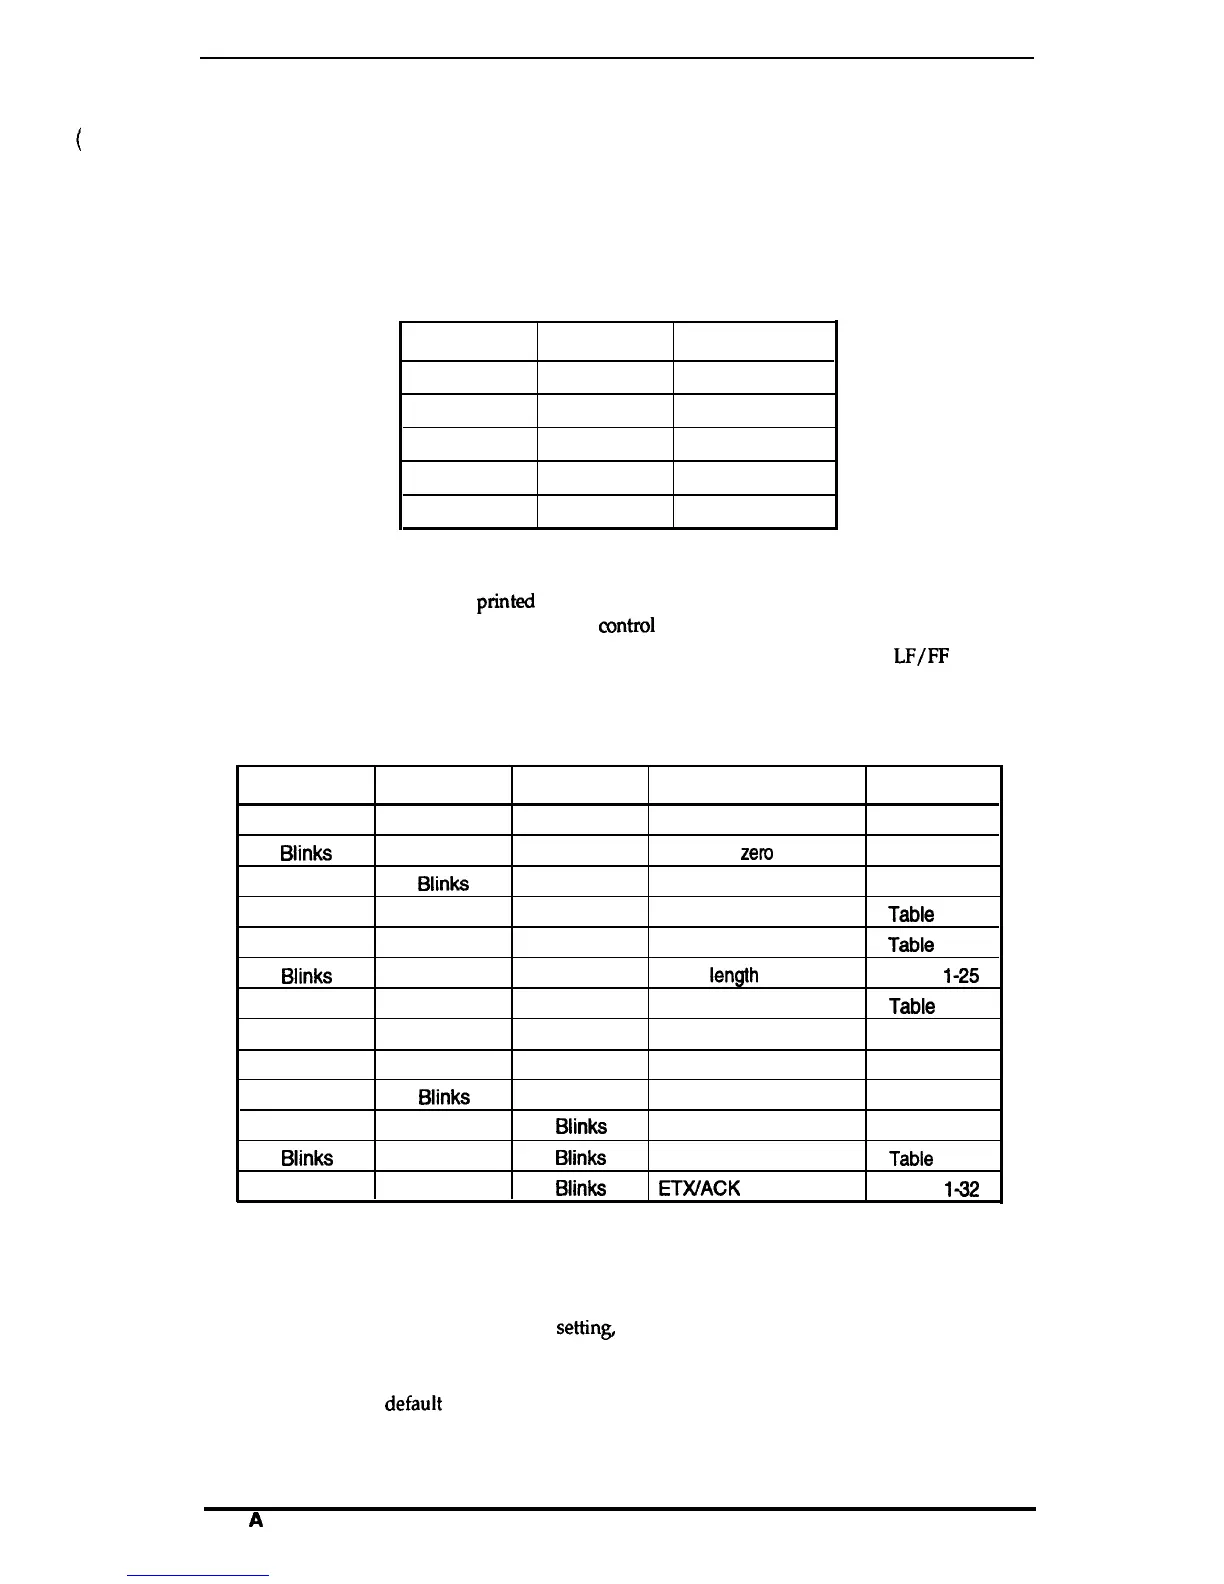
Table 1-19. Default Options
FONT Light 1
FONT Light 2 PAUSE Light
Setting
Submenu
Blinks
OFF
OFF
Character spacing
Table 1-20
Biinks
ON
OFF
Shape of
zem
Table 1-21
OFF
Biinks
OFF
Skip over perforation
Table 1-22
ON
Blinks
OFF
Character table
Tabie
1-23
Blinks
Blinks
OFF
Auto line feed
Tabie
1-24
Biinks
OFF
ON
Page
iength
Table
1-25
Blinks
ON ON
Auto tear off
Tabie
1-26
OFF
Blinks
ON
Tractor
Table 1-27
ON
Blinks
ON
Interface
Table 1-28
Blinks Biinks
ON
Bit rate
Table 1-29
OFF OFF
Biinks
Parity
Table 1-30
Biinks
OFF
Biinks
Data length
Tabie
1-31
ON
OFF
Biinks
ETWACK
Table
142
6.
7.
8.
9.
10.
When you reach the setting you want to change, press the PAUSE button once. The printer
automatically enters the submenu for that setting.
Press the FONT button to move the through the settings in the submenu. The printer beeps
twice each time you press the FONT button while in a submenu.
When the lights match your desired
settin~
press the PAUSE button to make your selection.
The printer saves the new setting and returns to the menu shown above.
Repeat steps 5 through 8 for each additional setting you want to change, or skip to step 10 to
exit the printer’s
defauit
setting mode.
When you are finished, turn the printer off. Any settings you have made remain in effect until
you change them again.
Rev.
A
1-17

 Loading...


