EasyManuals Logo

Epson LX-300 Service Manual

Epson LX-300
107 pages
To Next Page IconTo Next Page
To Previous Page IconTo Previous Page
Page #61 background imageLoading...
Page #61 background image
Disassembly and Assembly
LX-3.X)
Service Manual
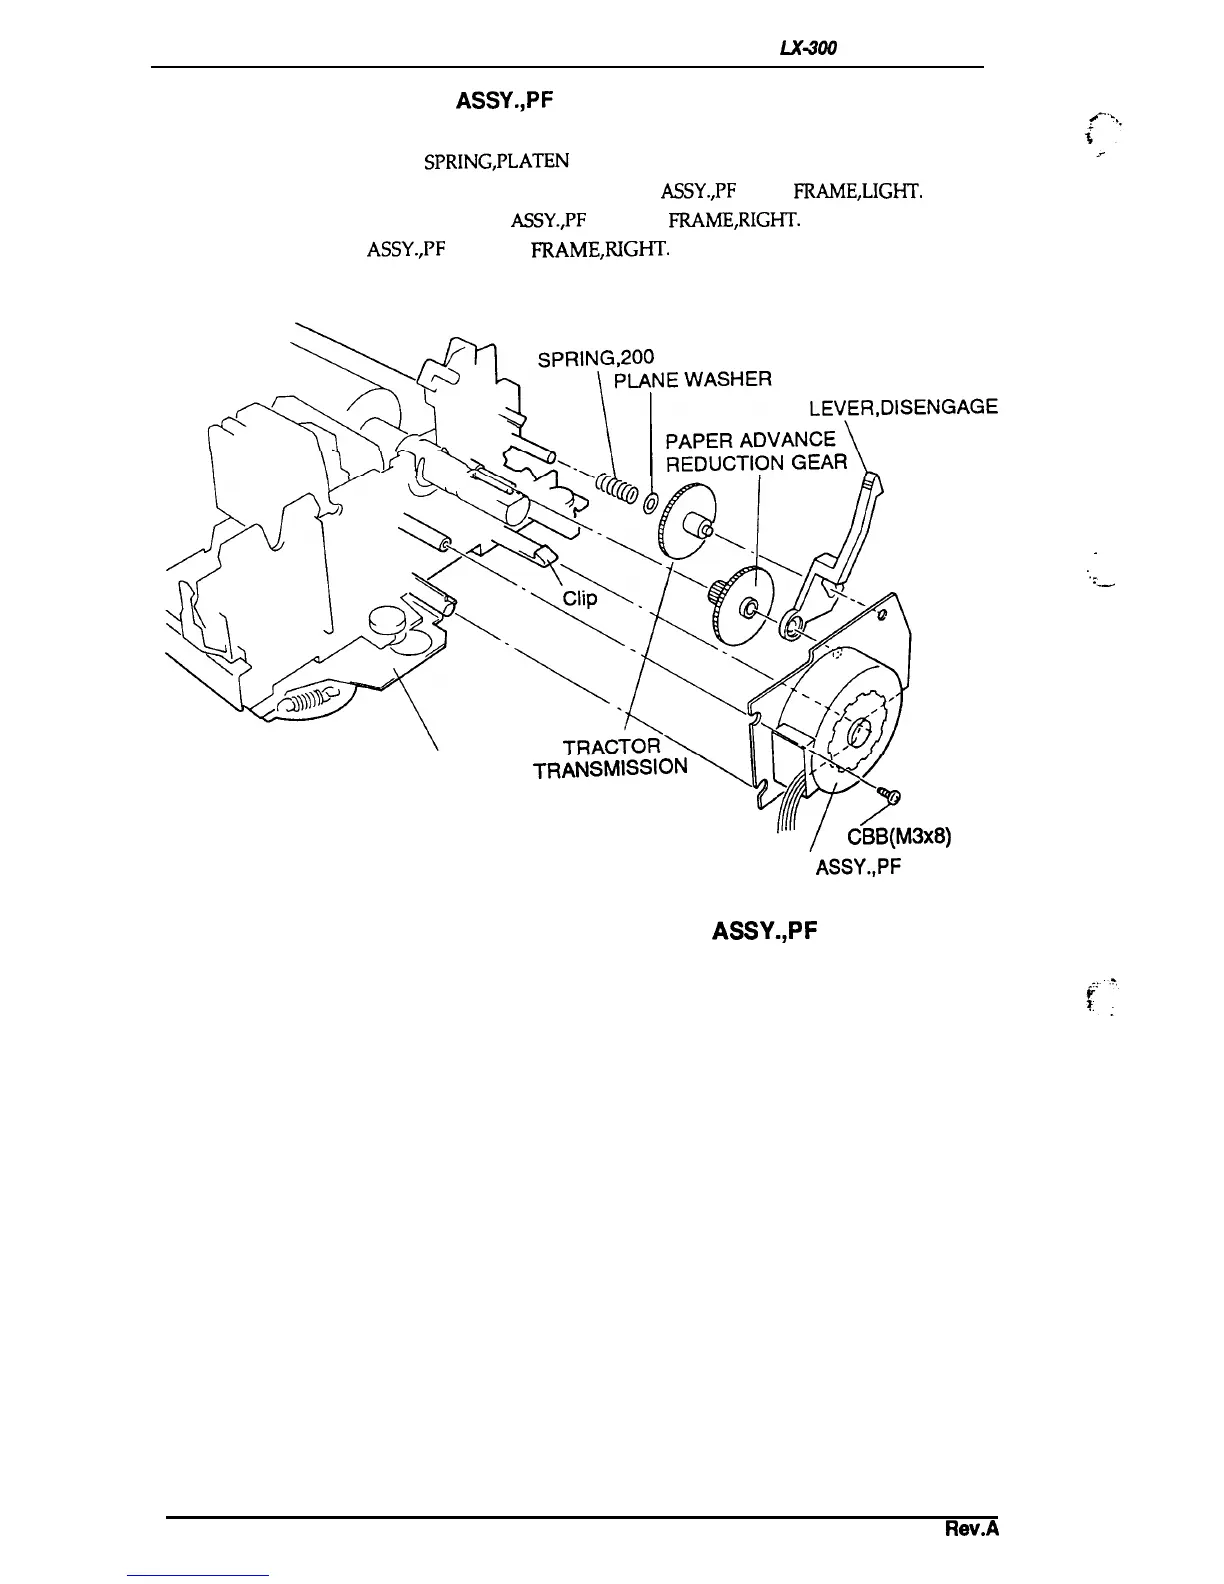
3.2.4.1 Removing the MOTOR ASSY.,PF
1.
Remove the printer mechanism (see Section 3.2.4).
2.
Remove the GROUNDING
SPRING,PLATEN
that secures the platen shaft. (see Section 3.2.43)
3. Remove the CBB (M3 x
8) screw
attaching the MOTOR
ASSY.,PF
to the
FRAME,LIGHT.
4.
Release the clip holding the MOTOR
ASSY.,PF
from the
FRAME,RIGHT.
5. Remove the MOTOR
ASSY.,PF
from the
FRAME,RIGHT.
.
‘.:-
FRAME, RIGHT
TR~NSMISSloN
GEAR
\uJy~
&
P
/
CBB(M3X8)
MOTOR,
ASSY.,PF
Figure 3-9. Removing the MOTOR ASSY.,PF
3-1o
Rev.A

Table of Contents

Other manuals for Epson LX-300

Questions and Answers:

Question and Answer IconNeed help?

Do you have a question about the Epson LX-300 and is the answer not in the manual?

Epson LX-300 Specifications

General IconGeneral
Print Method9-pin impact dot matrix
InterfaceParallel
Paper HandlingFriction feed, tractor feed
Weight4.4 kg
Operating EnvironmentTemperature: 5 - 35°C, Humidity: 10 - 80%

Related product manuals