LX-
Service Manual
DisassembiyandAssamblY
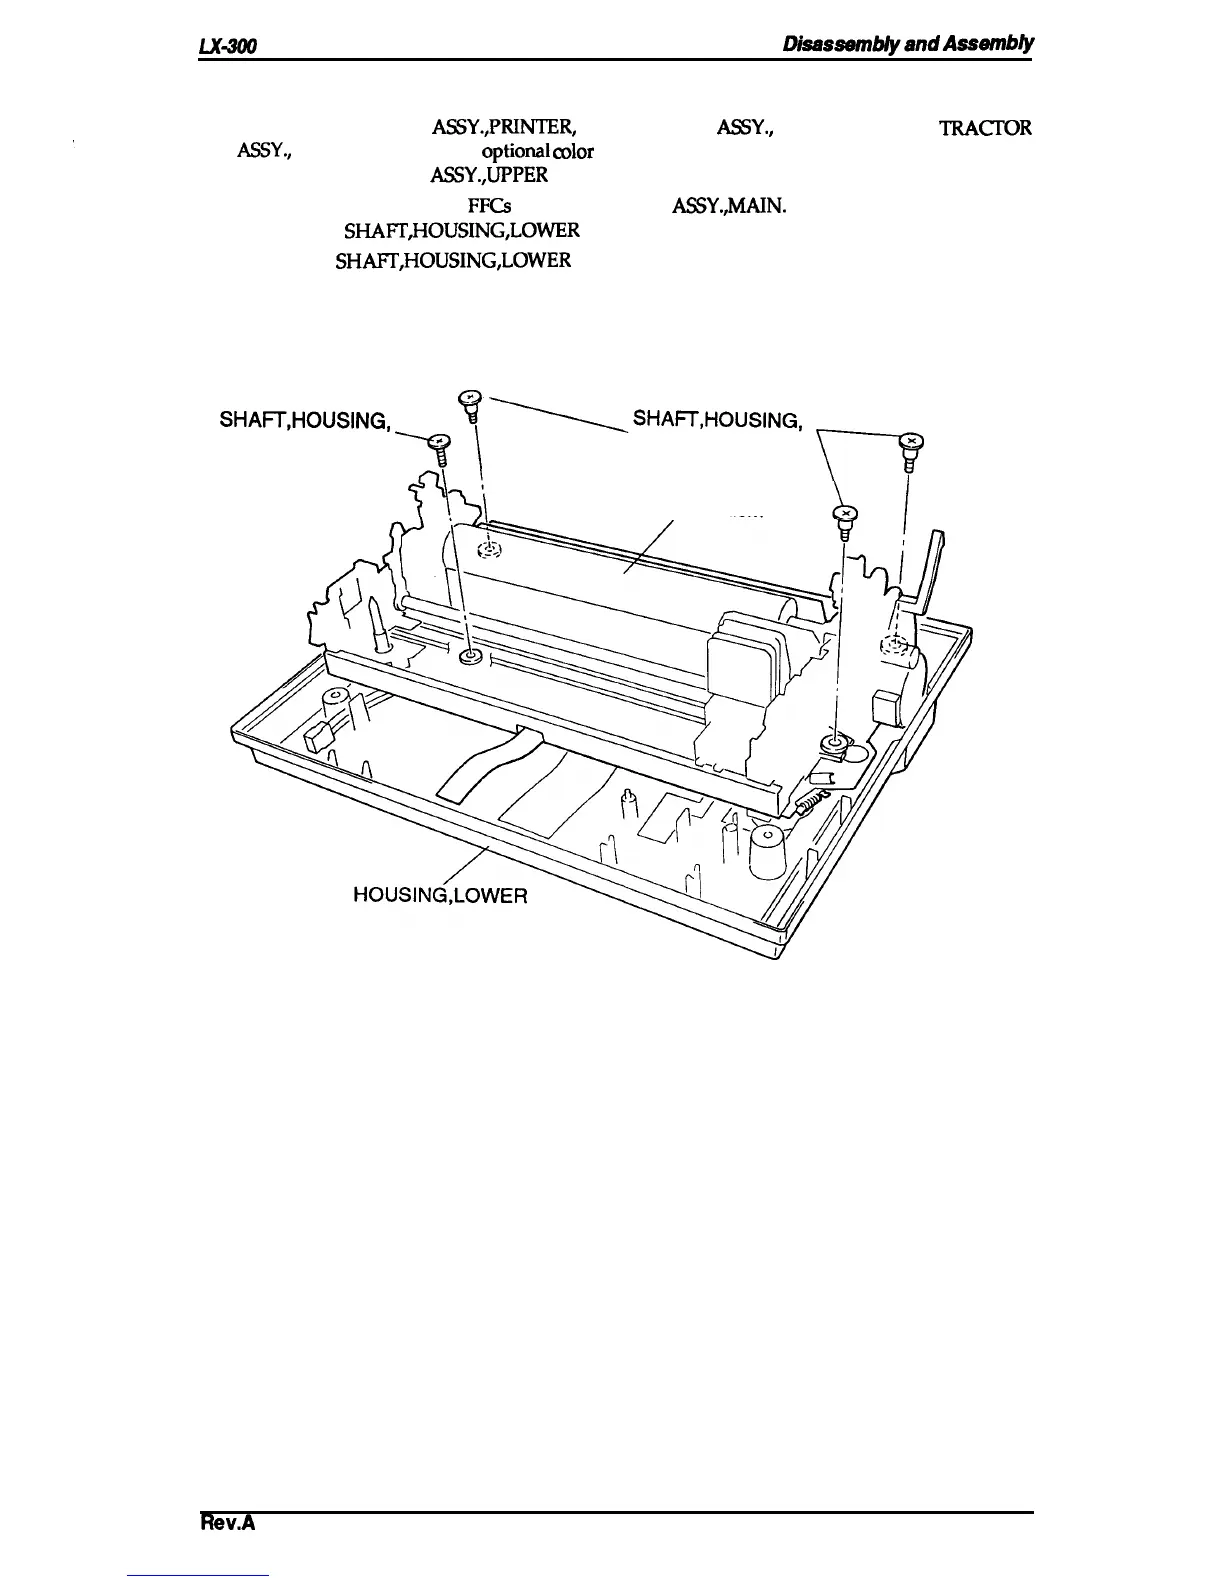
3.2.4 Removing the Printer Mechanism
1.
Remove the COVER
ASSY.,PRINTER,
EDGE GUIDE
ASSY.,
ribbon cartridge,
TRACT’OR
AS5Y.,
PLATEN KNOB, and optioml
color
upgrade kit.
2. Remove the HOUSING
ASSY.,UPPER
(see Section 3.2.2).
3. Remove the connectors and
FFCS
from the BOARD
ASSY.,MAIN.
4. Remove the3
SHAFT,HOUSING,LOWER
(1018296).
5. Remove the
SHAFT,HOUSING,LOWER
(1015457). Note that this
three described in the previous step.
6 Remove the printer mechanism.
SHAIT,HOUSING,
LOWER (1015457)
s
ff~-J-w
‘zq
LOWER(1018296)
f’h
Printer Mechanism
shaft is different from the
m?
Figure 3-8. Removing the Printer Mechanism
Rev.A
3-9

 Loading...


