LX-WI
Service Manual
Dkassembly
and Assembly
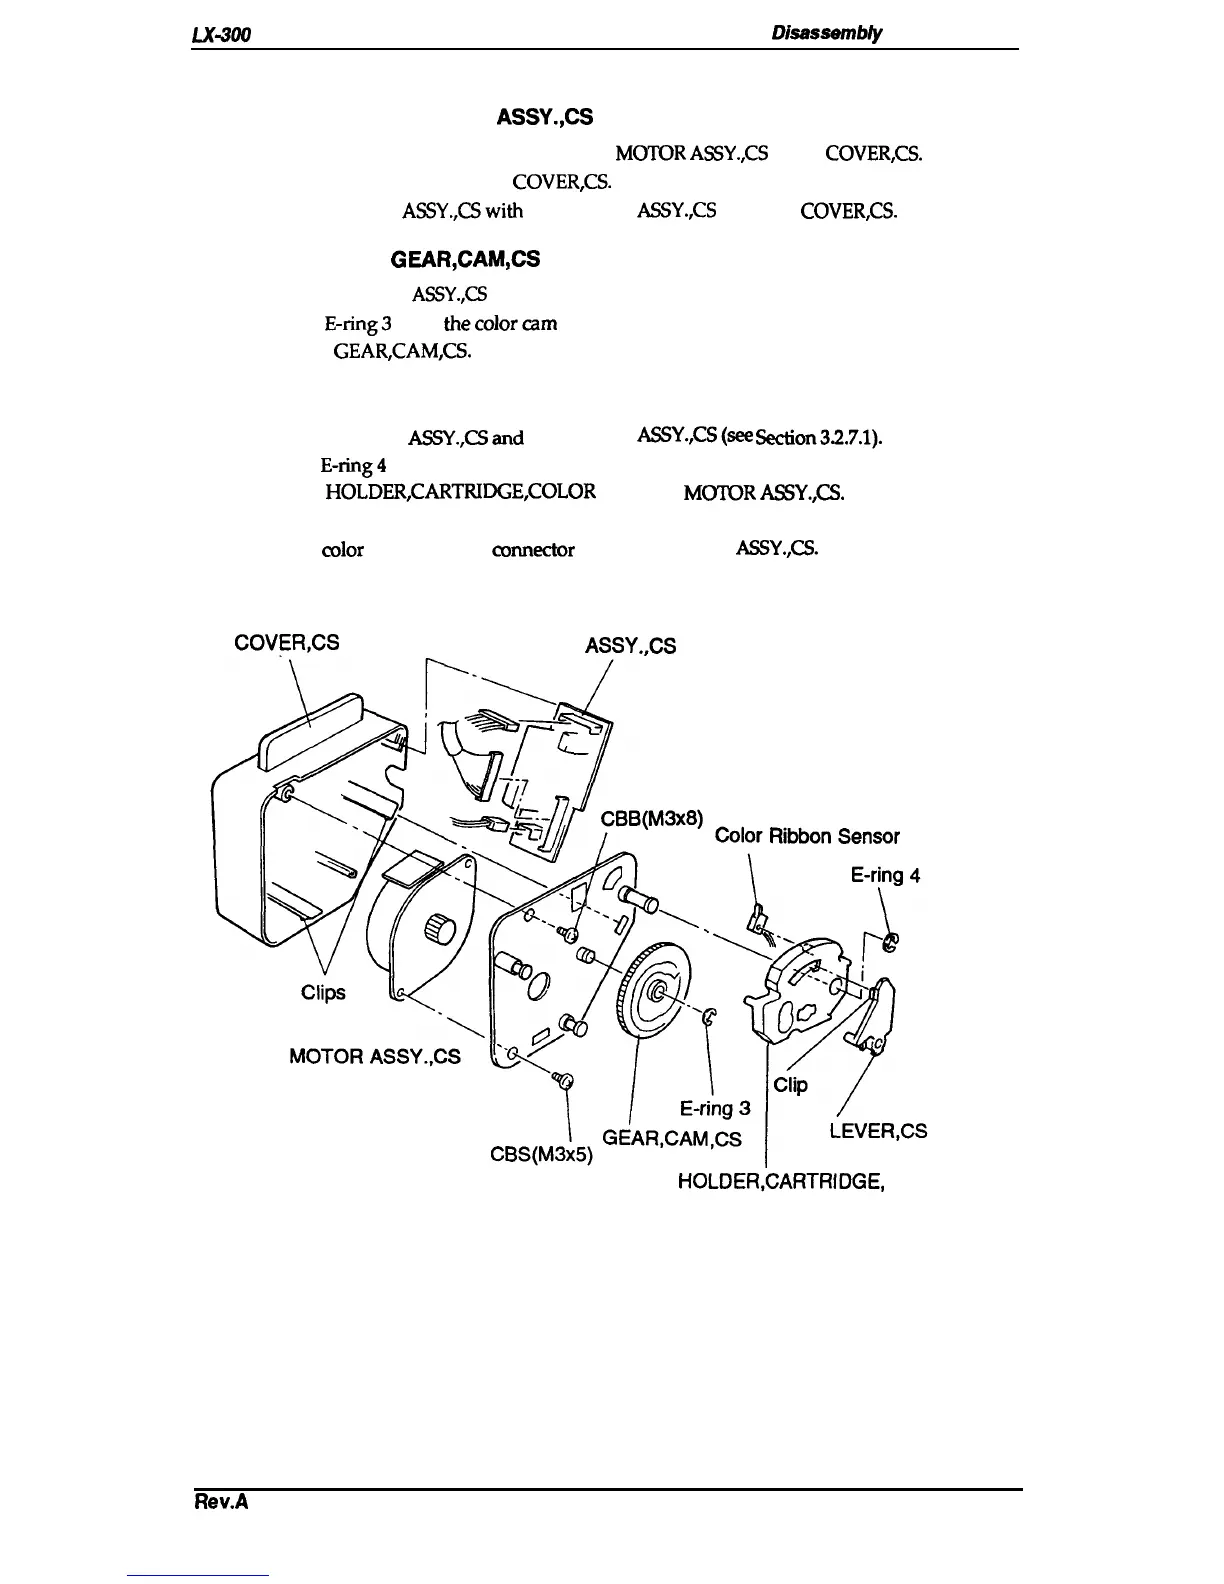
3.2.7 Disassembling and Assembling the Optional Color Upgrade Kit
3.2.7.1 Removing the MOTOR
ASSY.,CS
1. Remove the CBB (M3 x 8) screw attaching the
MO~R
ASSY.,CS
to the
COVER,CS.
2. Release the 2 clips attached to the
COVER,CS.
3. Remove the MOTOR
ASSY.,CSwith
the BOARD
ASSY.,CS
from the
COVER,CS.
3.2.7.2 Remove the
GEAR,CAM,CS
1.
Remove the MOTOR
ASSY.,CS
(see Section 3.2.7.1).
2. Remove the
E-ring3
from thecolorcam shaft.
3. Remove the
GEAR,CAM,CS.
3.2.7.3 Removing the Color Ribbon Sensor
1.
Remove the MOTOR
ASSY.,=and
the BOARD
ASSY.,CS(see
Section3.2.7.1).
2. Remove the E-ring4 from the cartridge holder shaft.
3. Remove the
HOLDER,CARTRIDGE,COLOR
from the
M~R
ASSY.,CS.
4. Release the clip that attaches the HOLER,CARTRIDGE,COLOR to the
color
ribbon sensor.
5. Remove the
color
ribbon sensor comector from the BOARD
ASSY.,CS.
COVER,CS
BOARD
ASSY..CS
HOLDER,CARTRIDGE,
COLOR
Figure 3-20. Disassembling the Optional Color Upgrade Kit
f?ev.A
3-19

 Loading...


