Using EPSON Plot!
B-3
2. Select
Open File from the File menu.
3. In the Open File dialog box, choose the HPGL or HPGL/2
file you want to print and click
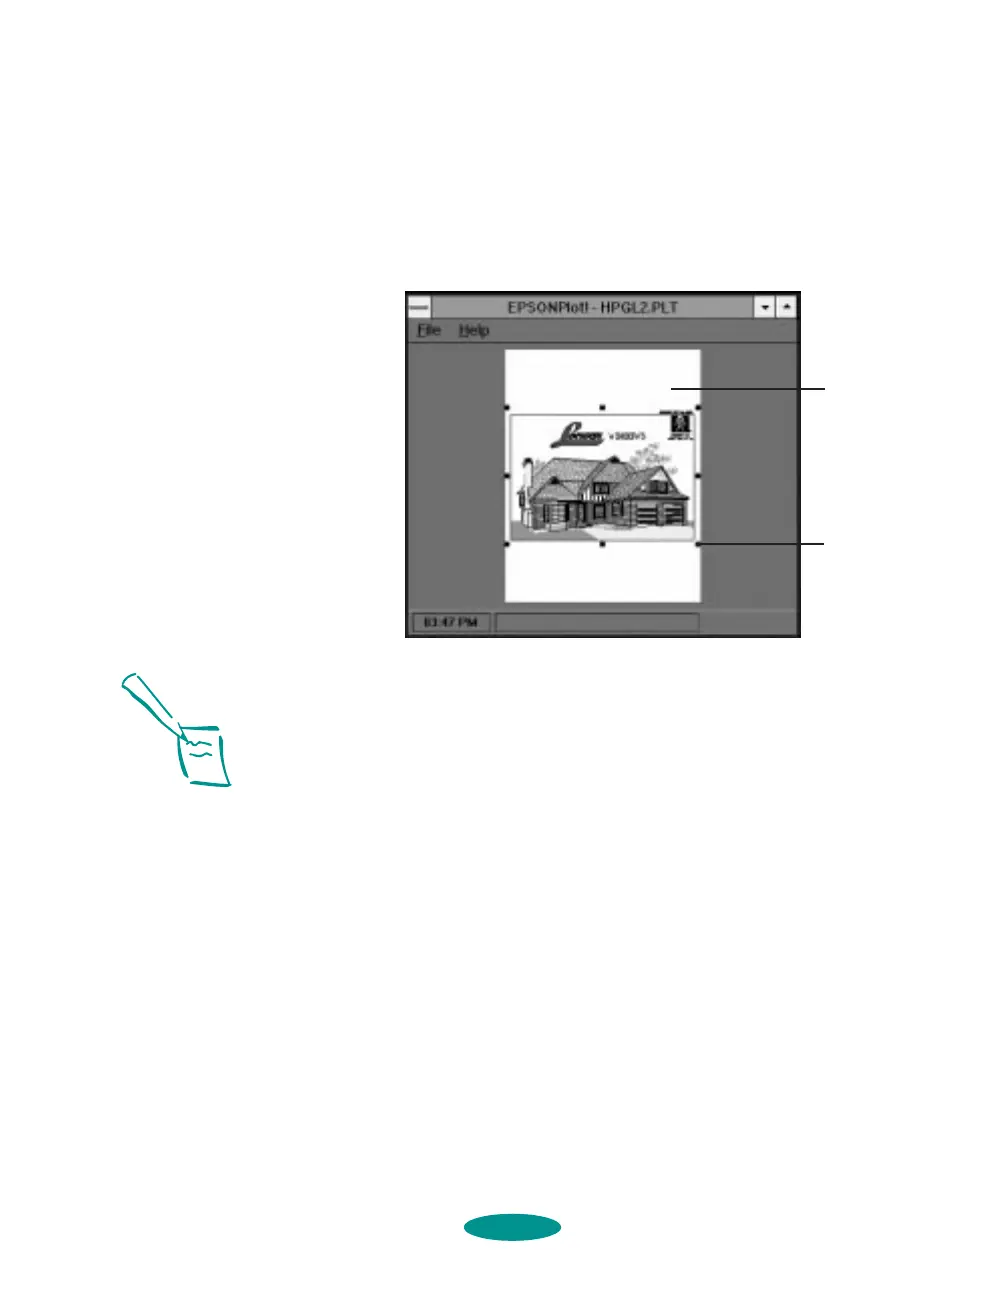
OK. A representation of the
file contents appears in the Live Paper Space in
EPSON
Plot!:
4. Select
Printer Setup from the File menu.
5. Select the
EPSON Stylus COLOR 1520 printer, if necessary,
and click
Options. You see the Main printer settings menu.
6. Follow the instructions in Chapters 1 and 2 to select the
correct printer settings. Make sure to select the
Paper
Source
and Paper Size options for your paper and feeder
so
EPSON Plot! can display the plot file contents exactly as
it will appear when you print.
7. When you’re finished selecting your printer software
settings, click
OK. Then click OK in the Printer Setup
dialog box.
8. If you want to resize the plot file, click a handle in
the Live
Paper Space and drag it to change the size. To reposition
the plot, click inside the image display and drag it into
position.
live paper
space
handle
Note:
The gray area around the
image represents the
area you cannot print on.
If you resize the plot file,
EPSON Plot! retains the
proportions of the
original and preserves the
X and Y coordinates.
Keep in mind that the
Print Quality (resolution)
you select in the printer
software may resize your
image differently than it is
displayed in EPSON Plot!.
eplot.fm5 Page 3 Friday, May 9, 1997 2:14 PM

 Loading...


