EPSON Stylus COLOR 670 Revision A
Disassembly and Assembly Disassembly 94
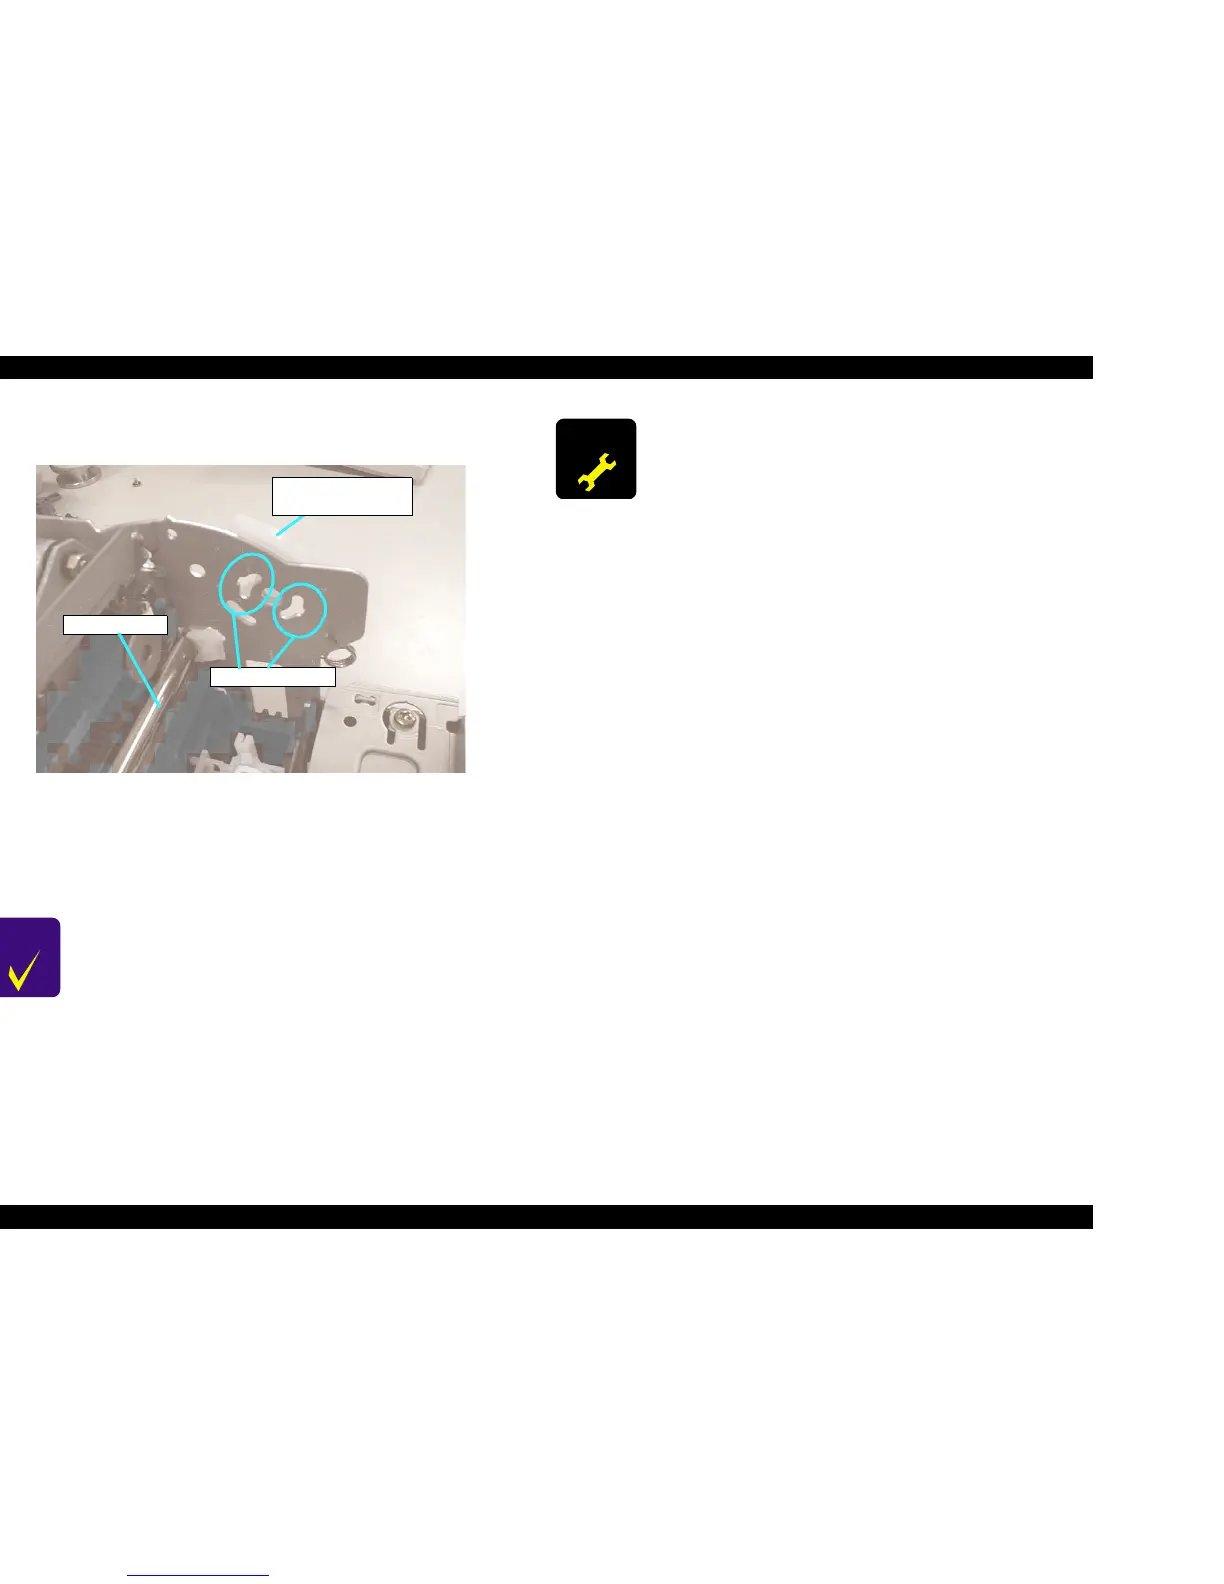
9. Rotate the Right Parallelism Adjust Bushing to the front side of the printer
to align the cutoff of the frame and remove it.
Figure 4-42. Right Parallelism Adjust Bushing Removal
10. Shift the CR Guide Shaft to the right and remove the left end of the CR
Guide Shaft from the Left Parallelism Adjust Bushing. Remove the CR
Assembly with CR Guide Shaft.
CHECK
POINT
n When installing the Spring Washer, convex side should
face to the Right Parallelism Adjust Bushing. Be careful
not to install it in wrong direction. (See Figure 4-41.)
n When installing the CR Assembly to the CR Guide Shaft,
make sure the Oil Pad is set to the specified position of
the CR Assembly.
n When the Oil Pad is especially dirty, replace the Oil Pad
with a new one which is lubricated with the specified
amount of oil.
Frame Right Cutoffs
CR Guide Shaft
Right Parallelism
Adjust Bushing
ADJUSTM ENT
REQUIRED
Perform following adjustments after removing the Carriage
Assembly.
n PG Adjustment (See “PG Adjustment” on page 101)
n Bi-D Adjustment (See “Bi-D Adjustment” on page 112)
Also, when you have replaced the Carriage Assembly,
perform Head Angular Adjustment (See “Head Angular
Adjustment” on page 109) in addition to the adjustment
items described above.
 Loading...


