EPSON Stylus COLOR 670 Revision A
Disassembly and Assembly Disassembly 75
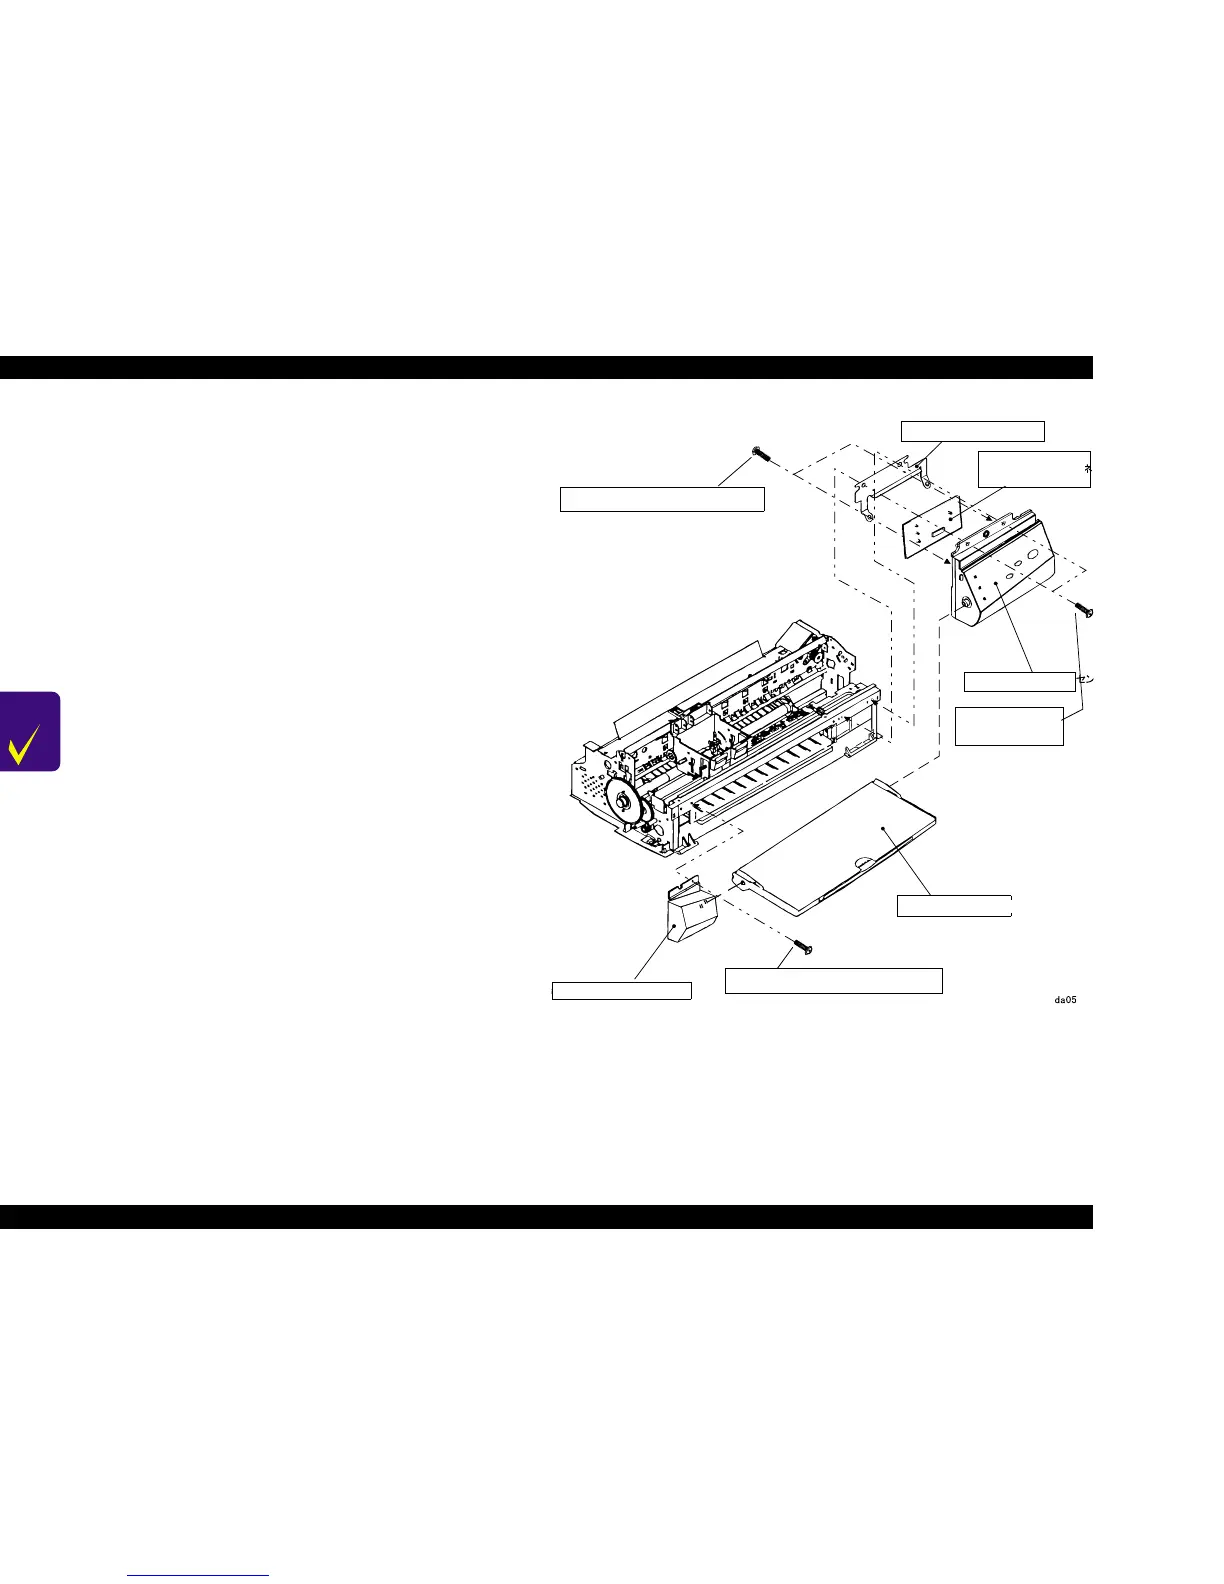
4.2.3 Control Panel Removal
1. Remove the Housing. (See“Housing Removal” on page 72)
2. Remove 2 screws securing the Control Panel, then remove the Control
Panel from the Printer Mechanism.
3. Remove the screw securing the Left Housing Panel to the Printer
Mechanism.
4. Remove 2 screws securing the Panel Board Assembly to the Printer
Mechanism, then remove C209PNL Board from the Panel Assembly.
5. Remove FFC from the connector on the C209PNL Board.
Figure 4-5. Control Panel Removal
CHECK
POINT
By removing the Control Panel, the Stacker Assembly can be
also detached from the Printer Mechanism, since it is held by
the Control Panel Assembly.
Left Housing Panel Securing Screw
Panel Board Assy Securing Screw
Panel Assembly
Securing Screw
Stacker Assembly
Left Housing Panel
Panel Board
Assembly
Panel Assembly
Panel Shield Plate
 Loading...


