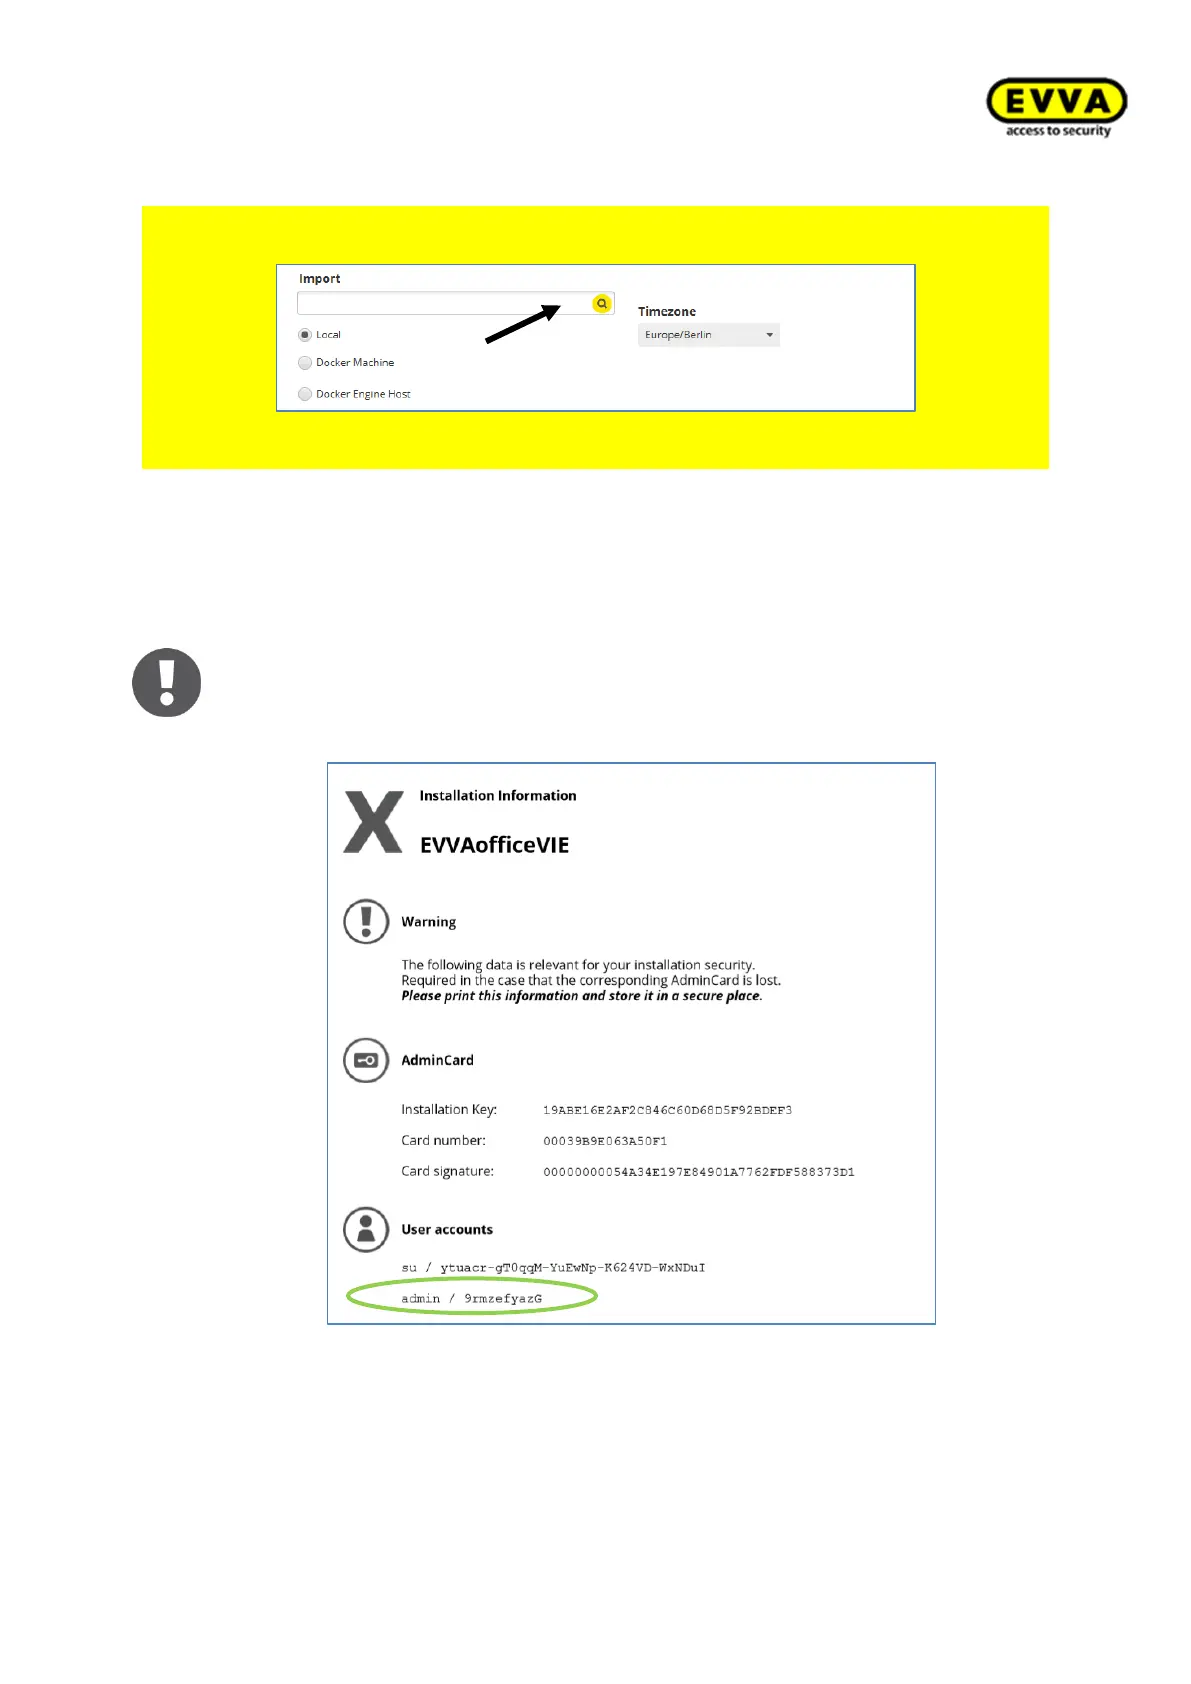
Use the "Import" field for the data import of your Xesar 2.2 system. The file name is
"aesssdb.h2" or "aesssdb.h2.db".
Figure 58 – Installation Manager database import
You have then successfully installed a Xesar 3.0 system!
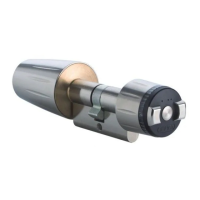
9. Step: installation information: admin + password
After successful installation of the system, an overview sheet which con-
tains the installation information is automatically generated and opened.
It features the installation administrator (admin) and system administra-
tor (su) passwords. Log in with the admin user name and password.