5.6 Integrating your Xesar tablet into your system
The Xesar tablet is delivered with the Xesar app. The tablet (first-time synchronisation) is
set up with the system (PC) via the shared WiFi network. In operation the Xesar tablet is
also synchronised with the Xesar software via the shared WiFi network.
For upgrades from Xesar 2.2 to Xesar 3.0 only:
Initially prepare your tablet – as described in section 5.7.Manually uninstalling and in-
stalling the Xesar app (upgrade from Xesar 2.2 to Xesar 3.0)
The IP address of the computer in the WiFi network is provided in the tablet as the server
address with the corresponding port no., e.g.: https:// 172.16.250.35:9090
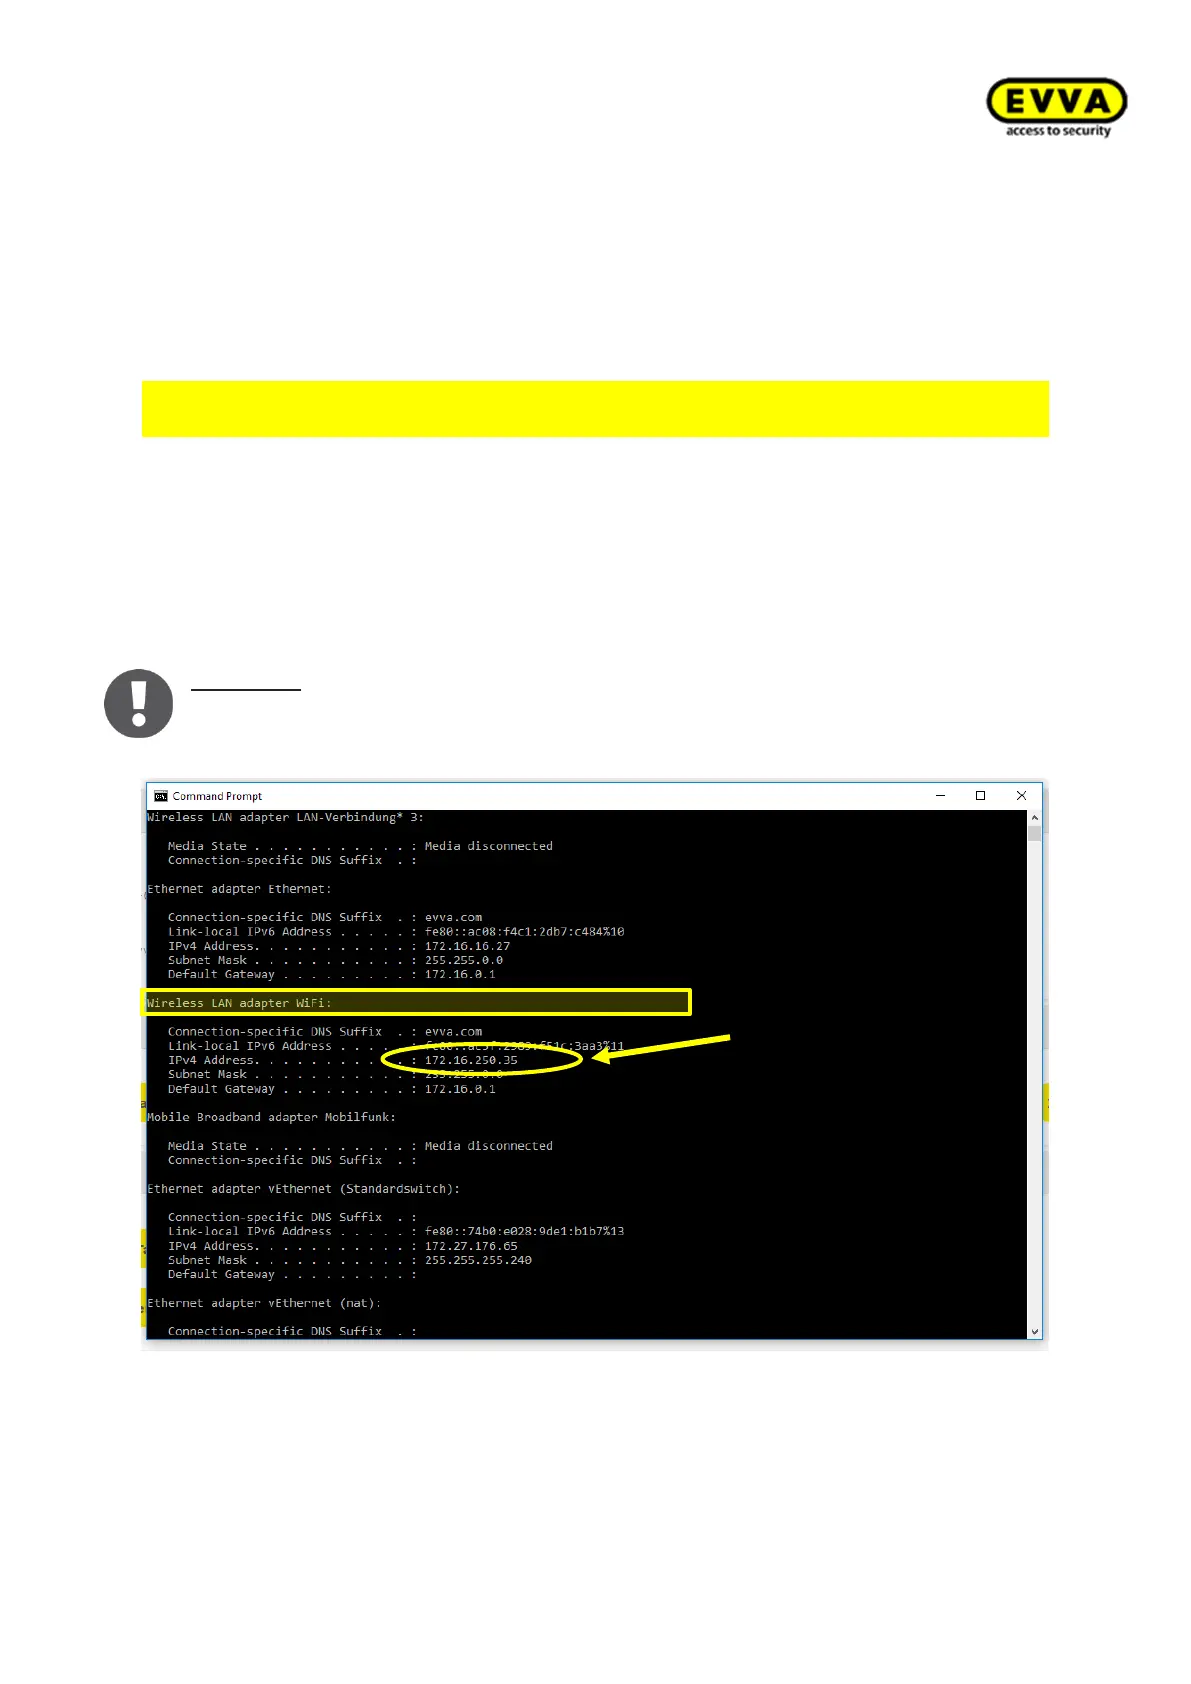
1. Step: Finding the correct target IP address
a. Enter "cmd" in the Windows search window. The Windows command line opens.
b. Enter the "ipconfig" command in the command line and press "Enter".
c. Scroll to "Wireless LAN adapter wireless network connection". Note the IP
address of your PC (!), as listed in the "IPv4 address" (potentially IPv6) entry on
your computer. In this example: 172.16.250.35
Note to b: the entry might also say "Wireless LAN adapter WiFi" or something similar
(depending on the hardware). It is important to note the WiFi/WLAN/wireless adapter
IPv4 address.
Figure 95 – Windows command line CLI