FLEX-6000 Signature Series – Maestro User Guide
Copyright 2024 FlexRadio, Inc. All Rights Reserved. | Page 121
27 HOW TO CONFIGURE TRANSVERTERS
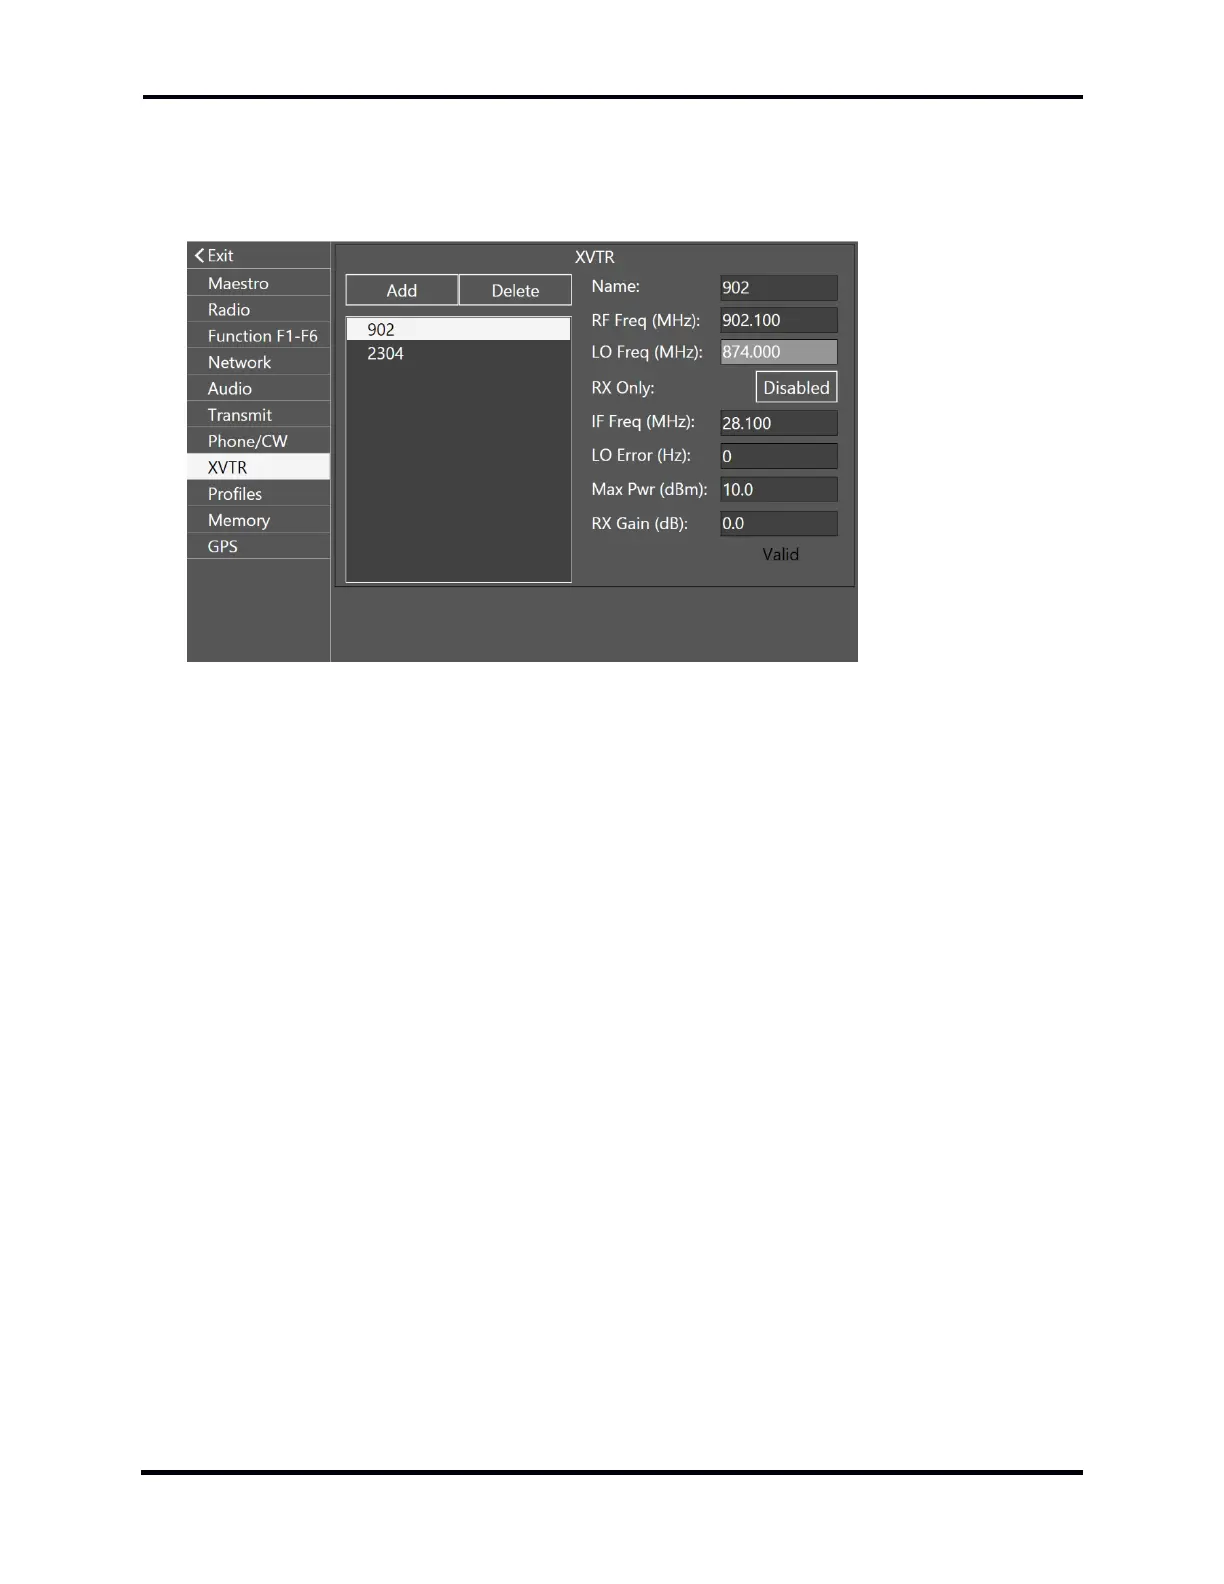
To configure transverters, open the transverter control panel on the XVTR tab of the Maestro Main
Menu. The transverter setup panel should look like this:
To add a transverter band, tap the Add button. A new transverter band tab will appear which has
blanks that need to be filled in with information about your transverter. The first blank holds the
name of the transverter or transverter band. Generally, you would enter something like "1296" for
1296MHz or "10G" for 10.368GHz, but you may enter any 4-character descriptor for the band that
suits you. Next, the RF frequency in MHz is entered followed by the IF frequency in MHz. This is
followed by any error in your local oscillator, maximum output power from the radio, and then any
IF gain in your transverter. Here’s a detailed description of each field and what you would input or
see in the field:
Name: holds the name of the transverter, generally a reference to the RF frequency of the
transverter. This name must be 4 characters or less. The name will be displayed in the Panadapter
during transverter use as a reminder that RF will be passing through the transverter. The name is
also used on the transverter band selection panel discussed later.
RF Freq (MHz): the output RF frequency of your transverter. This is the frequency that the final
antenna will work on. Note that the RF frequency and the IF frequency are directly related to the
LO frequency. You must enter an RF frequency that will be directly translated to the IF
frequency. For example, if you enter “1296” for a 1296 to 28MHz transverter, you must enter “28”
in the IF frequency. Do not use “1296.1” for one and “28.0” for the other unless this is the way
your transverter is configured. If you have any doubts, be sure that the LO frequency calculated by
Maestro matches the LO frequency of your transverter.
LO Freq (MHz): the calculated value of the local oscillator in your transverter. This number should
match the transverter manufacturer’s specifications. If it does not, check the RF and IF entries
again and make corrections.
RX Only: Enable this if you do not want to transmit through your transverter. It will lock out the
transmit capabilities in Maestro.

 Loading...