FLEX-6000 Signature Series – Maestro User Guide
Copyright 2024 FlexRadio, Inc. All Rights Reserved. | Page 109
25 HOW TO CONFIGURE ANTENNAS
25.1 GETTING STARTED
When Maestro starts, it loads a single Panadapter and Slice Receiver with Antenna 1 (ANT1)
selected by default. Transmit and receive operations are then functional on ANT1 with no further
setup or adjustment required.
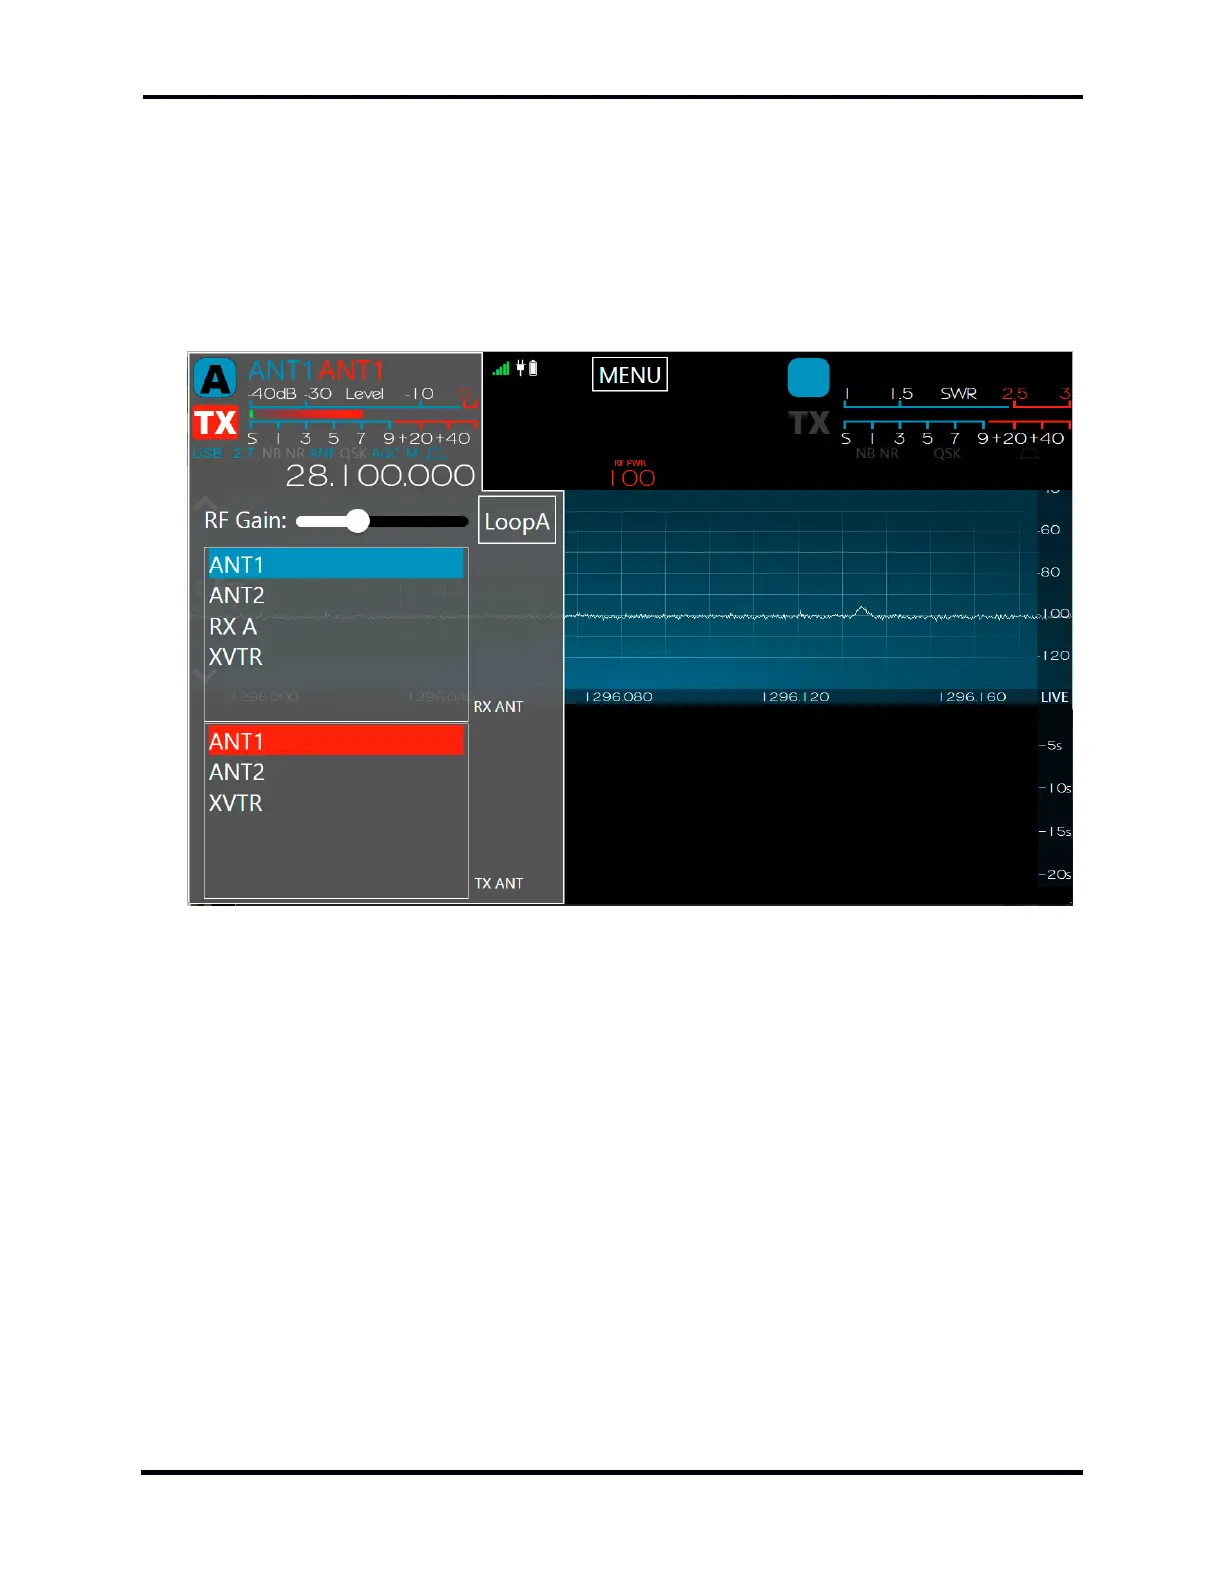
25.2 SELECTING THE TRANSMIT ANTENNA FOR A SLICE RECEIVER
The transmit antenna for each Slice is selected from the Antenna Menu shown on Slice A above.
The transmit antenna selector offers the same ANT1, ANT2, and XVTR options on both the FLEX-
6500 and FLEX-6700 models. Each Slice may have its own designated transmit antenna. Open the
menu by tapping on the antenna indicators in the Slice Flag.
Loop selection is provided in the Slice Receiver Antenna Menu and is indicated next to the receive
antenna selector on each Slice. The example shown above indicates that the RX A loop is active and
connected to ANT1.
25.3 ANTENNA OPTIONS FOR PIN DIODE QSK OPERATION
Full QSK operation with reception between individual CW elements is supported on a single
antenna at speeds up to 30 WPM. QRQ QSK is supported at 100+ WPM when a separate receive
antenna is used on the RX A, RX B, or XVTR inputs. The QSK annunciator located just above the
frequency display on each Slice Receiver Flag indicates that QSK is possible in the selected mode.
QSK is not supported with a separate receive antenna if that antenna is connected to ANT1 or
ANT2.

 Loading...