FLEX-6000 Signature Series – Maestro User Guide
Copyright 2024 FlexRadio, Inc. All Rights Reserved. | Page 21
4.4.11 Ethernet Connection
To use wired Ethernet communications, connect a CAT5 or greater Ethernet cable from the RJ-45
connector marked with the network symbol as shown below. The connector is compatible with 10,
100 (Fast Ethernet) and 1000 (Gigabit Ethernet) Ethernet switches and interfaces.
Note: On the Maestro “A” and B”, to operate using the Ethernet connection, the unit must be
powered using an external 13.8 VDC power source.
Note: On the Maestro “A” and B”, the connector is located above the 10-15 VDC power connector
on the left side of the Maestro back panel. Be careful not to plug the Ethernet cable into the MIC 1
connector located on the rear right side of the back panel.
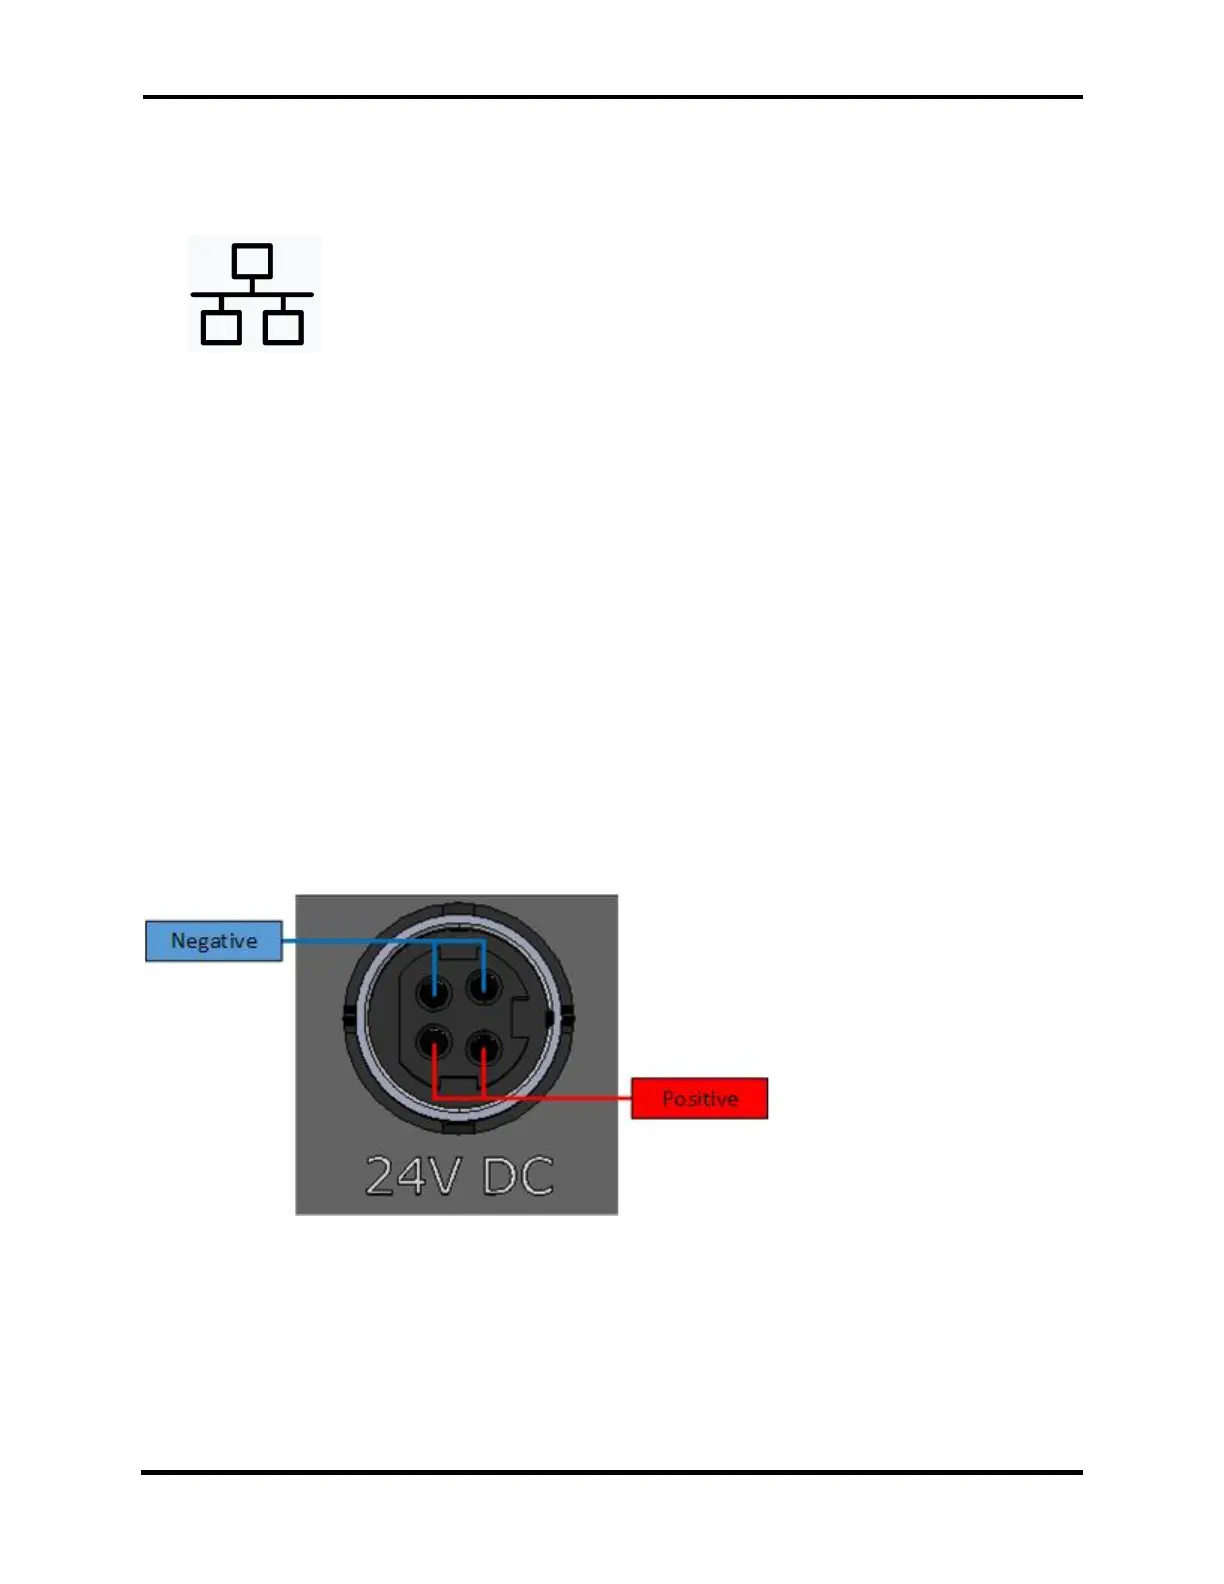
4.4.12 Maestro “C” 24 VDC Power Connection
The 4-pin DIN (PD-40V) power connector accepts a 4-pin DIN power plug to provide 24 VDC at 5 amps
(120W). The Maestro “C” is supplied with an AC/DC power supply with a 24 VDC output. Note that the
connector has a “key” to ensure the plug is inserted in the PD-40V connector with the correct
orientation.
As you look at the 4-pin DIN (PD-40V) power connector on the Maestro, the pins on the bottom are
positive, and the pins on the top are negative.
Note: Only use external power supplies provided by FlexRadio. Using a power supply with the
incorrect voltage or polarity may result in certain features not working correctly and can damage the
Maestro, voiding the warranty.

 Loading...